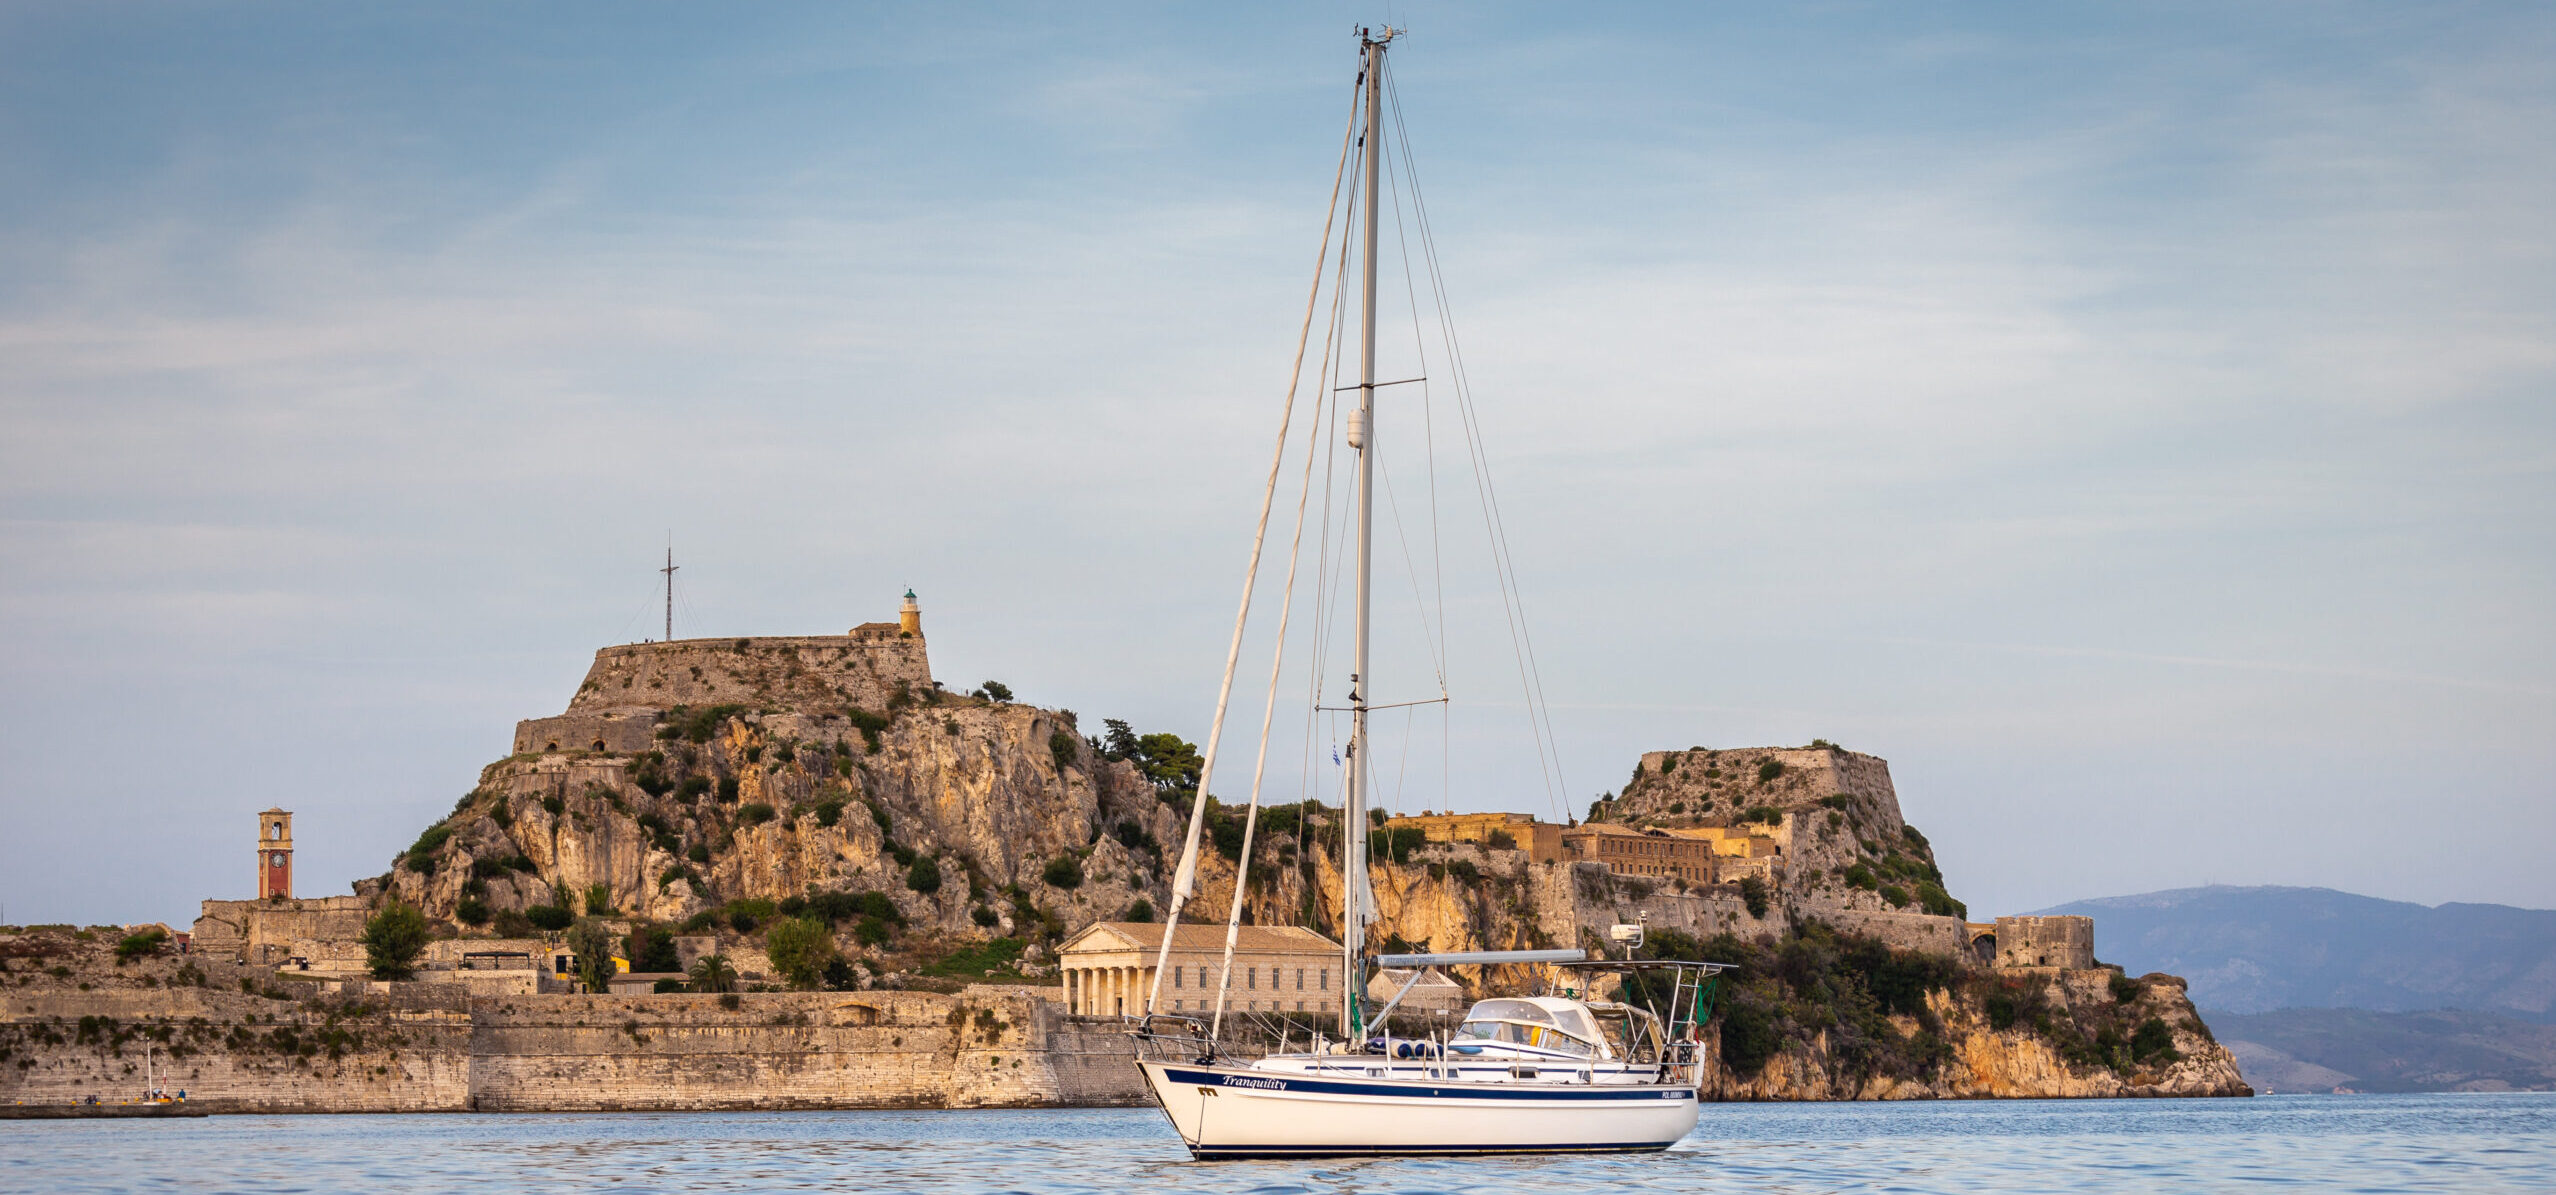

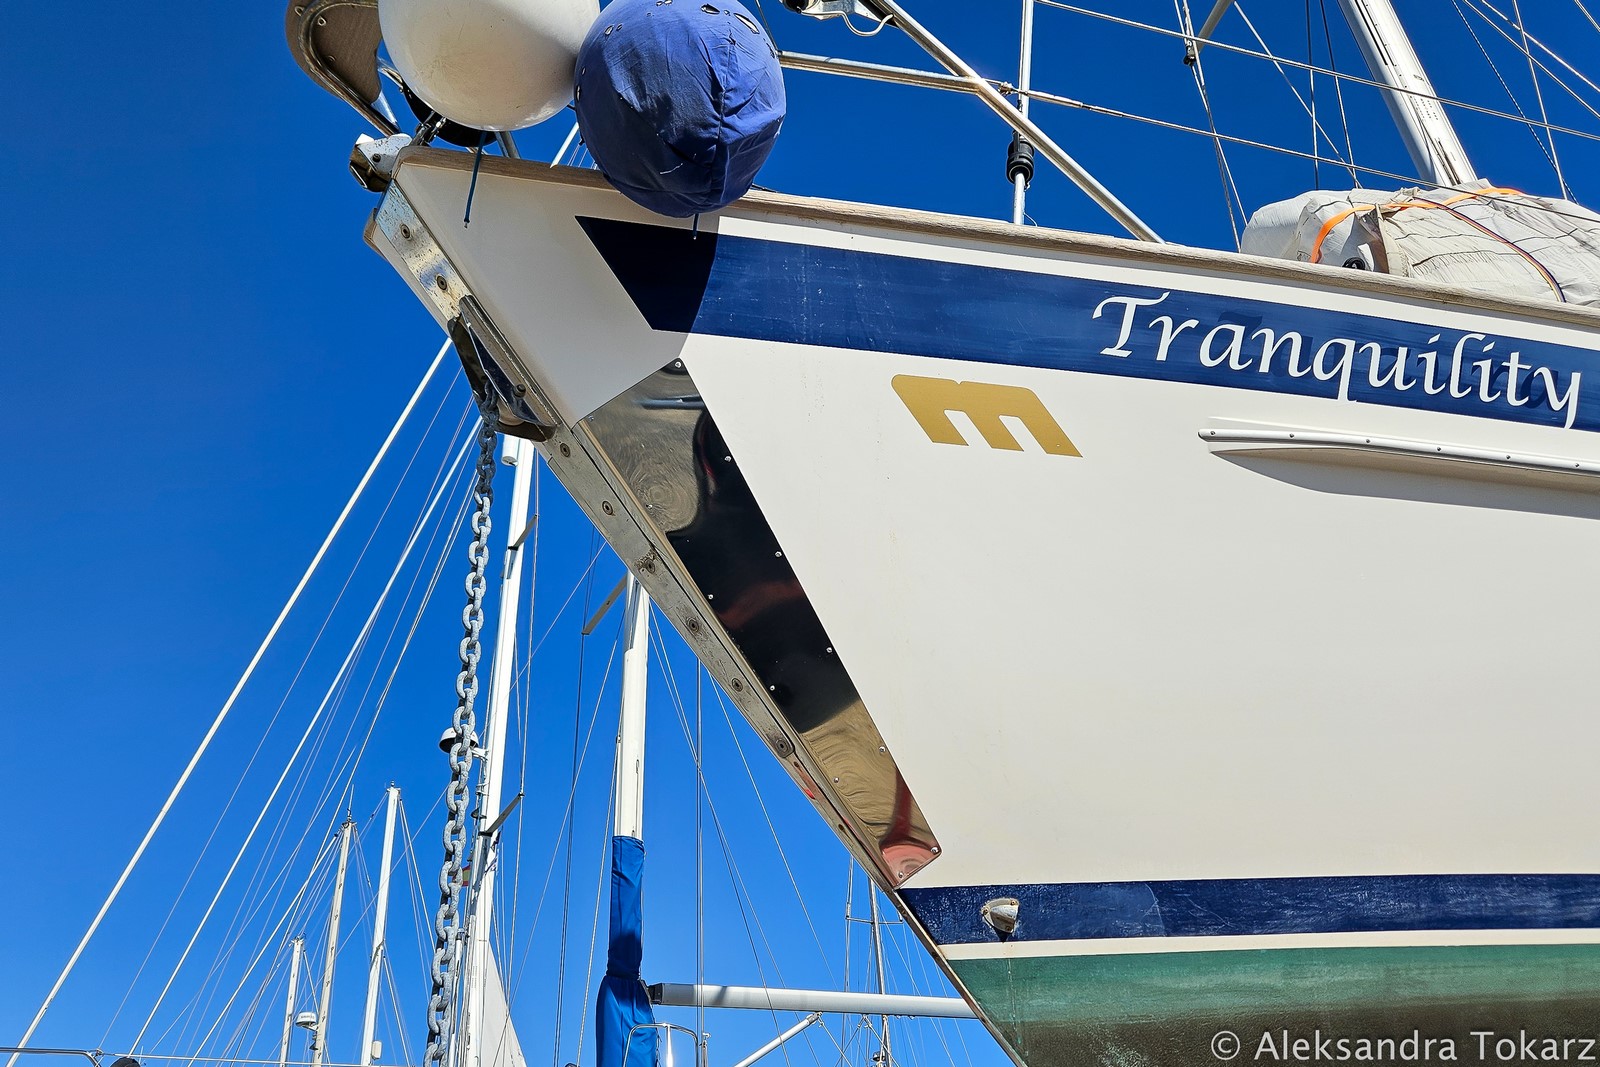
Spring is just around the corner, and our home, Malo 39 “Tranquility” has been rocking on the water for almost a month now. It’s the perfect time to reflect on the winter season, which—as always—we dedicated to another round of boatyard work aimed at upgrading our boat.
Winter Season of Upgrades on Malo 39
Winter is also the time for us to repair any issues that arose during the season and service the onboard systems to ensure they remain reliable for years to come.
Just like last year, we decided to gather and summarize everything that took place in the boatyard this winter. You’ve been able to follow our progress on social media—if you haven’t checked it out yet, we warmly invite you to do so!
Our Approach to Malo 39 Upgrades and Maintenance
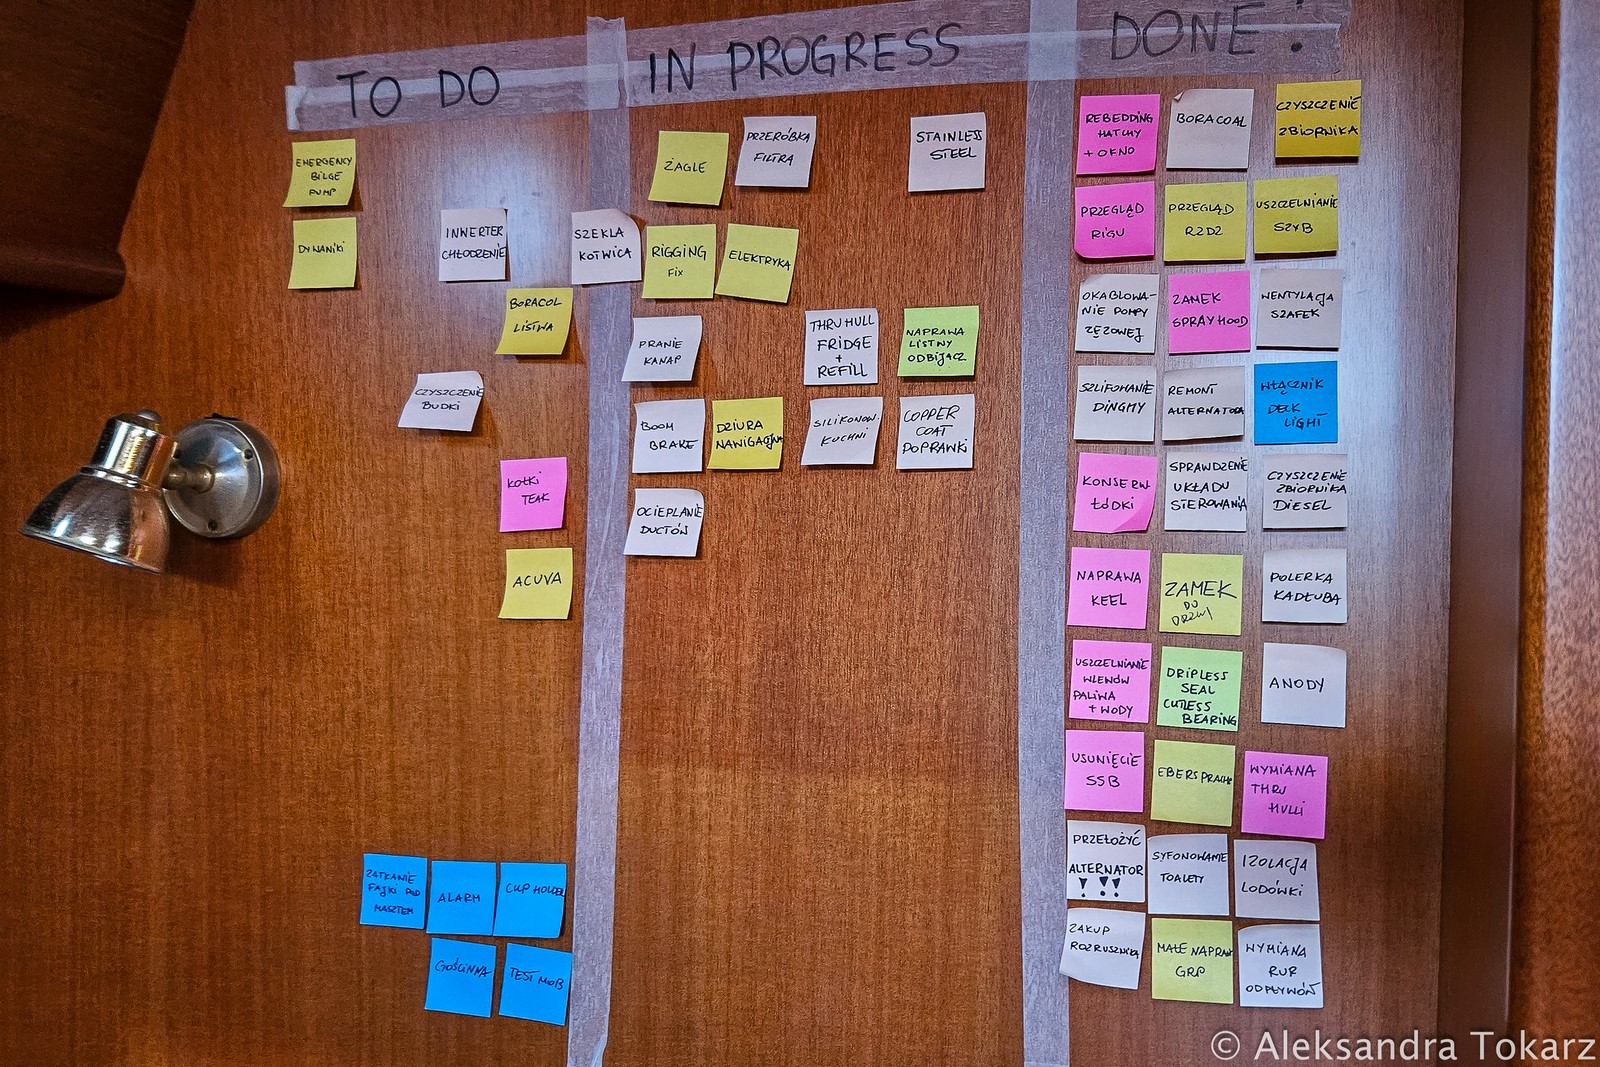
Our work on the yacht falls into three main categories: planned upgrades (some of which were scheduled up to two years in advance), repairs of ongoing issues, and preventive maintenance of essential systems.
Planned Upgrades First
While writing this post, we realized that we’ve accomplished so much that it’s impossible to cover everything at once. That’s why this week, we’ll focus on planned modifications and upgrades. These projects often begin months before they’re carried out, sometimes even miles before reaching our wintering destination.
Next week, we’ll publish the second part, where we’ll talk about fixing the things we managed to break during the season, as well as servicing the yacht’s systems.
How We Plan and Research Our Upgrades
Our upgrades always start with thorough research—gathering information not only from the Internet but also from specialized publications. We enjoy working with modern technology and keeping up with the times, so we plan every upgrade carefully to choose the best available solutions—not necessarily the traditional ones.
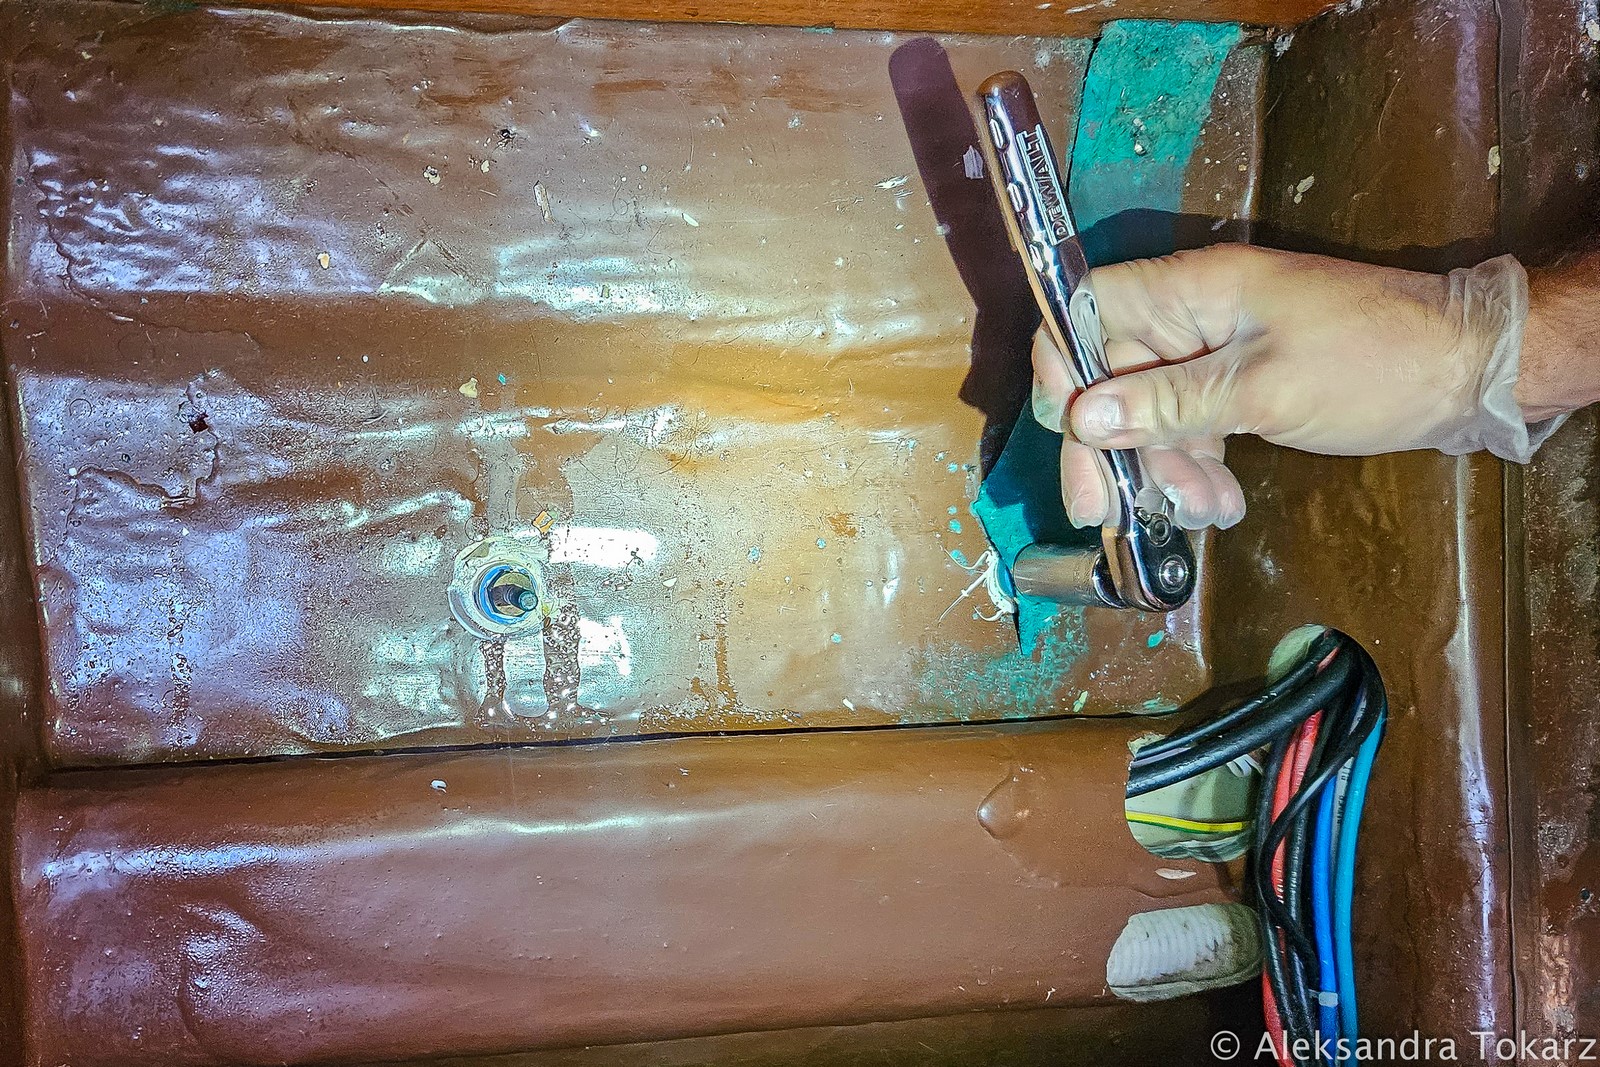
Upgrading to Composite Through-Hulls and Seacocks
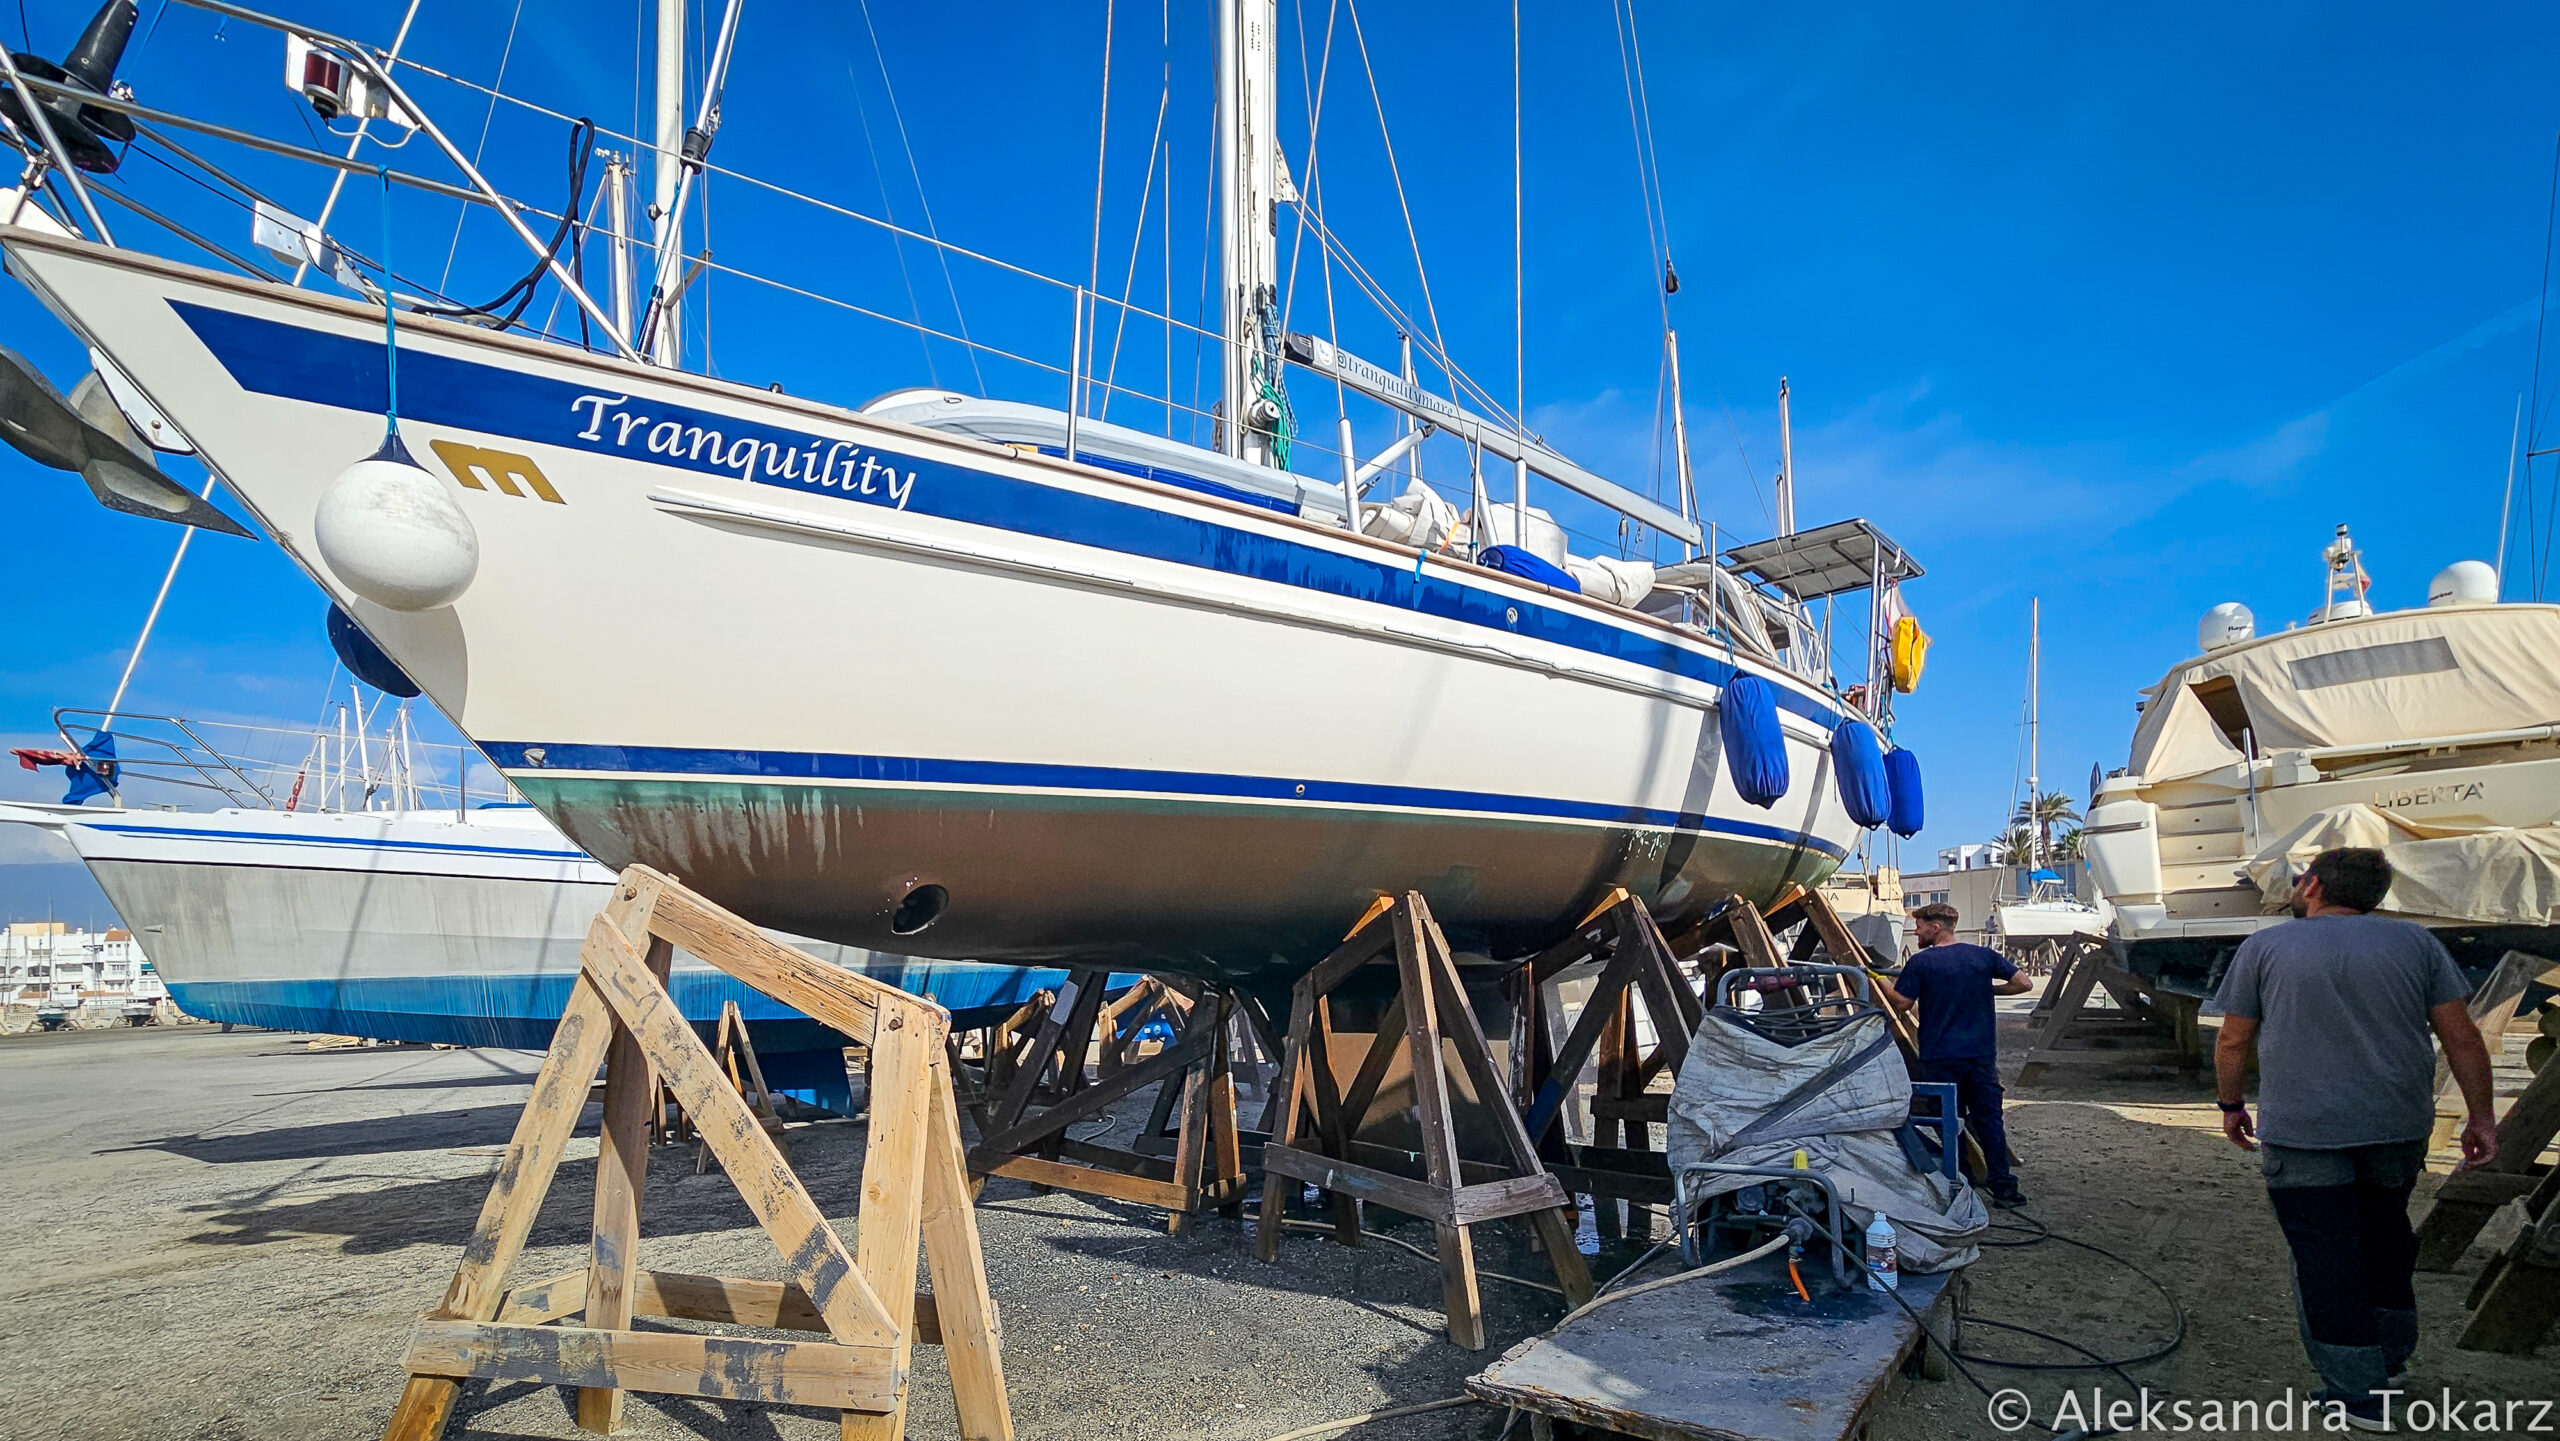
The first example of this approach to modernization was the replacement of all through-hull fittings and seacocks with composite ones instead of the commonly used bronze ones. We have prepared a separate article on this topic, which you can read here. In it, we explain all the pros and cons of these valves, which are often referred to as “plastic.”
We decided to replace them primarily because we had no way of verifying the age of the existing components. Our yacht is 22 years old, and we had no information about the last replacement of the seacocks and through-hulls. We even suspected that some of them were original! Since we were already planning to take the boat out of the water, we thought it was the perfect time to take care of this.
Despite a few complications, which we described in detail in the article linked above, the replacement process went fairly smoothly. Thanks to the new composite through-hulls and valves, we no longer have to worry about corrosion, and we hope our solution will serve us well for many years.

Reducing Hull Openings: Removing the Navtex Decoder
Staying on the topic of hull openings, this year we managed to reduce their number by two – which is a significant improvement, as the fewer potential leak points, the better!
This was made possible by completely removing the Navtex decoder from the yacht – a rather outdated device used to receive and decode navigation warnings and weather forecasts. Its grounding was a copper plate bolted to the bottom of the boat through the hull. After removing it, we filled the holes with epoxy resin and applied several layers of fiberglass mat and fabric both inside and outside the hull.

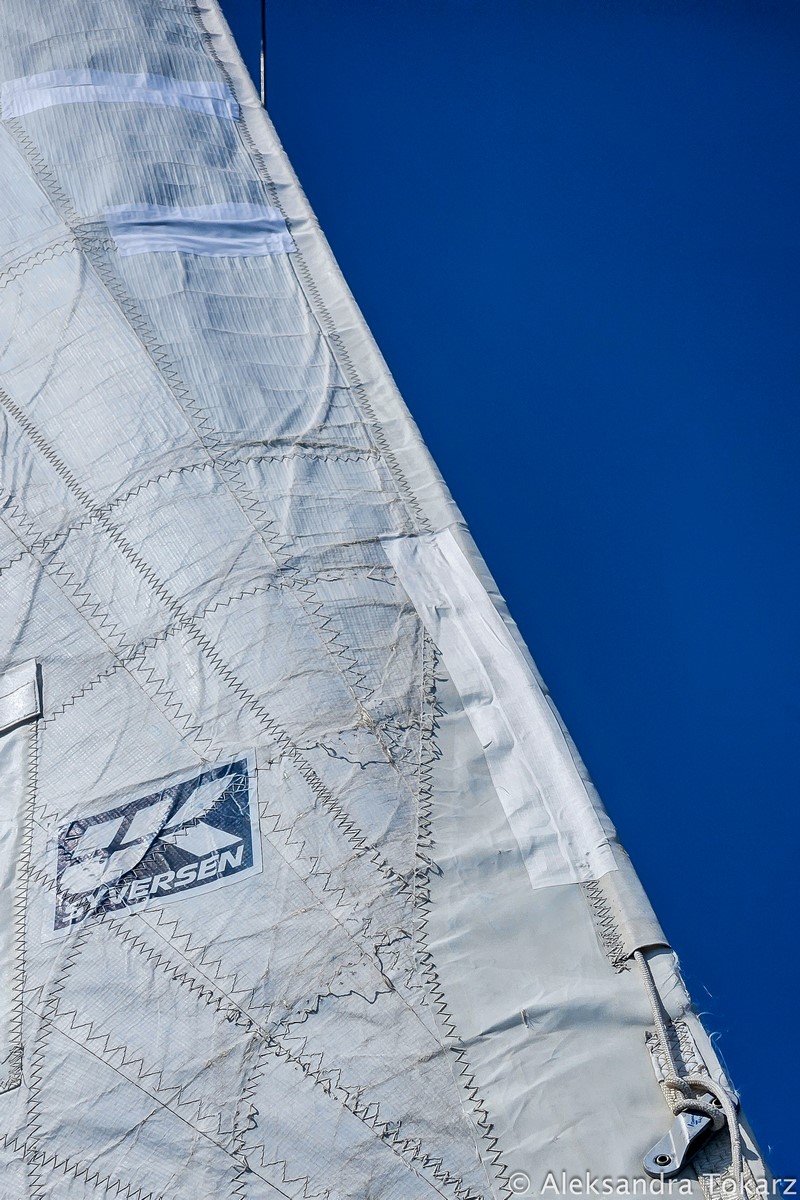
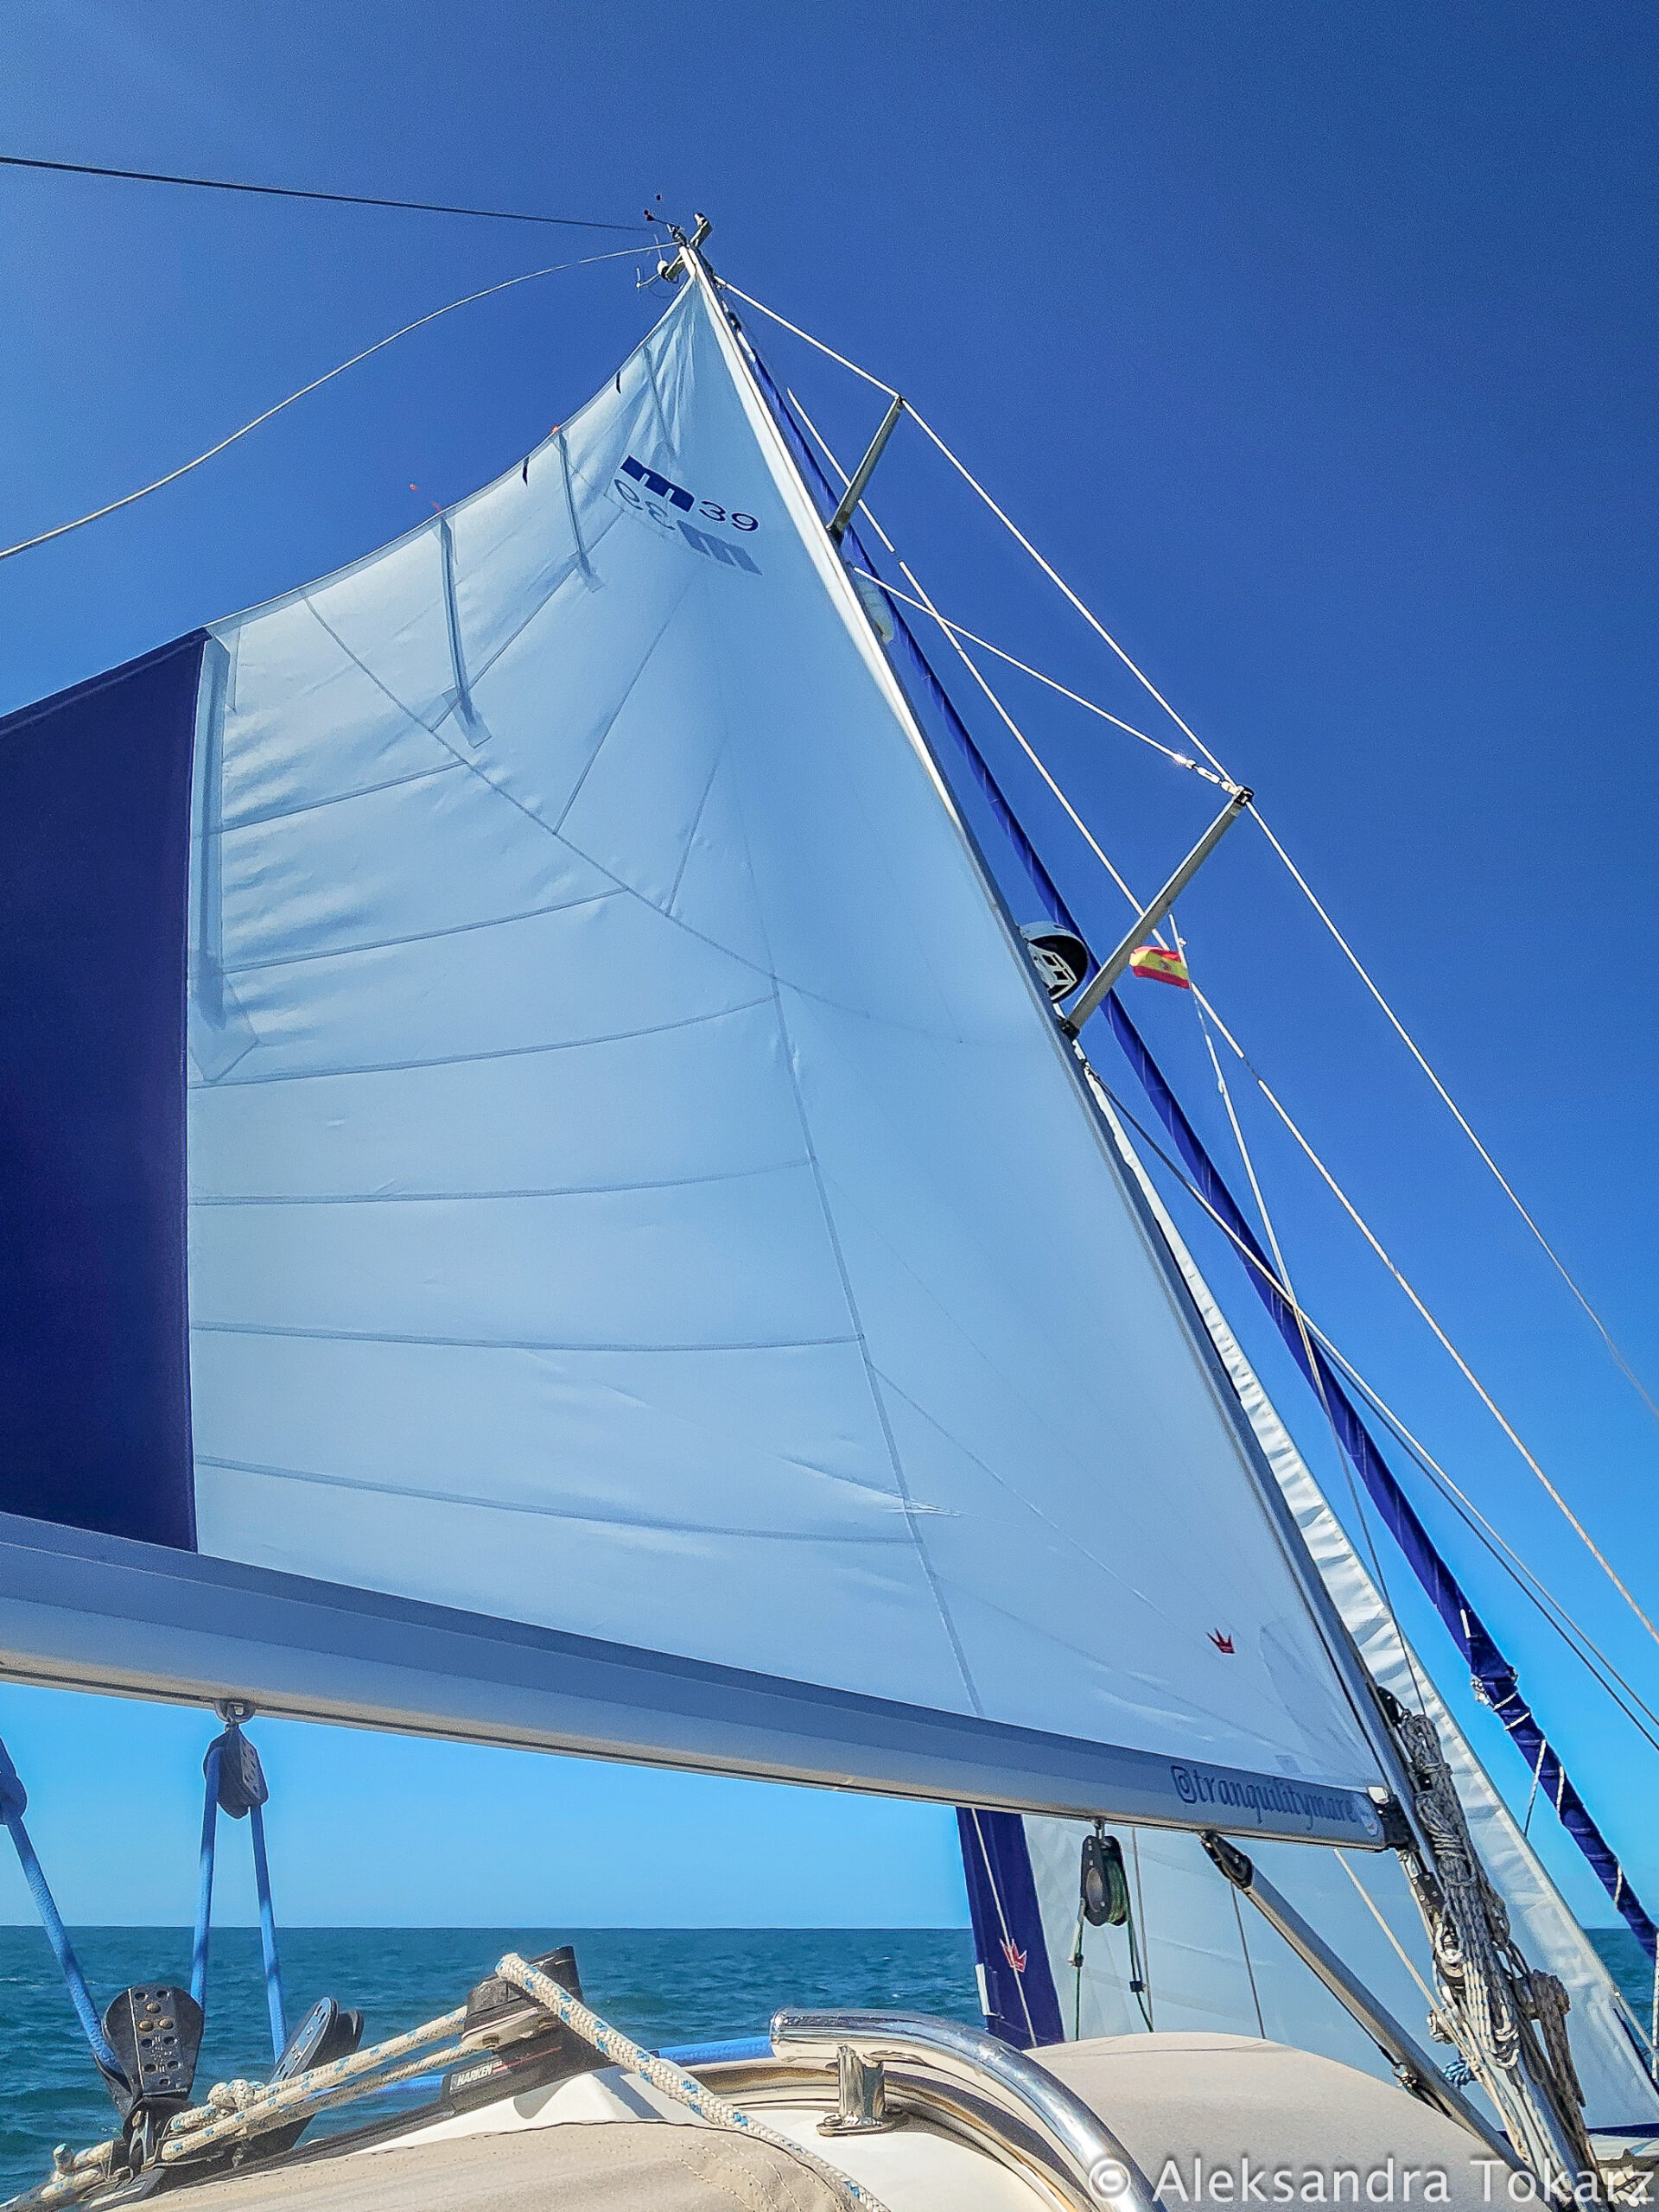
Sail Replacement for “Tranquility”
Sail Replacement on Malo 39: A Long-Awaited Upgrade
From the very first meeting with Tranquility, we knew that a sail replacement was on the horizon. The mainsail and genoa were original, meaning they were 22 years old. That’s a very long time for sails, but we also knew that the yacht hadn’t been heavily used before. We managed to repair them well enough to last us two more seasons—exactly what we had planned when buying the boat. However, increasing wear and noticeable shape loss while sailing (the sails were quite stretched) made the replacement inevitable.
Researching the Best Sails Options for Malo 39
Knowing this from the start, we spent a lot of time researching sails—analyzing available options, materials, and manufacturers. In the end, we chose one of the major sailmakers over smaller, local companies. The main reasons for this decision were the larger number of reviews on their products and a wider offer. We also wanted the measurements to be taken by the manufacturer, which was easily arranged thanks to their global service network.
Choosing the Right Manufacturer and Materials
After exchanging many emails with several sailmakers, we selected the one that stood out not only with a competitive price but, more importantly, with excellent communication and professional customer service. As for the material, we ultimately chose Hydranet—a fabric significantly more durable and resistant than the popular Dacron. The jib, being the least frequently used sail, was made from reinforced Dacron.
Sail Measurements and Purchase Process
To take the measurements, we sailed to Valencia in November. The whole process was smooth and professional, which reassured us that we had made the right choice regarding the manufacturer.
Along with selecting the right materials and manufacturer, we also optimized the financial aspect of the purchase. Having previous experience in this area, we carefully planned the purchase and export in a way that significantly reduced the final cost.
First Impressions and Future Testing
A few days ago, we received our new sails and set them for the first time. They look great, and we can’t wait to test them in different conditions. The first impressions are very positive, but the real test will come with the miles we sail. We’ll be putting them through their paces and will definitely share our insights!
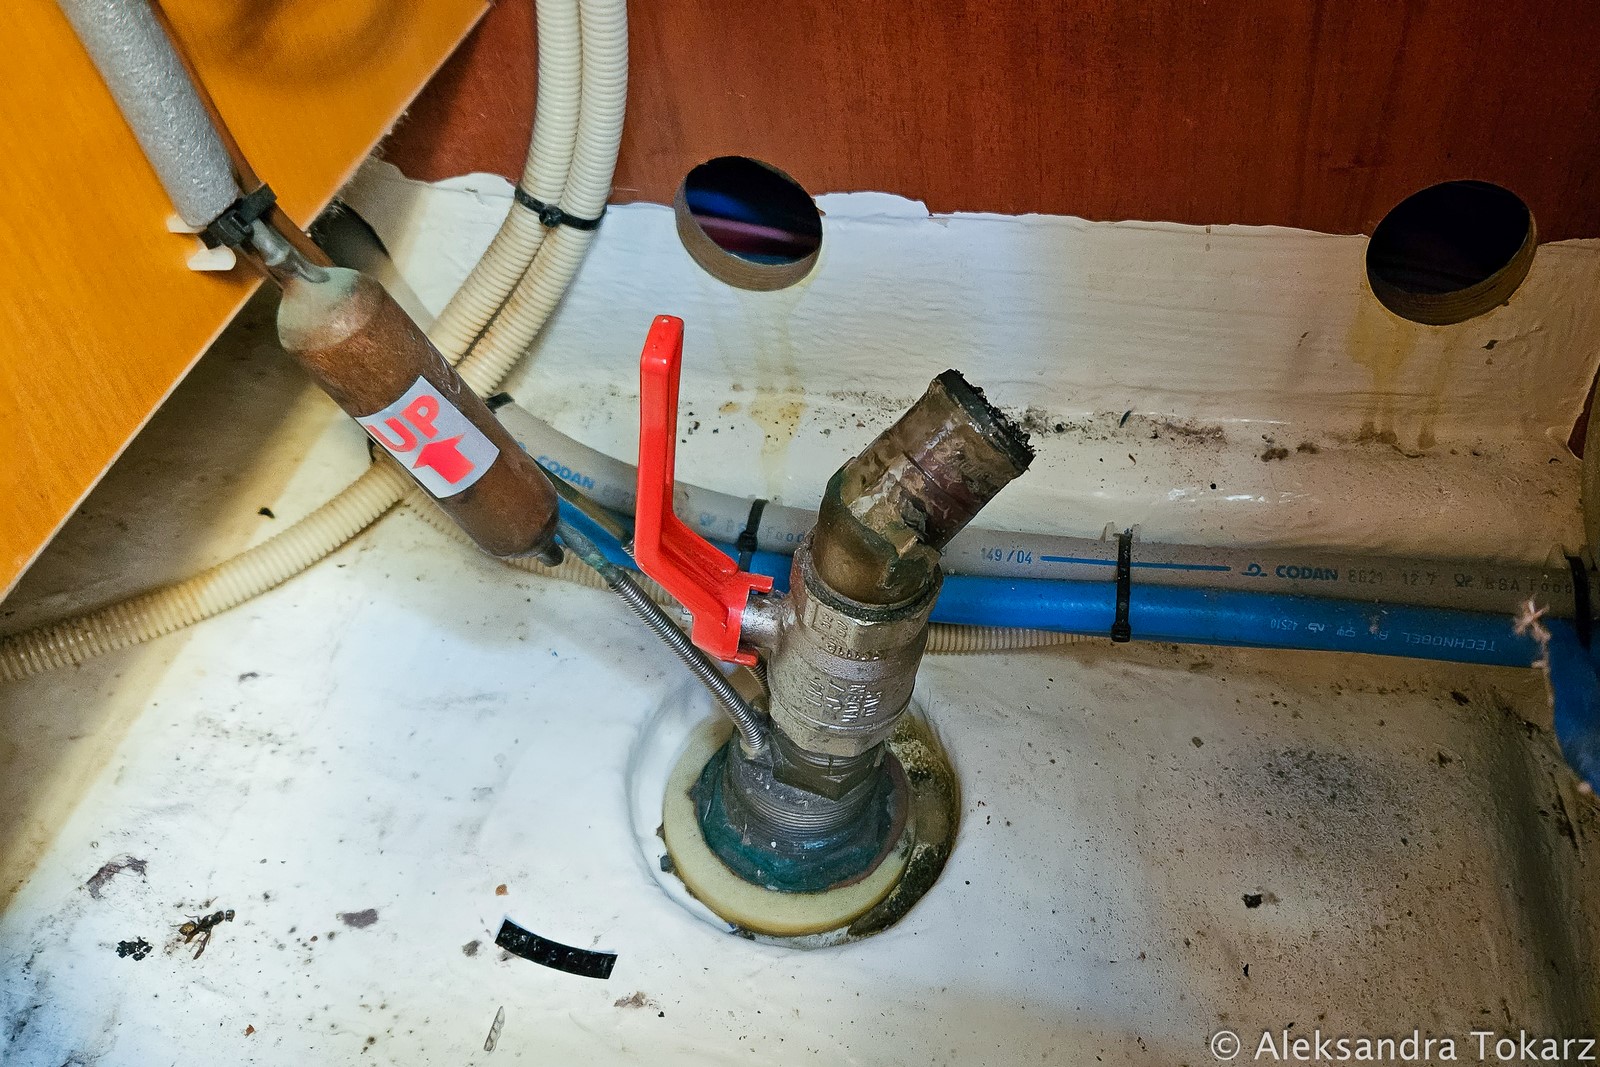
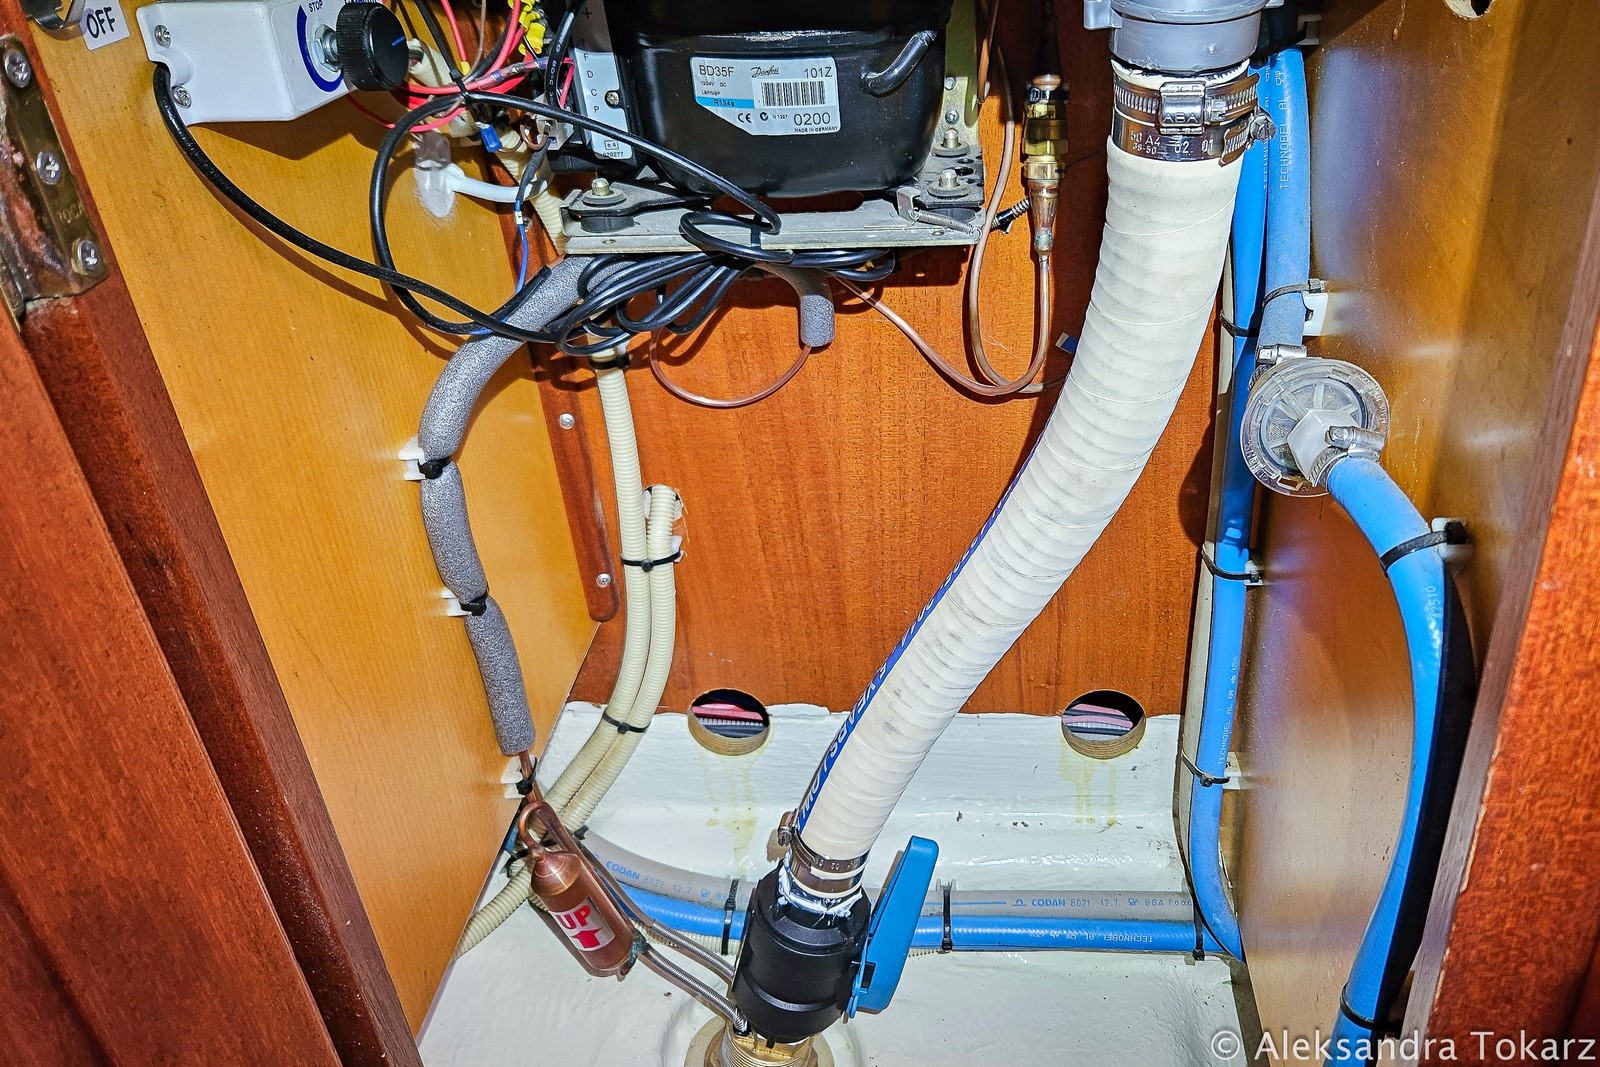
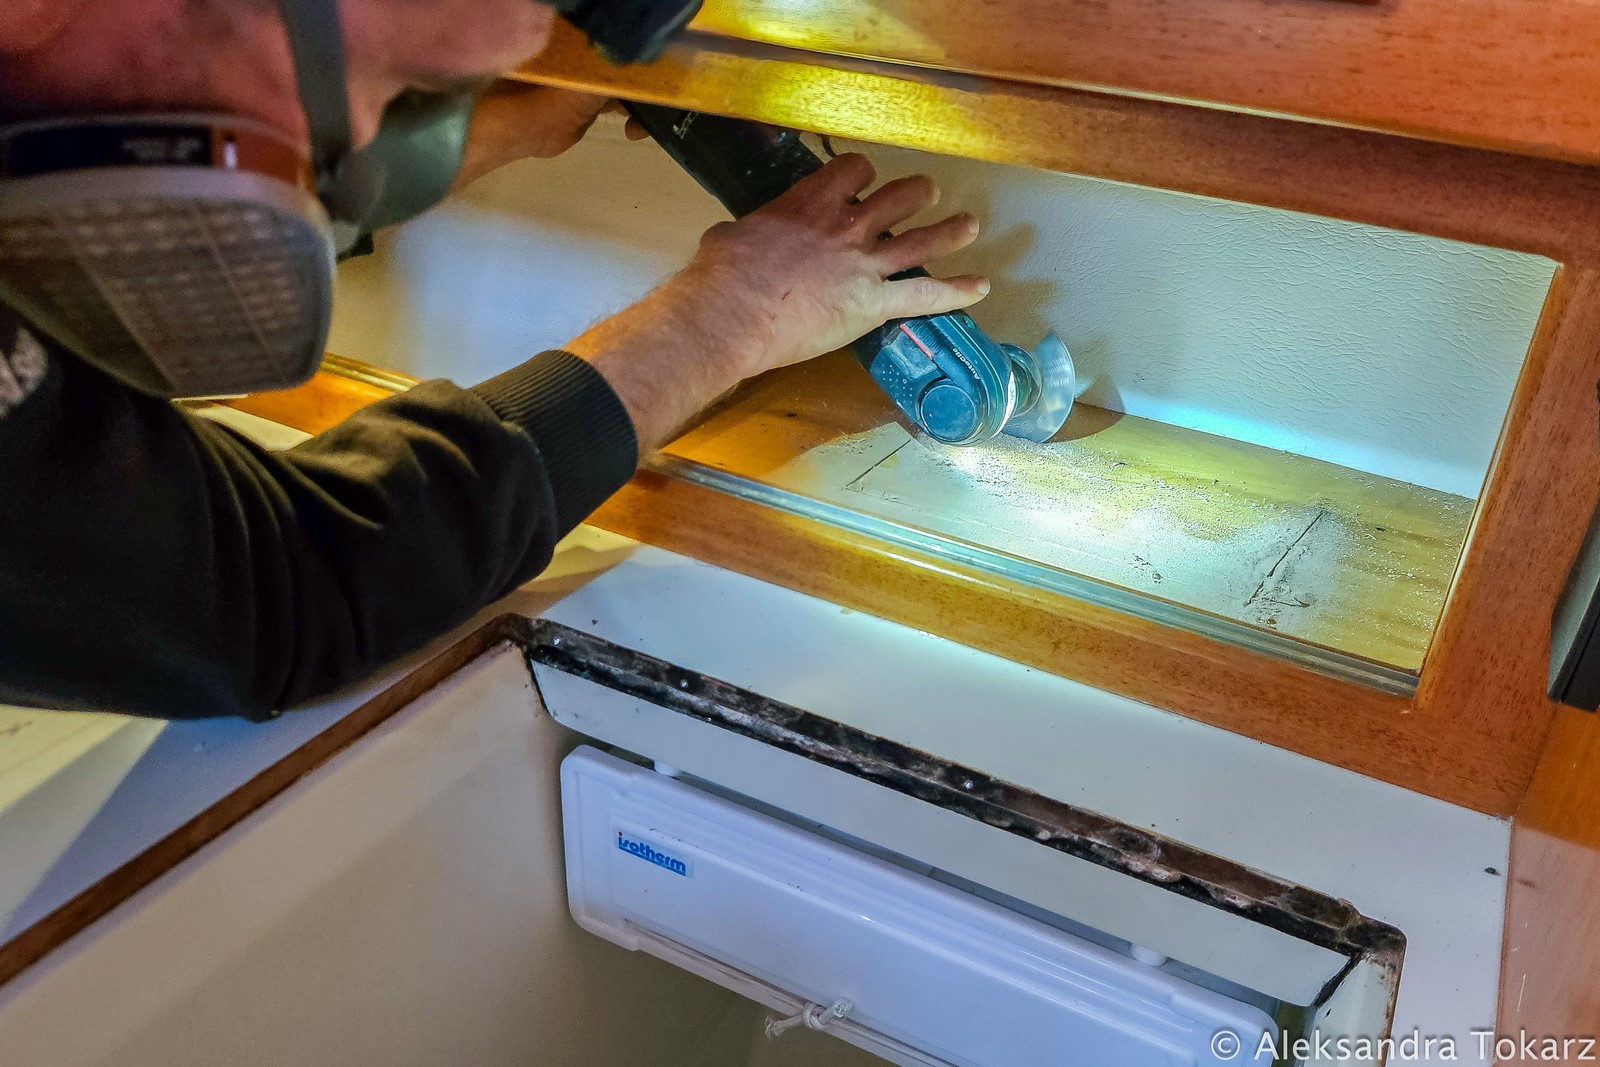
Replacing the Fridge Through-Hull Fitting
Water-cooled Fridge System on Our Malo 39 Yacht
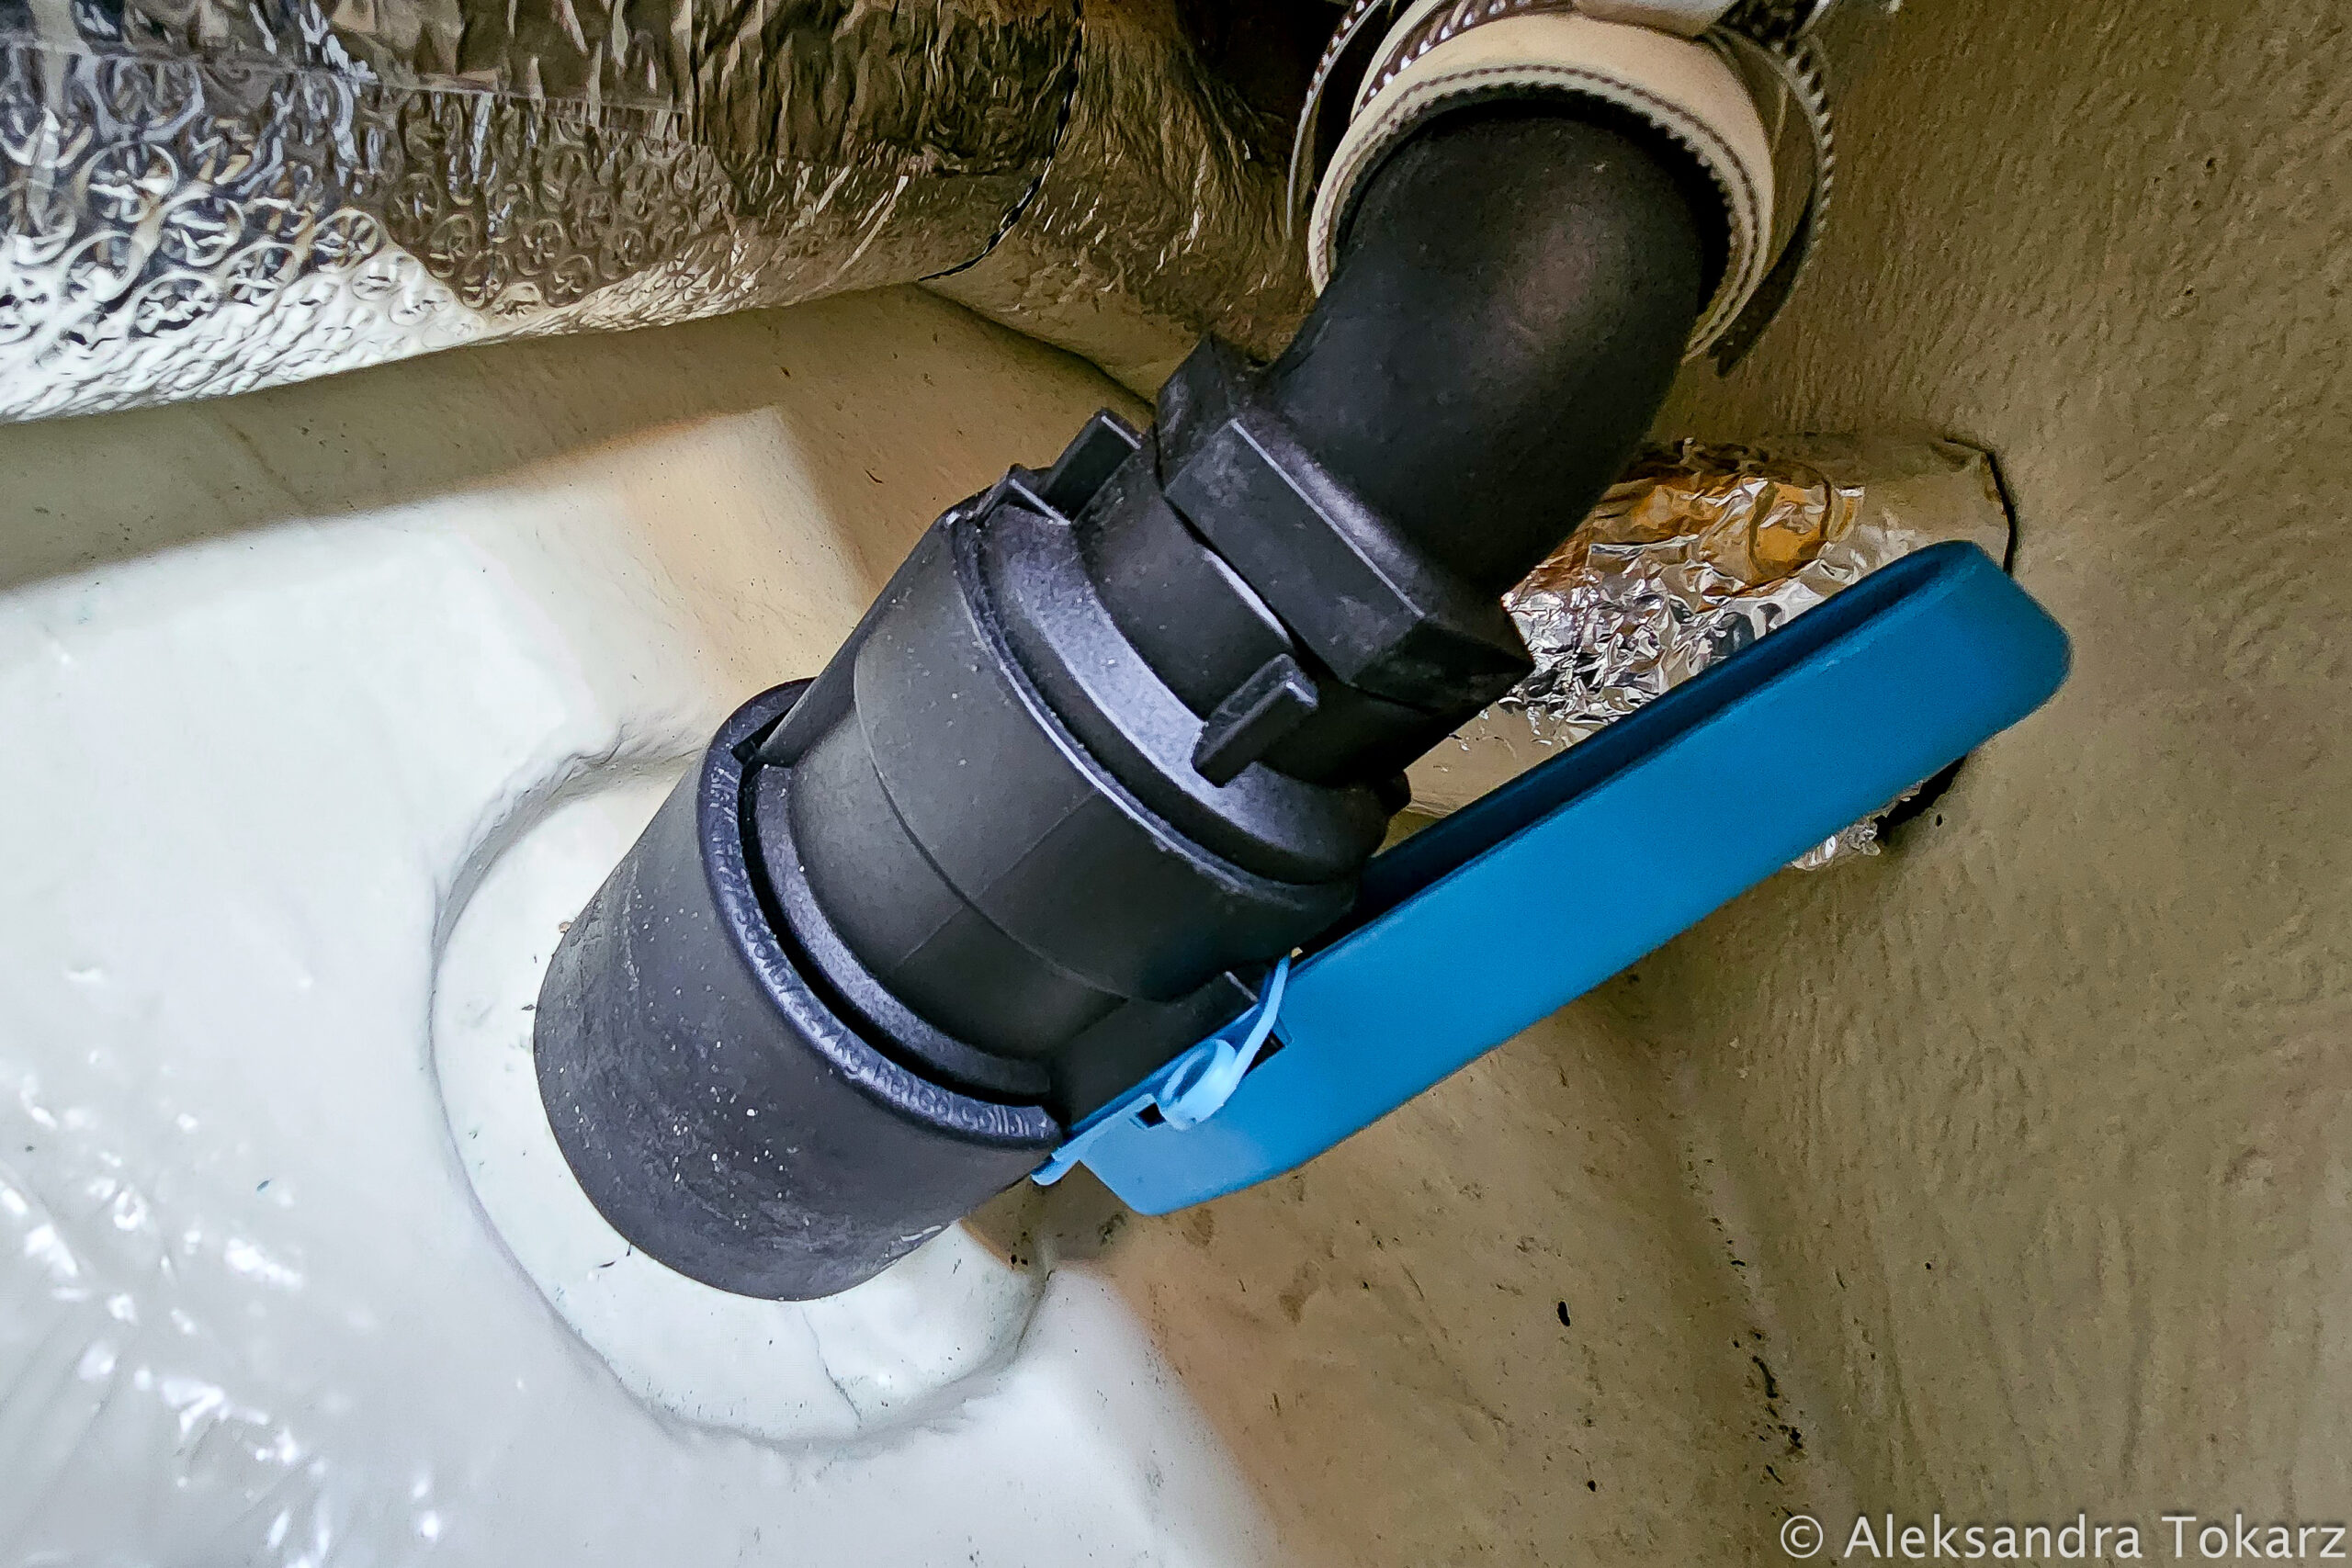
Let’s return briefly to the topic of through-hull fittings and seacocks. Unfortunately, the components of our yacht didn’t allow us to fully transition to composite fittings. The reason? Our fridge, which is cooled not only by air but also by water. This setup is commonly used on yachts to improve cooling efficiency, reduce energy consumption, and minimize heat buildup around the fridge. And it’s actually a very effective solution.
Typically, such a system consists of a metal plate mounted near the keel, through which the coolant flows to support the fridge’s operation (keel-cooled fridge). However, in our case, a different approach was used—the cooling is done via a through-hull fitting, the same one that also drains water from the galley sink. As a result, the fitting serves both as a cooling system and a drainage installation. Although we haven’t had issues with it so far, 22 years is far too long to feel at ease.
The Struggle to Find a Suitable Replacement
And this is where the trouble began. It turned out that this specific fitting is only manufactured in brass—there was no option to replace it with a bronze version, let alone a composite one. As we’ve mentioned before, brass isn’t the best choice for through-hulls. To make matters worse, finding this part was nearly impossible—the easiest solution would have been to buy an entirely new fridge. After a long search, we finally found this particular fitting in Germany, but its price was absurd—it cost more than half the price of a brand-new fridge!
The Expensive Necessity of Replacing the Fitting
Unfortunately, we had no choice. Sailing on with a 22-year-old brass through-hull was simply not an option. The alternative would have been to rebuild the entire fridge and switch to the more common metal plate cooling system, which would have further increased costs and extended the timeline. In the end, we replaced the old fitting with a new one—still made from a material we would have preferred to avoid for such a component. It’s hard to call this an upgrade—it was more of an expensive necessity. And expensive in the literal sense, because the price we paid for it was truly ridiculous.
Installation of a Stainless Steel Bow Shield
A problem we’ve been struggling with for the past two years is recurring gelcoat damage on the bow, caused by impacts from the anchor. Unfortunately, we consider the anchoring system on Malo 39 to be one of their biggest design flaws. Instead of being pulled onto the deck like on most yachts, the anchor and chain pass directly through an opening in the bow, which creates several issues for us.
When raising the anchor, we have to be extremely careful—it passes very close to the hull, and its sharp edges can easily cause damage. The problem is further aggravated by the fact that our anchor is oversized, reducing clearance even more and increasing the risk of impact.
After yet another repair to the bow due to such an incident, we concluded that instead of repeatedly fixing the gelcoat, it would be better to find a more durable and effective solution.
Common rubber bow protectors were not an option—they were too thick, not durable enough, and our anchor would have quickly torn them apart. Ultimately, we decided to install stainless steel shields. While we haven’t had many opportunities to test them yet, we’re confident they will provide effective protection for the bow and save us a lot of work in the long run.
Adding Access Ports to Our Water Tank
Since we found a great stainless steel specialist in Almerimar, we decided to take advantage of the opportunity and tackle a few additional projects. These weren’t the most urgent tasks, but having a trusted professional on hand was too good to pass up.
One of these projects was adding two extra access ports to our water tank. Why? To allow for thorough mechanical cleaning. Structurally, the tank had only one opening, and the internal baffles dividing it into three sections made it impossible to reach the farther areas. As a result, for the past two years, we had to rely solely on chemical cleaning.
Since the tank walls are only 1.5 mm thick, we had to weld reinforcement frames around the new openings before threading them. We then installed covers, sealed everything with micro-rubber gaskets, and secured them with bolts. After multiple leak tests, bolt tightening, and precise gasket positioning, everything is now perfectly sealed.
Of course, we immediately cleaned the previously inaccessible sections of the tank. The amount of sediment was shocking, and the color of the water after washing was downright nauseating. Without a doubt, this was an excellent decision—both for the boat and for our health!


Upgrading Our Fuel System
Replacing the CAV Filter with a Racor on Malo 39
One task we postponed last year was replacing our fuel filter. Our original Malo 39 CAV filter proved to be highly impractical—it was impossible to change without spilling a significant amount of diesel. This would be an absolute nightmare if we ever had to replace it at sea!
Another major drawback of the old filter was the lack of a water separator, which is essential for removing water from fuel—especially important if we refuel in locations where fuel quality isn’t guaranteed.
We decided to upgrade to a Racor, which includes a water separator and features a much more user-friendly filter replacement system. This upgrade required rearranging the components under the stairs, where the filter is located, and replacing the fuel hose fittings, as the new filter is considerably larger than the previous one.
Additionally, we installed a Bosch manual fuel pump in the system, making the bleeding process after a filter change much quicker and easier. Previously, we had to rely on the small, inefficient pump on the engine or crank the starter dry.
In fact, it wasn’t until we installed this pump that our fuel system actually met the installation requirements of our Yanmar engine. For some reason, Malo shipyard omitted this crucial component in the original setup.


Installing an Emergency Bilge Pump for Added Safety
Installing a second bilge pump has been on our to-do list ever since we became owners of Malo 39 Tranquility. We firmly believe that for an ocean-going yacht, two electric bilge pumps plus one manual pump are the absolute minimum.
For our backup pump, we chose a high-performance Johnson model with a flow rate of 258 liters per minute—an impressive capacity! Since its primary function is to handle critical situations, the more water it can remove, the better.
Rather than mounting it permanently, we designed a mobile setup consisting of the pump and a coiled fire hose. This ensures it’s always ready for immediate deployment, with its reach only limited by the length of the power cable. Of course, the pump is wired into the yacht’s electrical system, guaranteeing that it’s operational whenever needed.
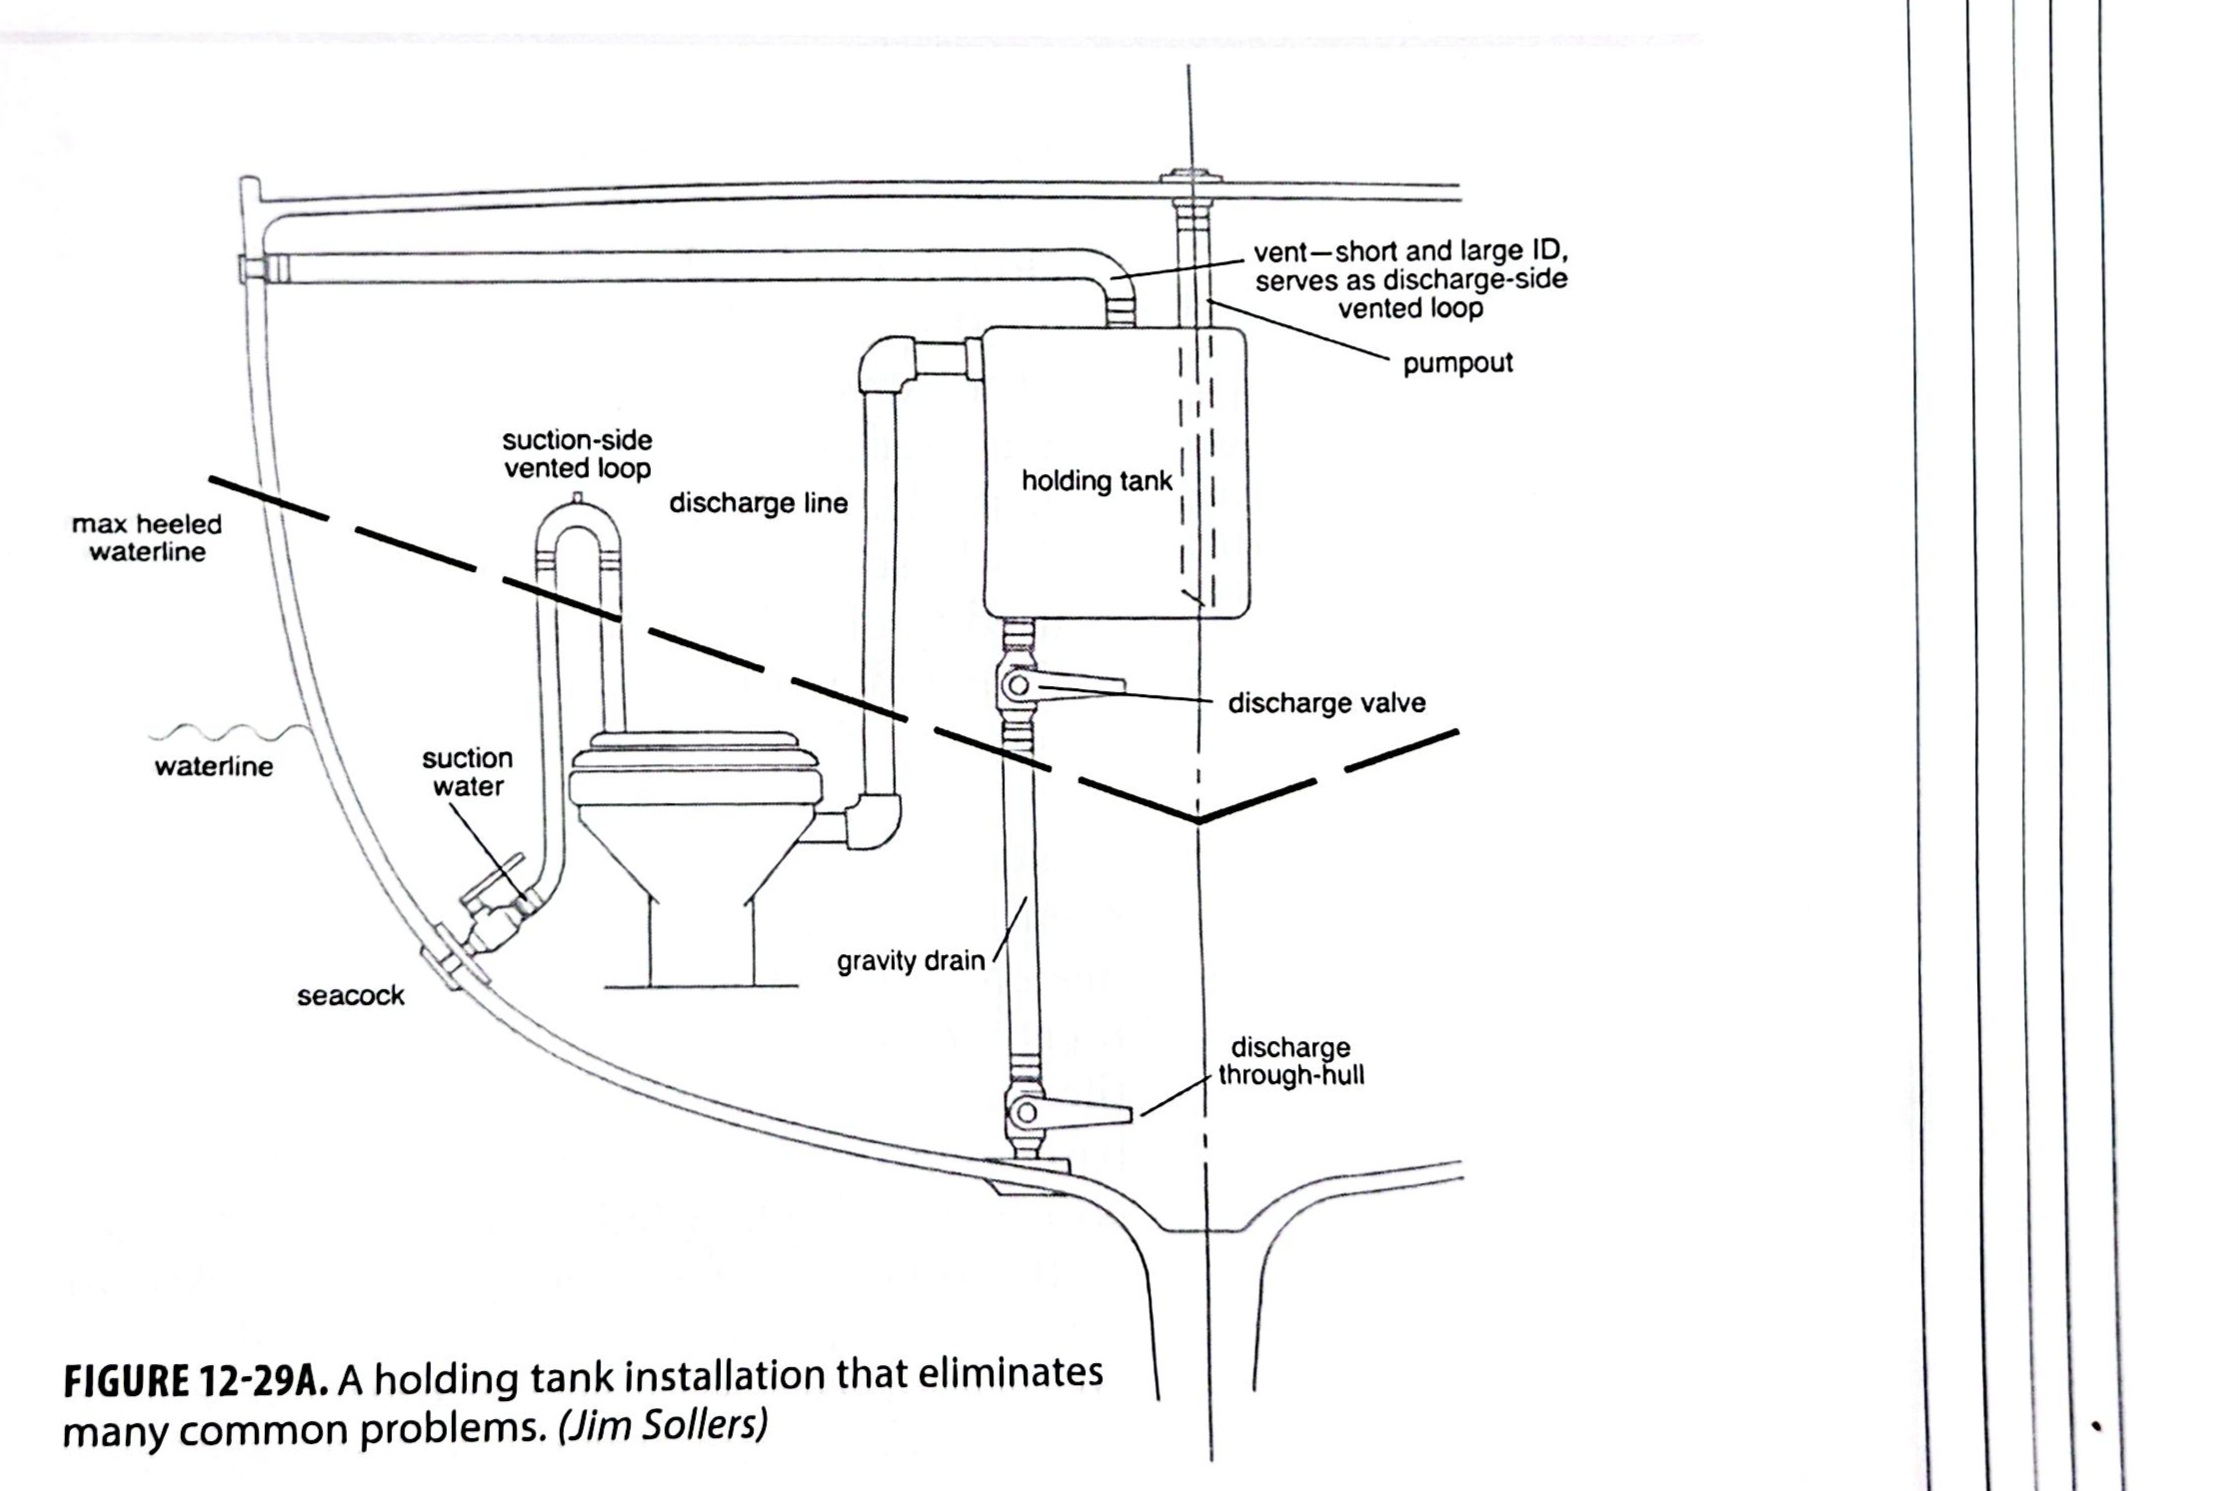
Redesigning the Marine Toilet System on Malo 39
Another upgrade, another fix after Malo’s original design! This time, we tackled the toilet system—specifically, the entire setup including the black water holding tank.
The previous system defied gravity, pumping waste from the toilet into the tank from the bottom. With heavy use, this often led to unpleasant back flush from the tank into the toilet. Since this is a common issue on Malo yachts, we decided to redesign the system entirely.
We opted for the simplest and most reliable solution: pass-through tank. We moved the toilet’s waste inlet to the top of the tank and repurposed the old bottom inlet as an outlet. This change ensures a more logical waste flow and creates a natural siphon effect, improving overall system safety.
Most importantly, the backflow issue—previously a regular nuisance—has been completely eliminated!
From a technical standpoint, the modification required removing the tank from the cockpit locker, welding a new top-mounted inlet, and cutting a few new openings between the toilet and the locker. While it took some effort, the results were well worth it!


Moving the Deck Light Switch to the Cockpit
Many of our yacht modifications stem from experience at sea, and relocating the deck light switch was no exception. The deck light is essential for nighttime work on board, whether adjusting sails or handling tasks on deck.
Previously, like all other light switches on Malo 39, it was positioned at the navigation table inside the cabin. This meant that every time we needed to turn it on or off, we had to go below deck—a process that was not only inconvenient but also disruptive. Climbing down the companionway in the dark, especially in rough seas, was far from ideal. It also disturbed the person sleeping below and unnecessarily prolonged even the simplest tasks.
To fix this, we relocated the switch to the cockpit, making it easily accessible from the helm. The season has only just begun, and we’re already appreciating the convenience of this upgrade!
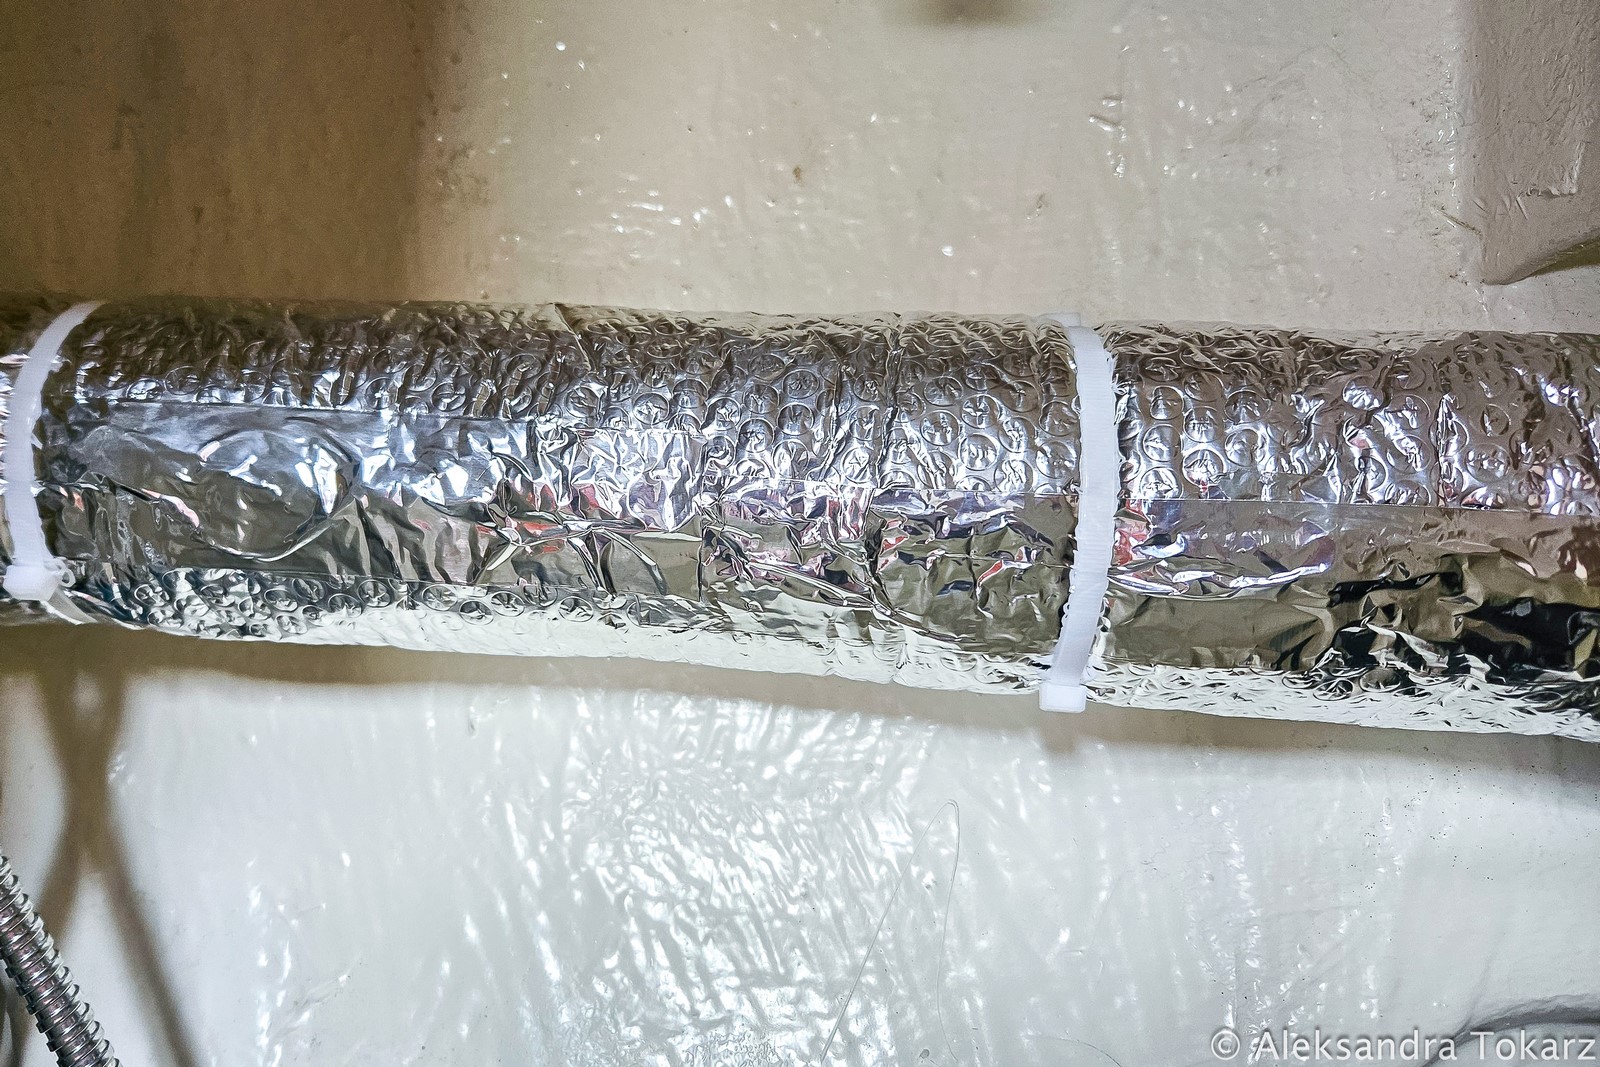
Insulating Hot Air Ducts
Thermal insulation is a well-known topic for every yacht owner. It is especially crucial in colder climates and seasons when condensation and moisture can significantly reduce onboard comfort. Additionally, a yacht cools down quickly due to water exposure, and heat loss through any leaks can be substantial.
On Malo 39, the heating system, an Eberspächer unit, distributes warm air throughout the boat via a network of ducts. The farther the air travels from the heat source, the greater the loss. While we’ve never really felt cold onboard, any improvement in efficiency is always welcome.
Thanks to Sailing Polaris, a YouTube channel we follow, we came across an interesting idea—insulating “sleeves” for air ducts to help reduce heat loss. We couldn’t find the exact same product in Spain, but we ordered insulation foil and wrapped it around the ducts wherever possible. A big thank you to Sailing Polaris for the great inspiration!
This winter, our Eberspächer heating system also underwent a major overhaul—but we’ll cover that in part two.

Carpets Onboard Malo 39
This topic is somewhat related to insulation. After much consideration, we decided to cover the yacht’s floors with carpets. The main reason was our northern voyage this year and the anticipated colder temperatures. Carpets provide an extra layer of insulation while also making the yacht’s interior feel cozier—especially in chilly weather.
Another factor behind our decision was our remarkable ability to drop things on the floor, inevitably leaving scratches and dents. The carpets serve as a protective layer, helping to shield Tranquility from our accidental damage—at least when it comes to the flooring.
Although we’re not usually fans of rugs, runners, or other hard-to-clean surfaces, we found this solution worth trying. Like many yacht upgrades, time will tell if it was the right choice. For now, we can say one thing—it definitely feels cozier.
Since we’re unsure whether this setup will work for us long-term, we went with an economical option. We made the carpets from IKEA runners, cut them to size, and sealed the edges with a heat gun. Underneath, we placed a special non-slip underlay (also from IKEA), which does an excellent job of keeping them in place.


Malo 39 Fridge Insulation Fail
One upgrade that turned out to be a complete failure was our attempt to improve the fridge insulation. We had long suspected that its insulation was lacking—excessive condensation in the cabinets above suggested an issue, and the fridge itself would frost over quickly and frequently. On top of that, we noticed significant mold growth where the insulation met the fridge. Our verdict? After 20 years, the insulation foam was likely compromised by moisture and mold, severely reducing its effectiveness.
When we removed the fridge lid —somewhat destructively—we were surprised to find… perfectly intact, undamaged foam. Determined to find the real problem, we cut an opening in the bottom of the kitchen cabinet. Once again, everything looked fine—except for the fact that we had just ruined a piece of furniture. The mold we had seen from the outside was, in reality, limited to a small section, which could have easily been cleaned, sanded, and sealed with Sikaflex.
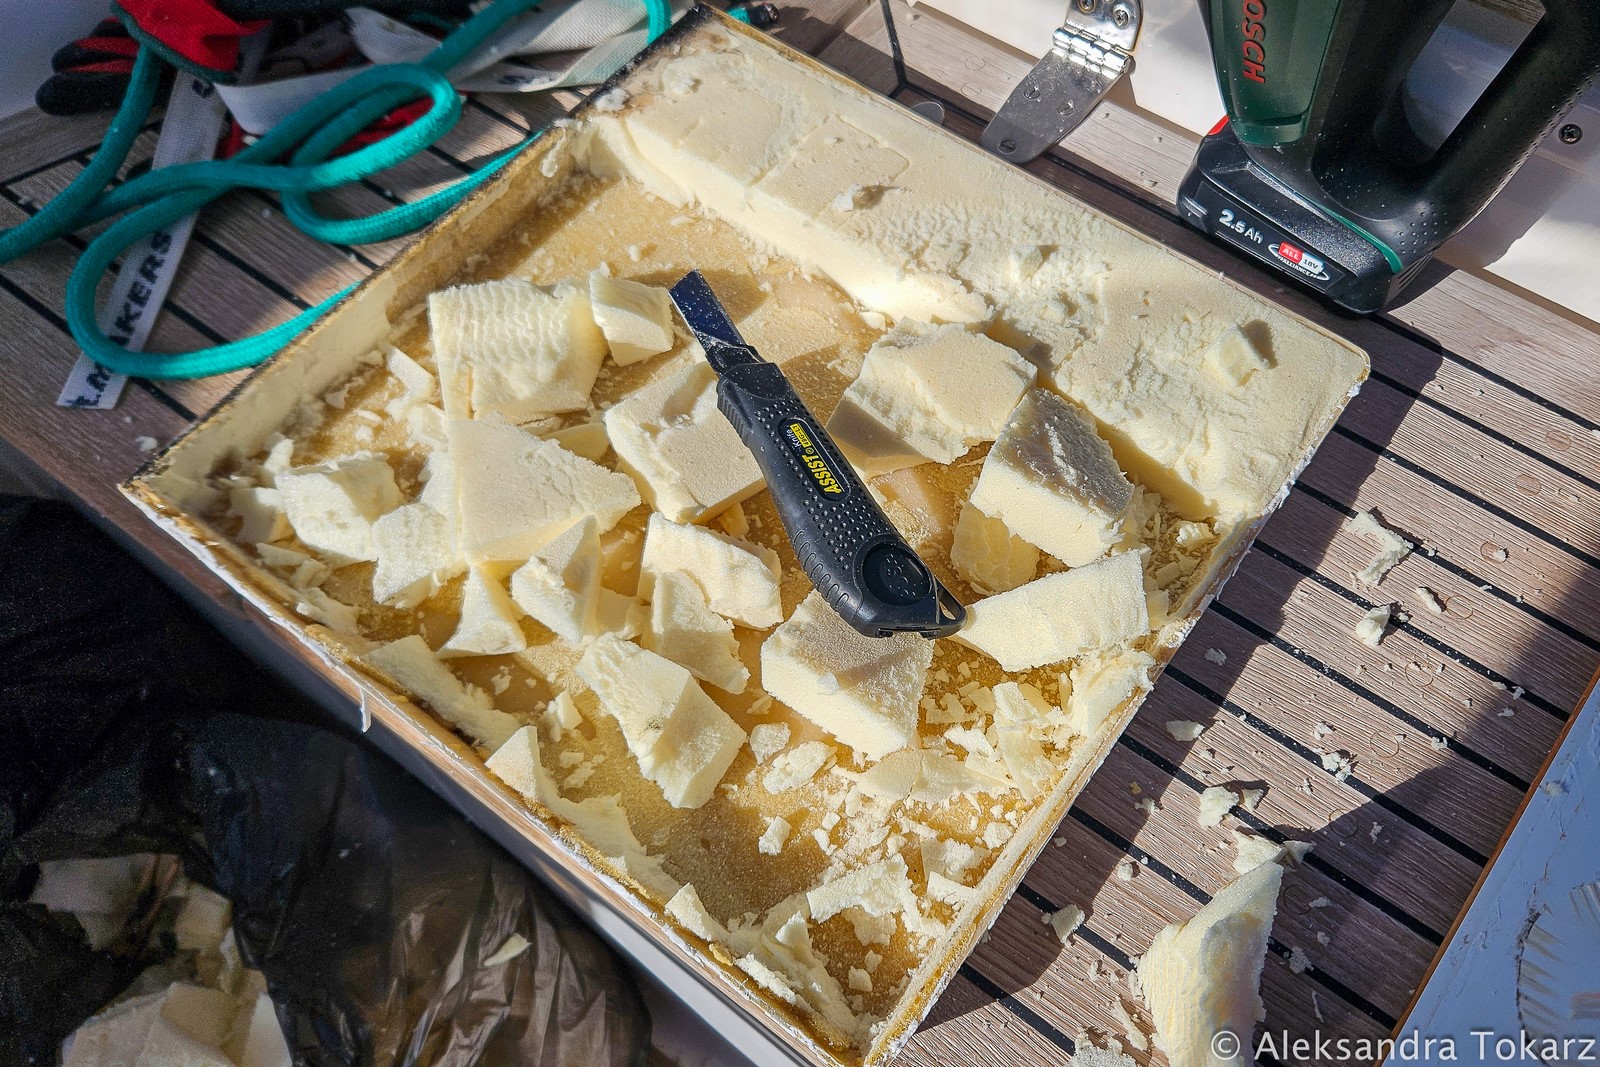
To salvage some value from our efforts, we looked for ways to add an extra layer of insulation around the fridge. Unfortunately, the available space was too tight to fit even an extra centimeter of material. In the end, we had no choice but to put everything back together, repair the damaged cabinet, reinforce the insulation with fresh polyurethane foam, and… accept that we had done a lot of work for absolutely no reason. The only real upgrade we did was adding some micro-rubber seals around the lid.


Winter Upgrades: Mission Accomplished!
We’ve reached the end of our winter upgrades! Initially, I planned to include here two more categories—repairs and system maintenance—but the post turned out to be a bit too long. So, we’ve decided to split it into two parts. Part number two is available here.
The length of this post made us realize just how much work we accomplished this winter. It was a lot! And the fact that we managed to finish everything on schedule and without major issues proves one thing—good preparation is the key to success!
If you’re planning upgrades for your boat and need expert guidance, we’re here to help! Our consulting services are fully tailored to your needs, ensuring you get the best solutions for your vessel. Let’s work together to optimize your boat for performance, safety, and comfort—contact us to get started!


No responses yet