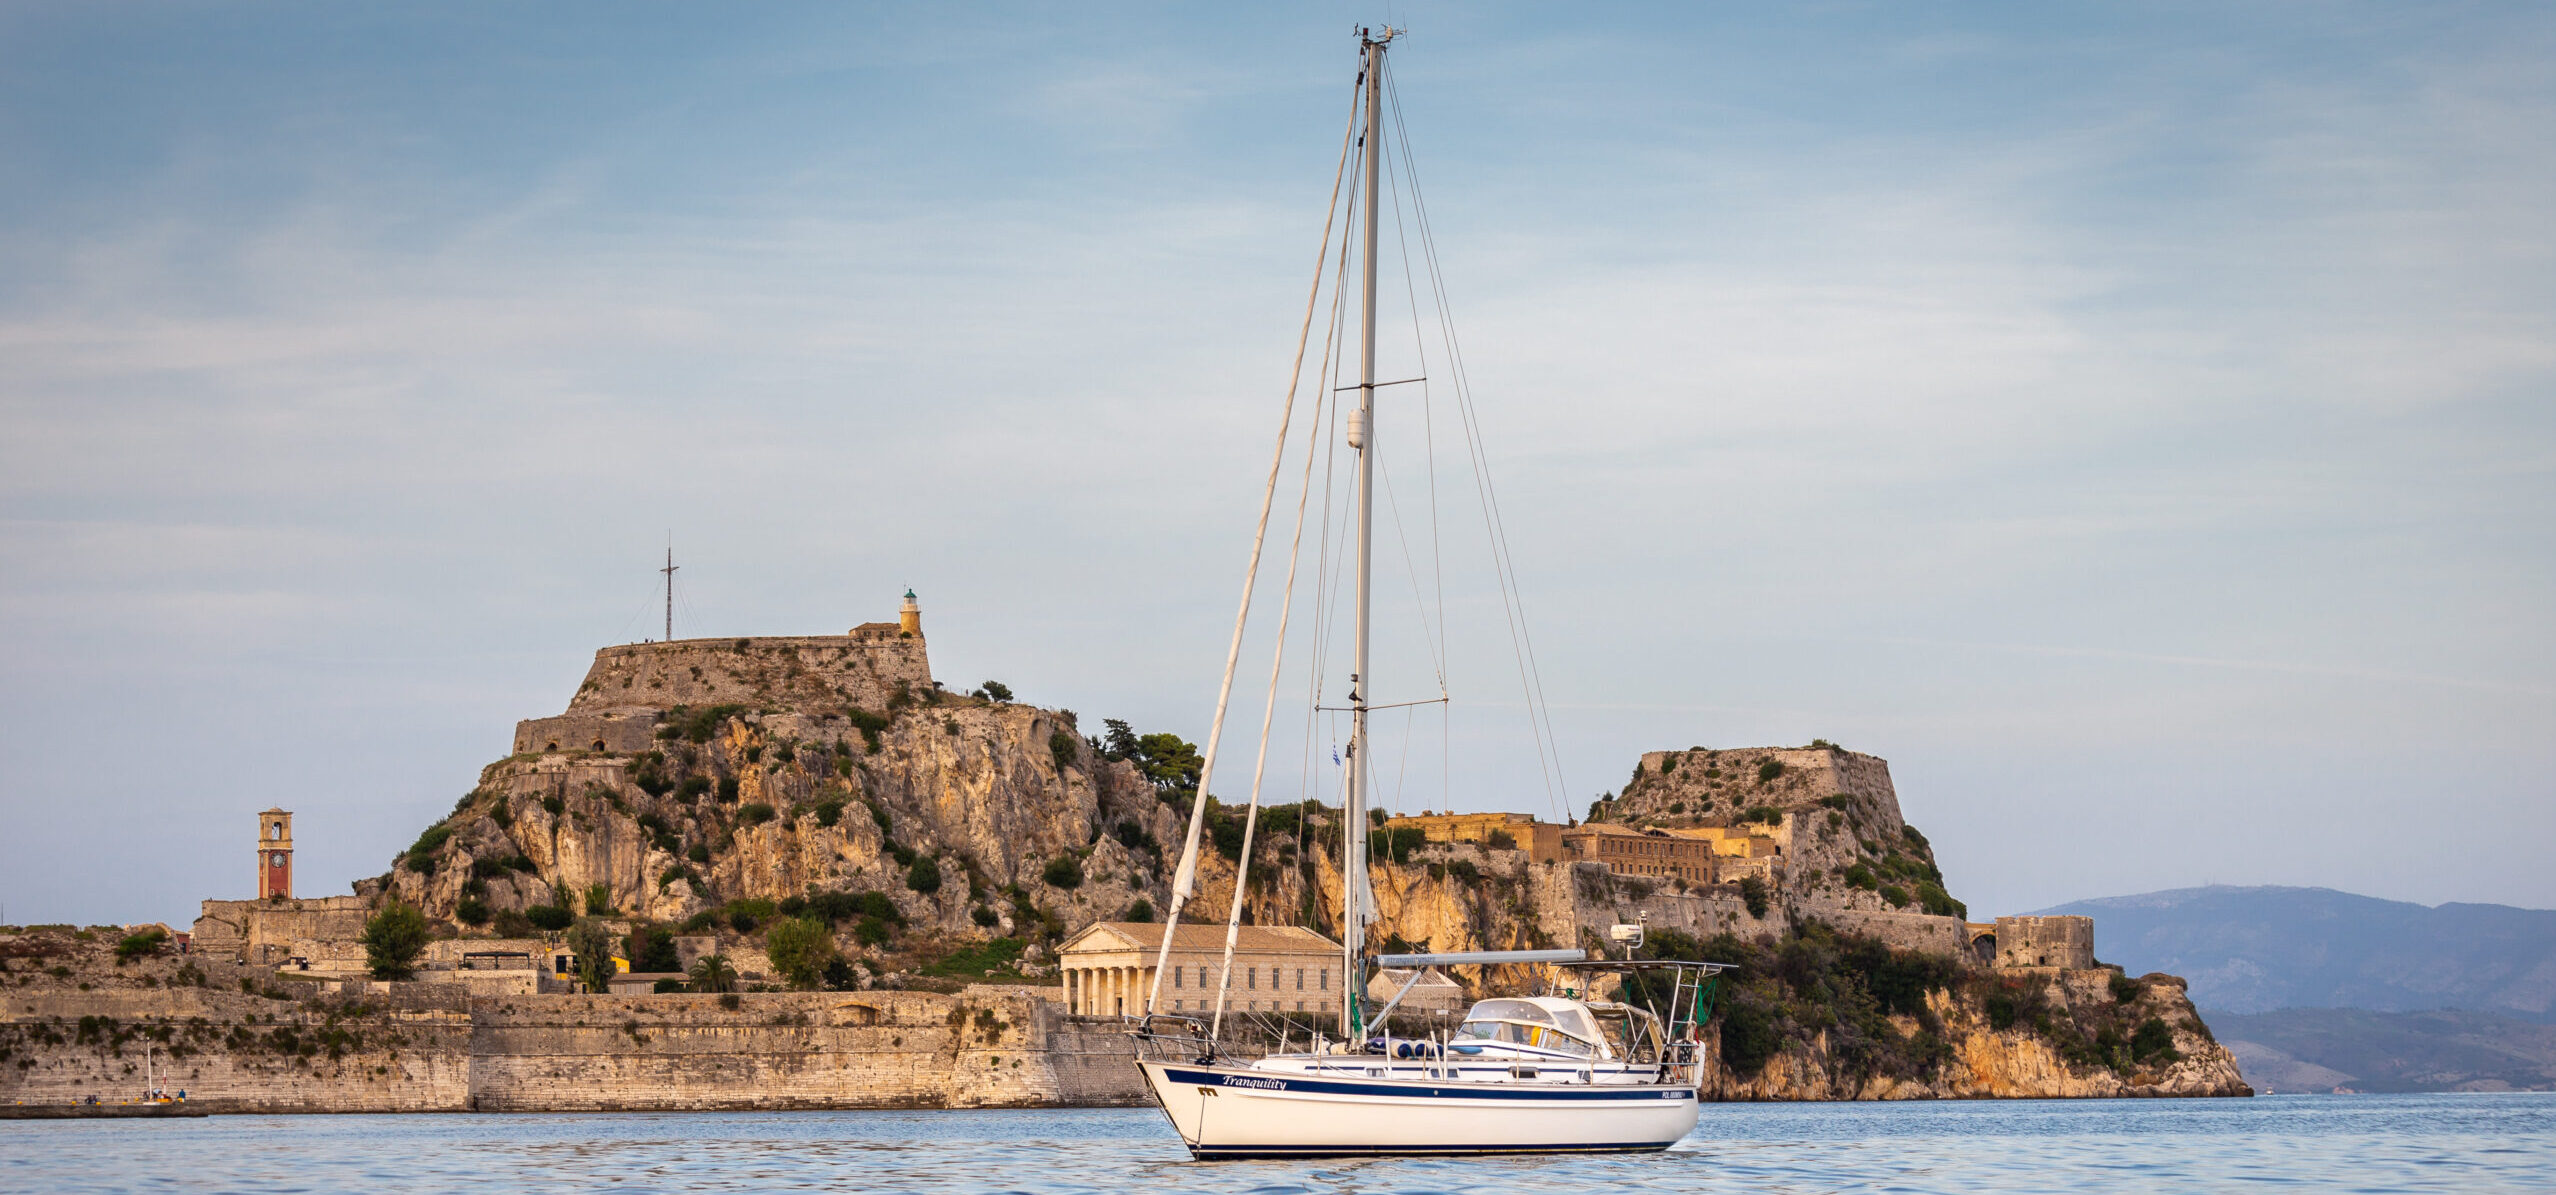
The sailing season is now well underway, so it’s high time to look back at the winter refit!
Big Picture
So far, every winter aboard Tranquility has been a period of intensive work and upgrades. First, we hauled out in Preveza, Greece. Then, during two consecutive winters worked in Almerimar, Spain. Year after year, these winter refits formed part of a larger plan: preparing the boat for long-distance, off-grid ocean cruising before leaving Europe behind. This past winter marked the third and final stage of our Malo 39 refit project.
As originally intended, Tranquility is now fully equipped and upgraded. She’s ready for multi-month ocean passages and long-distance cruising while providing the safety and comfort we were aiming for. At this point, we have no major refits planned. Many systems and equipment have been replaced proactively. We continue to challenge the notion that owning a yacht means spending your time fixing it in remote tropical corners of the world.
In this post, we’ll take a look at the key projects and upgrades completed during the Winter of 2026. We hope you enjoy the read!
Malo 39 Refit: Previous Upgrades
You can find summaries of our previous Malo 39 refit seasons here:
First winter: Winter boat upgrades on our Malo 39
Second winter:
Malo 39 Winter Upgrades – Part 1/2: What We Improved
Malo 39 Winter Upgrades – Part 2/2: Maintenance and repairs
For this third and final winter Malo 39 refit season, alongside countless smaller jobs, we had three major projects left on the list: replacing the standing rigging, installing a watermaker, and fitting a second, fully independent backup autopilot.
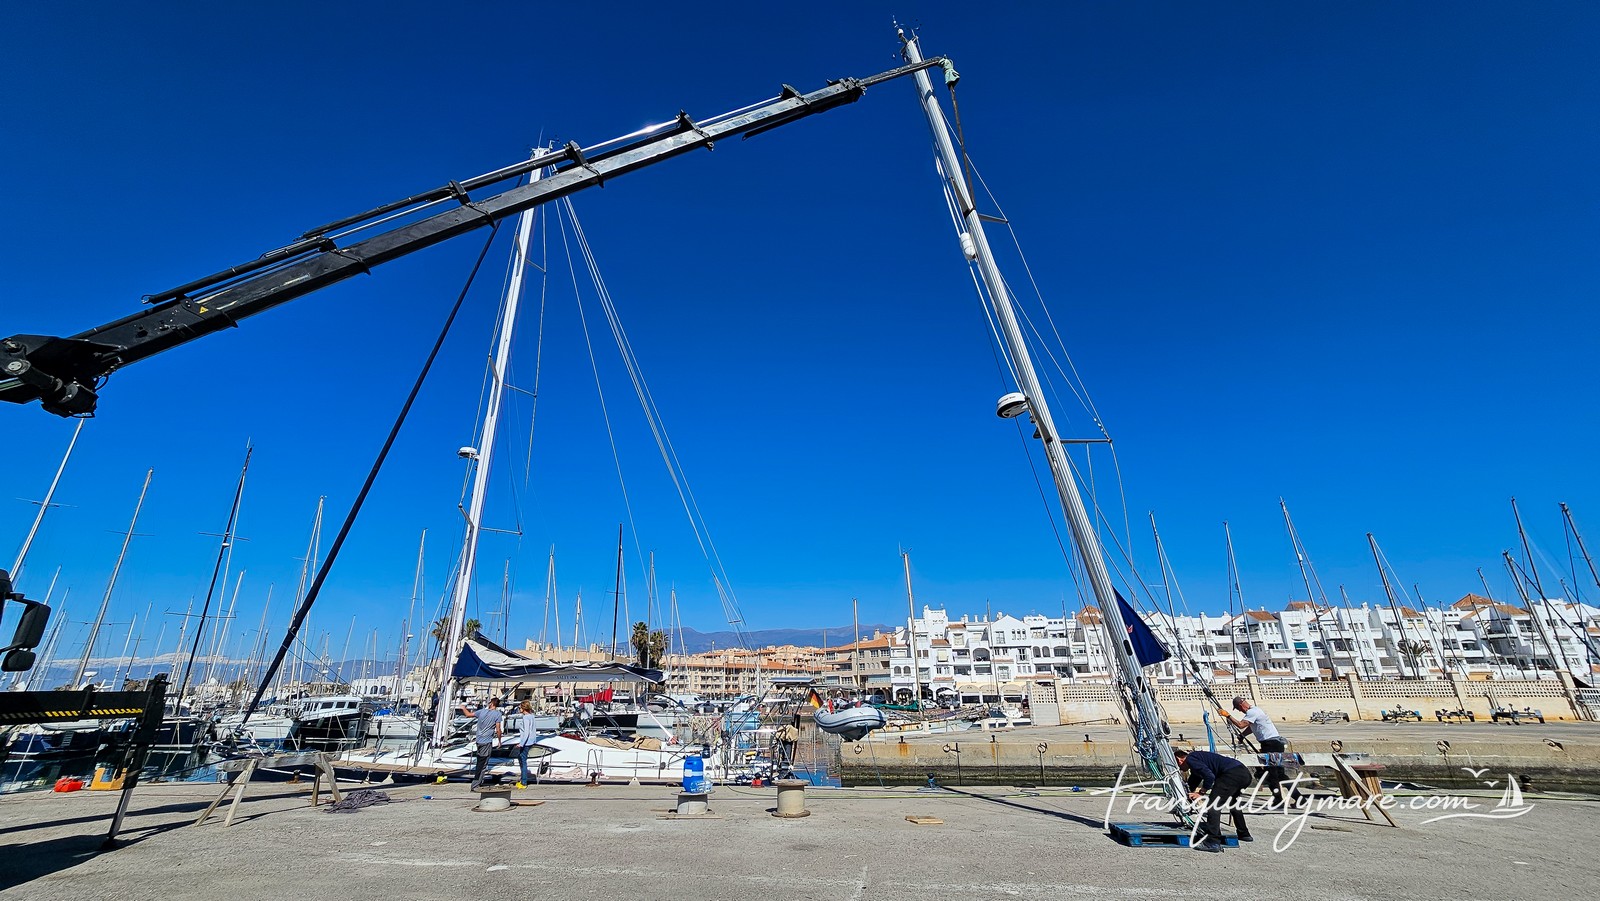
Replacing the Standing Rigging
Why did we decide for the replacement?
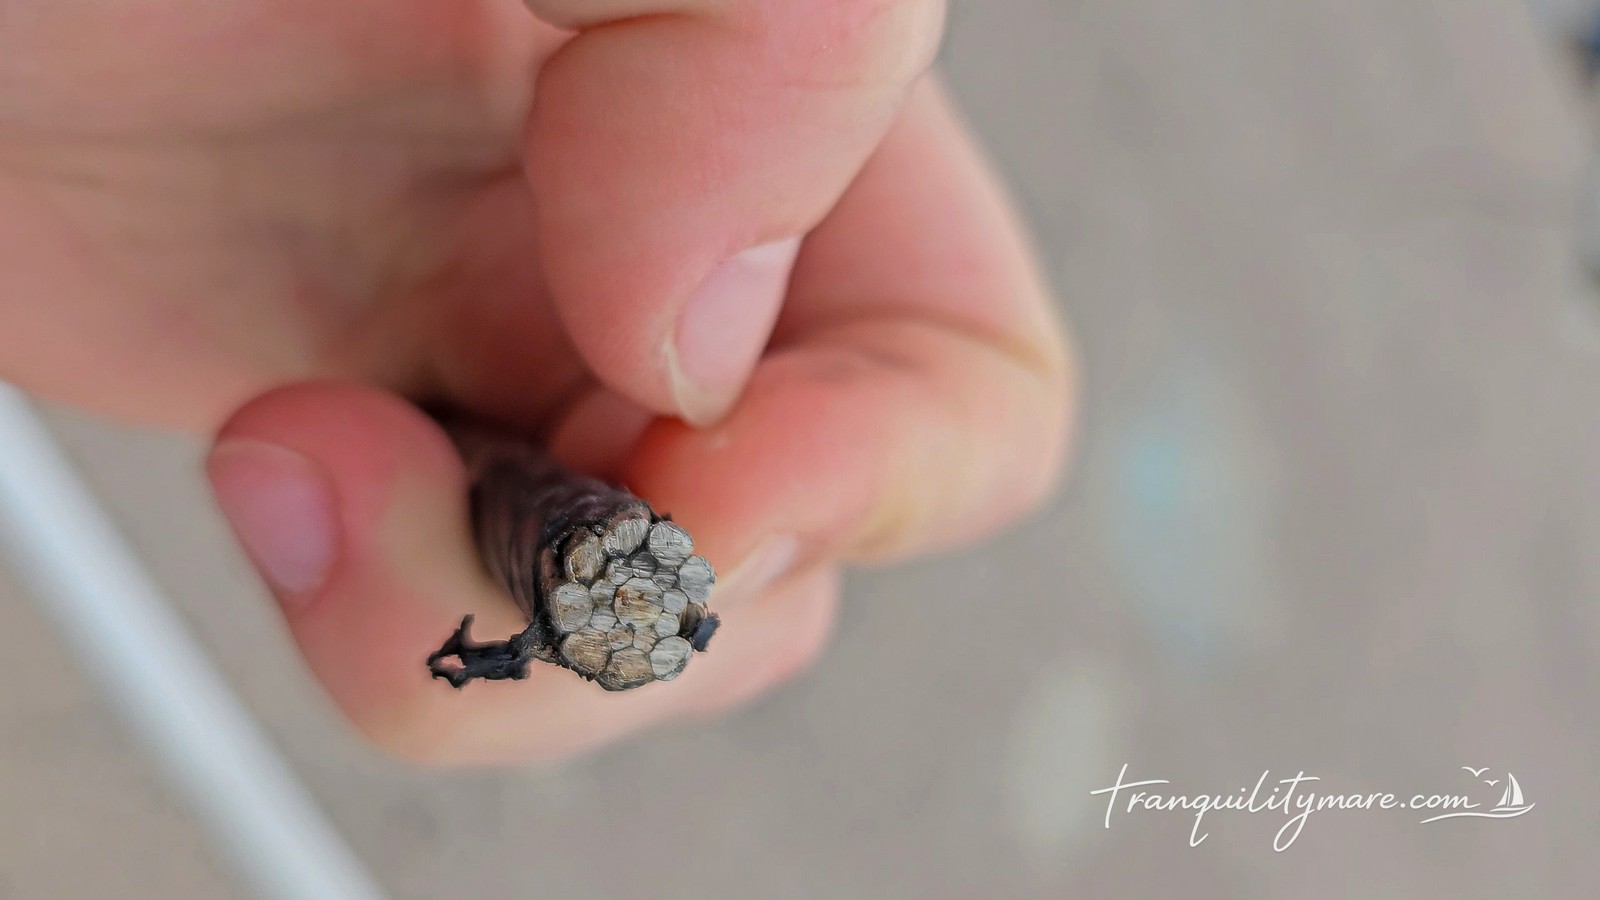
We knew we would eventually have to replace the standing rigging from the moment we bought the boat. At the time, it was already over 20 years old. However, the yacht had seen relatively little use throughout its life. The rigging showed no obvious signs of wear, so we decided to leave the project until the very end of our Malo 39 refit schedule.
After three seasons of sailing, the rigging still appeared to be in excellent condition. The problem is that a visual inspection can never provide complete certainty when it comes to stainless steel. Fatigue and internal deterioration can develop without any visible warning signs. With an Atlantic crossing planned for this autumn, there was really only one sensible option for 24-year-old standing rigging—regardless of how good it looked: replacement. An additional consideration was insurance. Once standing rigging passes the 20-year mark, obtaining insurance coverage becomes increasingly difficult and, in many cases, impossible.
Choosing right specialist for standing rig replacement
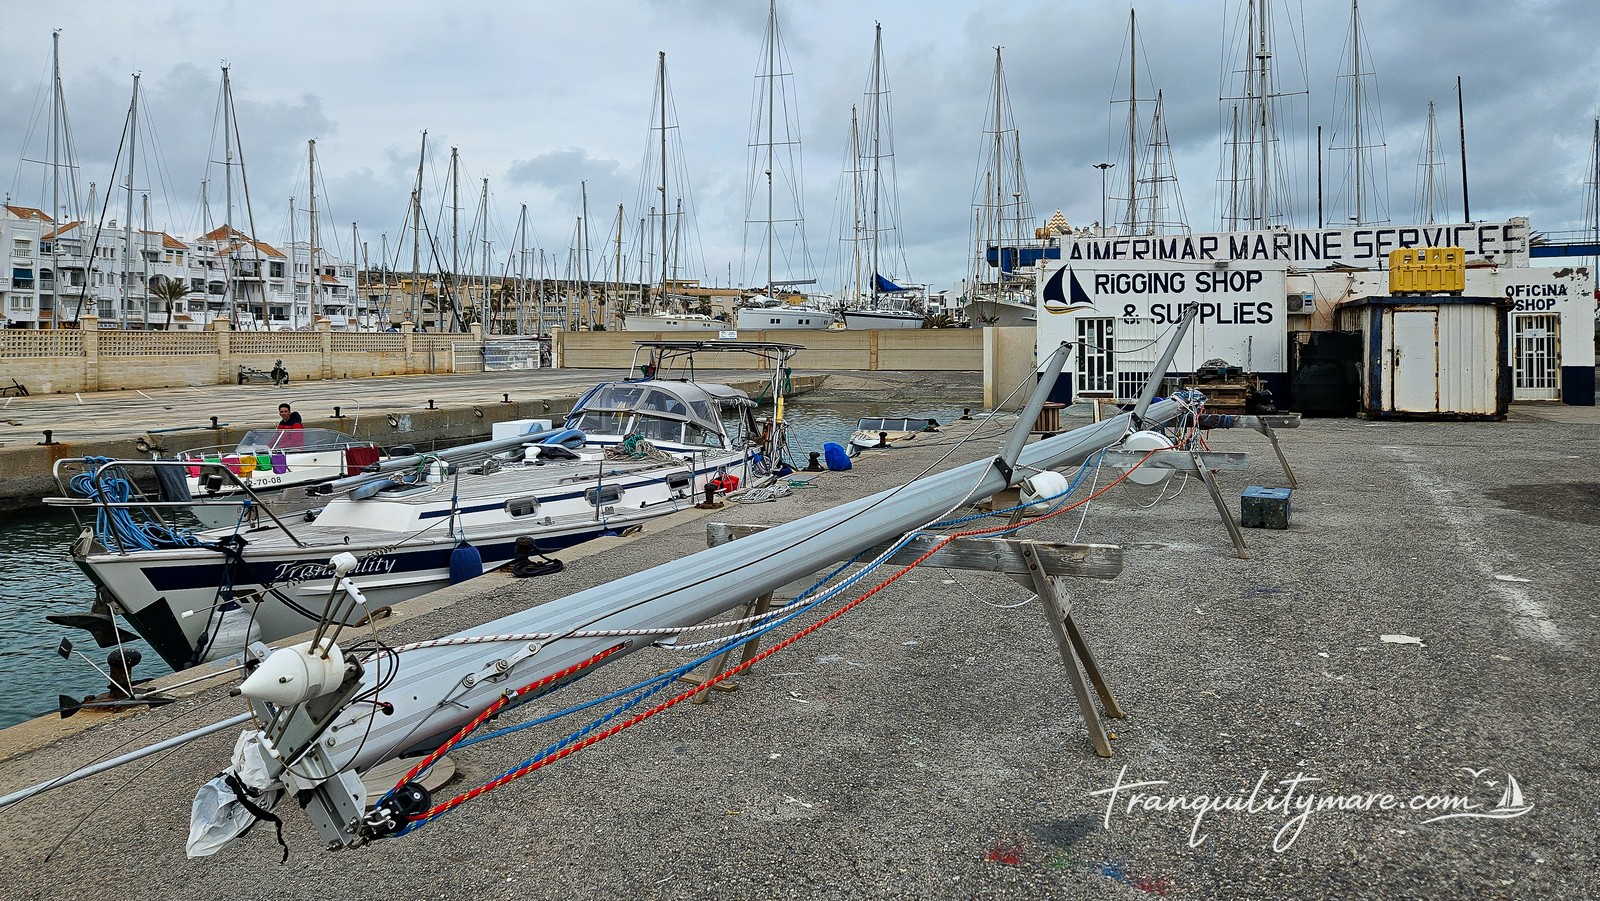
Having heard plenty of stories from sailors whose brand-new rigging started showing signs of corrosion within a year of installation, we knew this was one job that had to be done by a proven and trustworthy specialist. During our previous winter in Almerimar, Spain, we took notice of Almerimar Yacht Services. Company quickly earned our respect for its professionalism and expertise. We also met numerous sailors who had their rigging replaced there and, even after years of use, were still completely satisfied with the results.
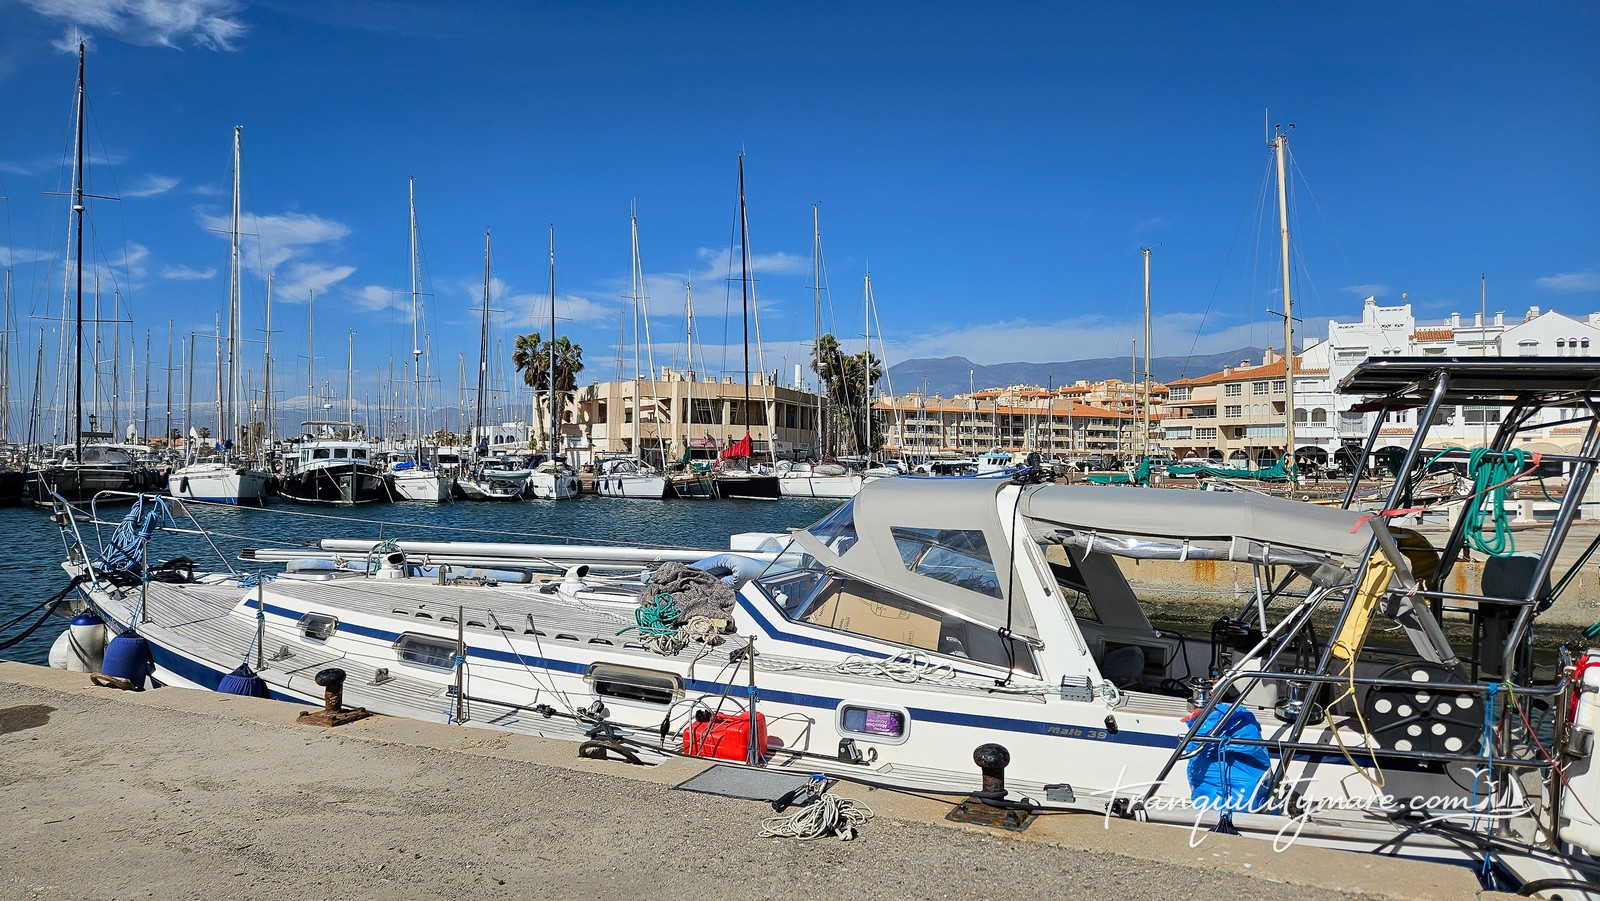
The decision was therefore straightforward. After our trip north, we would return to Almerimar for another winter and carry out the rigging replacement there. This is one of those jobs that is almost always delegated to specialists. In fact, we know of only one crew who replaced an entire set of standing rigging themselves.
There were still plenty of decisions to make. Which components should be replaced? Should we increase the wire diameter? In our case, the shrouds were originally 10 mm, while both the forestay and backstay were 8 mm. We also had to decide which wire construction to go with.
Compacted Strand vs 1×19 wire
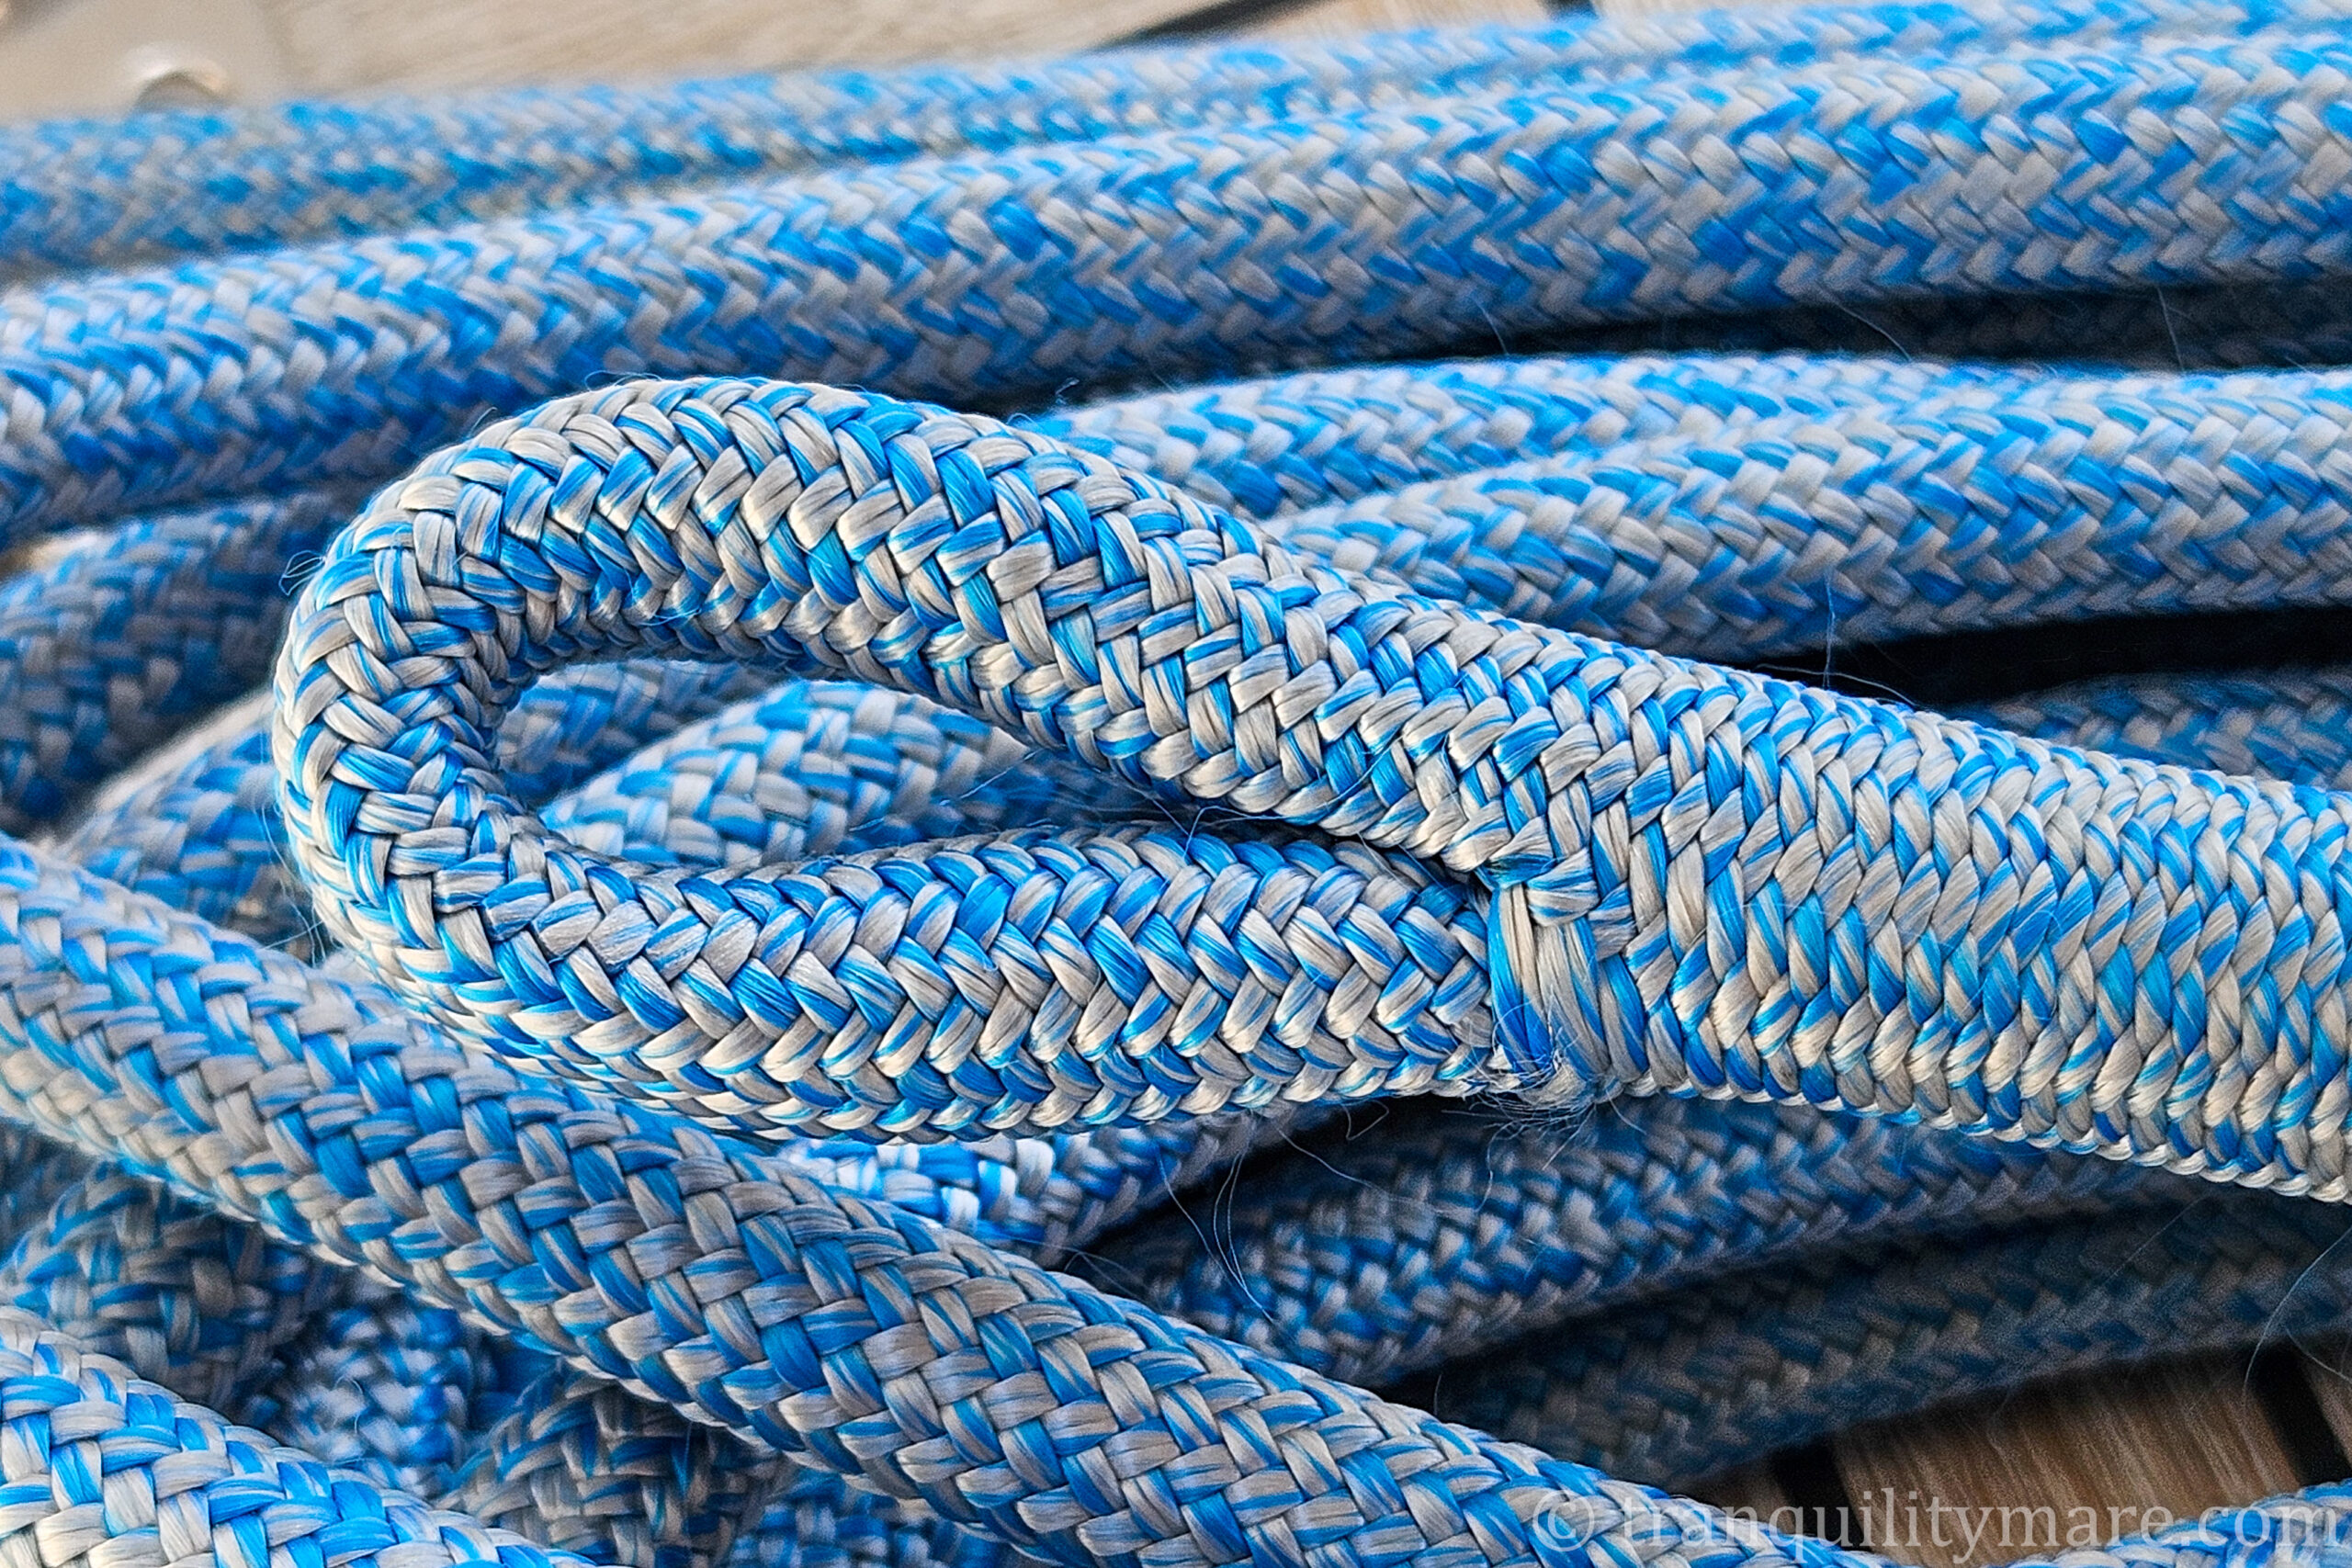
In the end, considering our cruising plans, we opted for 10 mm Compacted Strand wire (formerly known as Dyform) for the shrouds, forestay, and backstay. Compacted Strand is a more advanced type of rigging wire than the standard 1×19 construction commonly used on cruising yachts. Thanks to a manufacturing process that compresses the outer strands, it is around 40% stronger than 1×19 wire of the same diameter (for 8 mm and 10 mm sizes). It’s also exhibiting roughly 20% less stretch. In practice, this results in a stiffer and more stable rig.
Compacted Strand is also more resistant to wear and corrosion. Its surface is smoother and more tightly packed than that of conventional 1×19 wire. The wire itself is slightly heavier—by around 10%—but its higher strength allows a smaller diameter to be used while still achieving load ratings comparable to a thicker 1×19 wire. The result is significantly stronger and stiffer standing rigging for only a modest increase in weight.
The obvious downside is cost. In our case, the investment made sense given the type of sailing we have planned. But that does not mean Compacted Strand is the only—or necessarily the best—choice for every cruising plan.
Replacing the Running Rigging
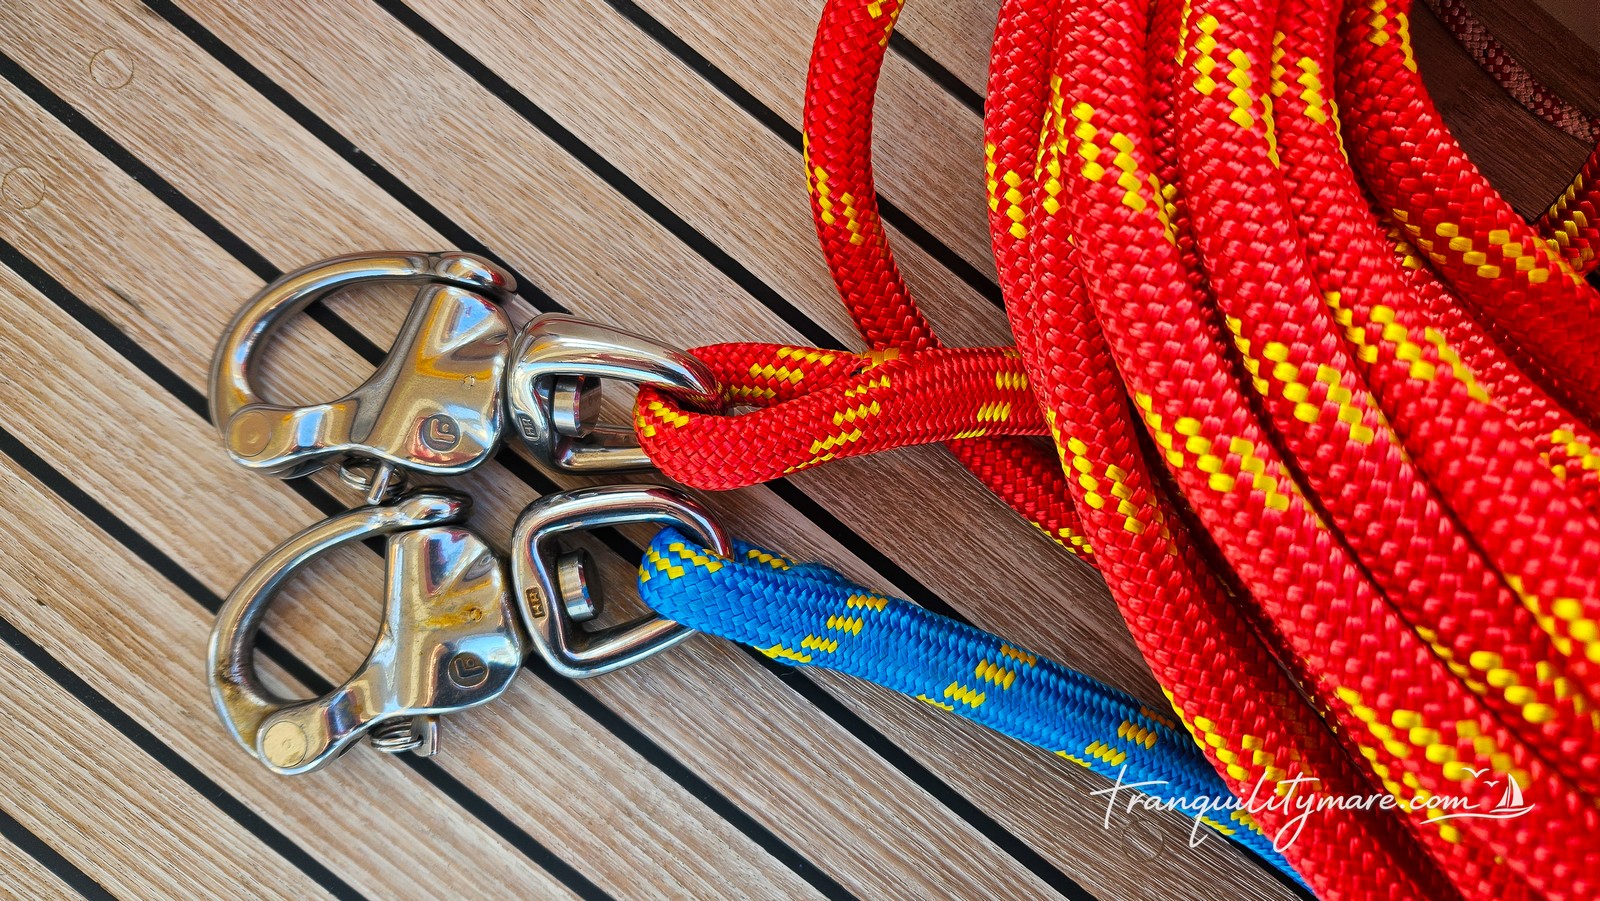
Alongside the standing rigging replacement, we also replaced a large portion of the running rigging—the lines that had remained unchanged since we bought the boat. This included the jib, genoa and gennaker halyards, the topping lift, main’s outhaul, all sheets, and the furling lines.
Most of the new lines are Gleistein MegaTwin, featuring a Dyneema core and offering very high strength. We also finally took the opportunity to organise the colour coding of our running rigging. It may sound like a minor detail, but in practice it makes life on board much easier. Until now, all of our headsail sheets looked exactly the same, making it far too easy to grab the wrong one.
Overall, we’re very happy with the upgrade, although we do have one reservation. The manufacturer states that this particular line is suitable for use as sheets. But in our opinion it is simply too stiff for that application. It performs exceptionally well as a halyard or furling line, but when it comes to sheets, we definitely prefer something softer. Stiffer lines are simply less comfortable to handle.
The original jib and genoa halyards on our boat were wire-to-rope halyards, consisting of a stainless steel wire spliced to a polyester line. This used to be a common solution for reducing halyard stretch. However, with modern Dyneema lines now readily available, it is no longer necessary. We therefore replaced the old wire-to-rope halyards with full-length MegaTwin lines, eliminating the need for the complicated wire-to-rope splice altogether.
The mast sheaves that had previously carried the wire sections also needed to be polished. Years of steel-on-metal contact had left noticeable wear grooves from constant friction.
Other Mast Work
With the mast already unstepped, we took the opportunity to install a second gennaker halyard on the opposite side of the mast. This means that regardless of which tack we set the gennaker or whisker pole on, the halyard is already on the correct side. It no longer needs to be led around the forestay each time. It also serves as a backup in the event of a failure in either the standing or running rigging. In our case, it provides an additional safety line when climbing the mast as well.
All of the new lines were spliced, allowing them to retain up to 95% of their original breaking strength. By comparison, traditional knots can reduce a line’s strength by as much as 40%. We have written a separate article and recorded a tutorial on how to splice this type of rope. Its unique construction requires a different technique from that used with standard double-braid lines.
Since the mast was already down, we also carried out a number of smaller jobs and upgrades while everything was easily accessible. In addition to installing the second gennaker halyard, we mounted an external camera at the masthead to give us a constant view of the boat and its surroundings. We also replaced some ageing electrical cables and upgraded some of the navigation and deck lights.
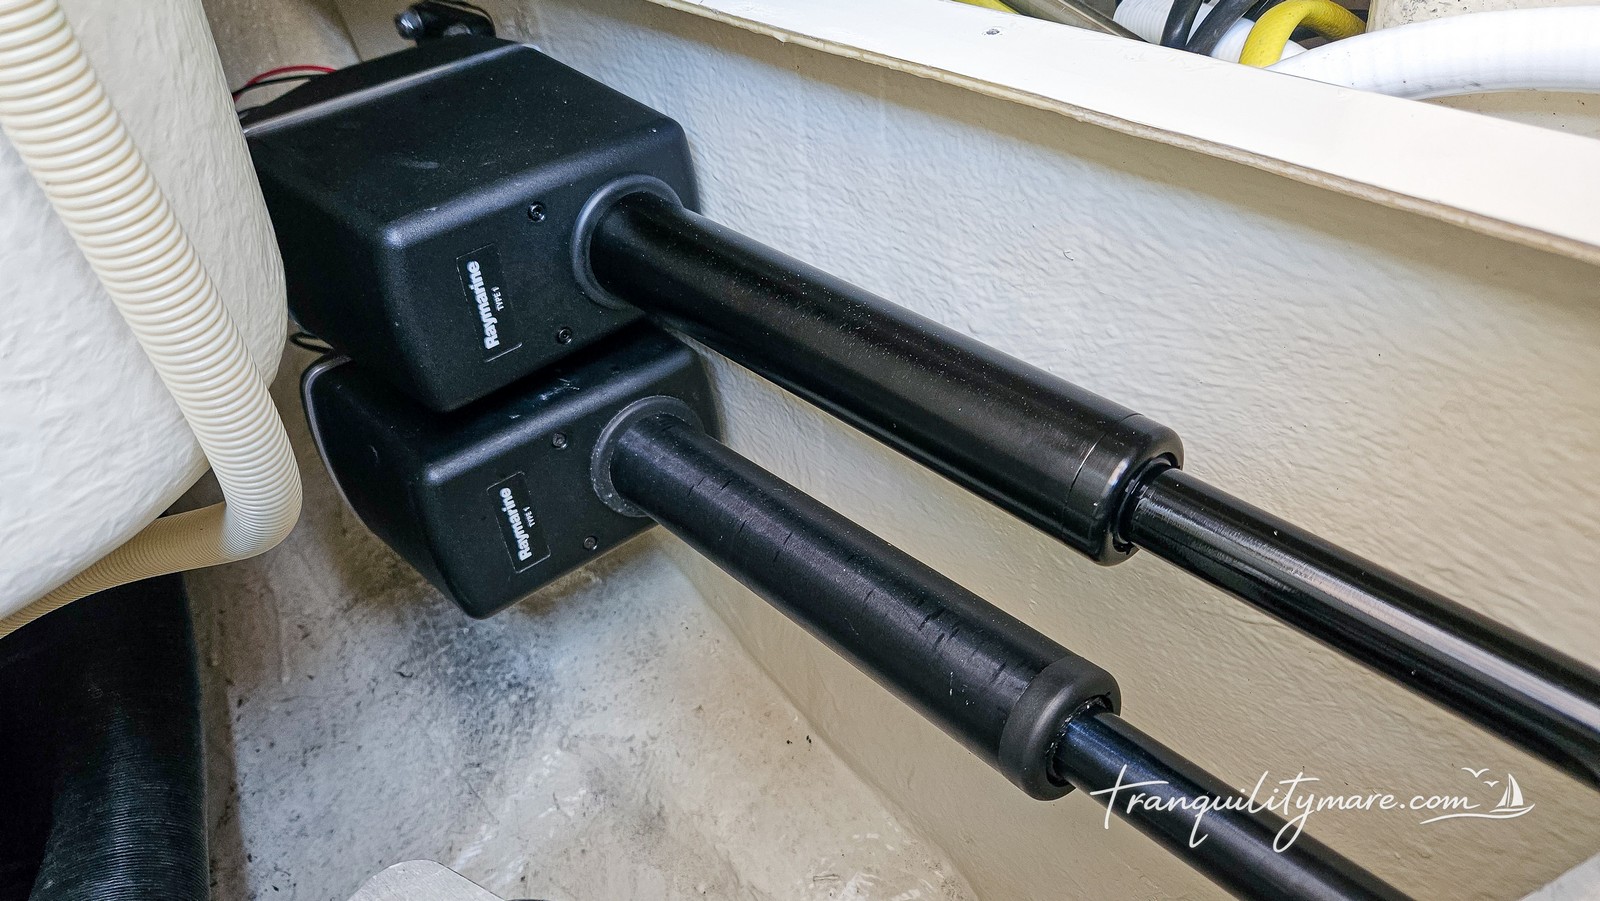
Installing a Second Autopilot
Ever since we bought the boat, we knew we wanted a second, backup autopilot. We sail short-handed 99% of the time, and on a long ocean passage, an autopilot failure means one person is suddenly tied to the helm. Hand steering for days and nights on end is simply exhausting. And well-rested crew is one of the most important safety factors aboard any yacht.
In our view, the ideal setup is to have two completely independent steering systems: an electric autopilot and a windvane self-steering system. A windvane is mounted on the stern and uses the force of the wind to steer the yacht without consuming any electrical power. Besides the obvious advantage of zero energy consumption, some windvanes can also serve as an emergency rudder should the main rudder become damaged or lost.
Unfortunately, the layout of our stern, together with other equipment we store there, ruled out the installation of a windvane. It would also have made communication in and out of the boat more difficult.
We therefore decided that a second electric autopilot would be the best compromise for our particular setup. We will cover the entire installation in a separate article, including all of the technical details.
Watermaker
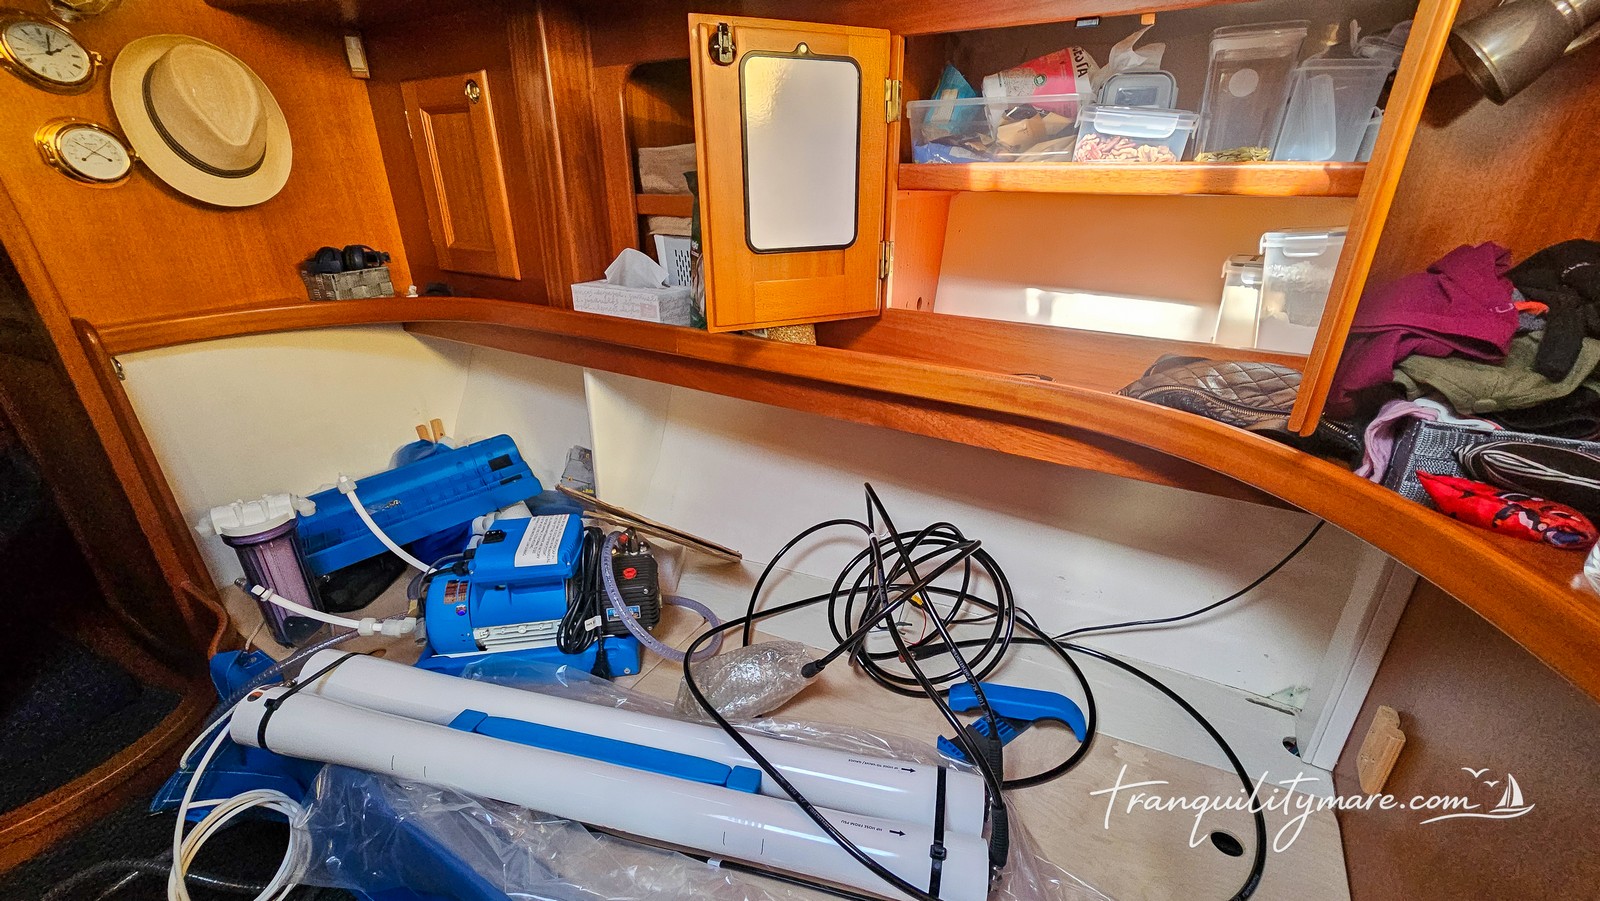
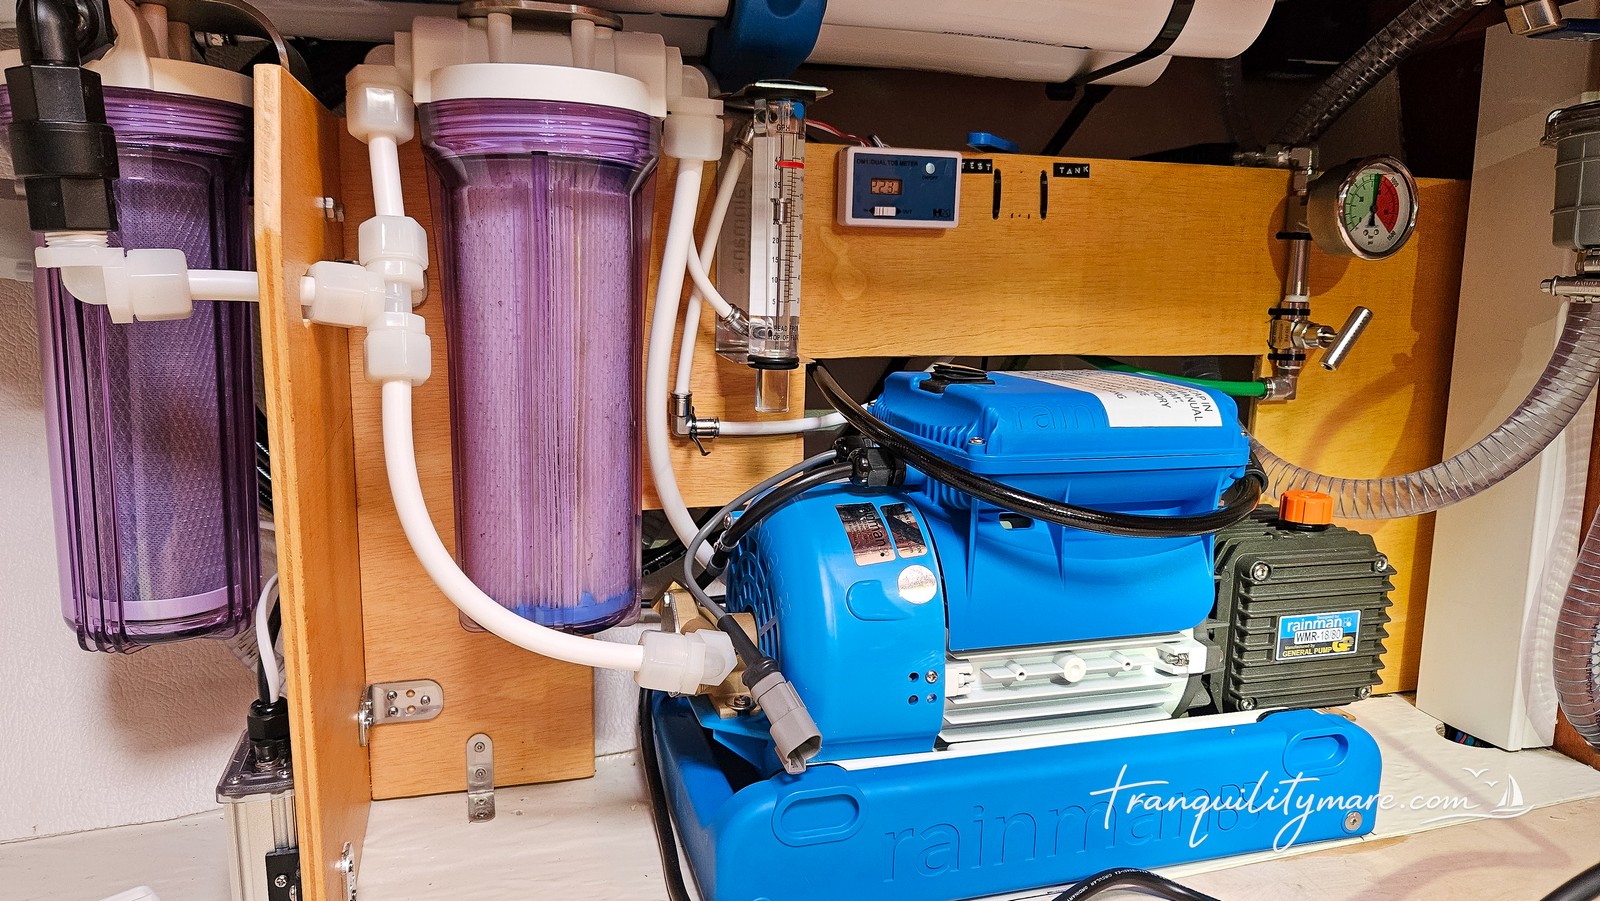
Installing a watermaker was the final piece of the self-sufficiency puzzle. We deliberately left it until the last round of winter projects. We believed—and still believe—that a watermaker is not an essential piece of equipment for cruising in Europe and the Mediterranean. Many sailors have circumnavigated, and continue to circumnavigate, the world without one. However, we are happy to take advantage of modern technology, so Tranquility is now equipped with a modular 140 l/h AC-powered watermaker from Rainman.
We won’t pretend this was a straightforward project. Finding a practical and ergonomic layout for all the components, integrating them with the boat’s existing systems, and modifying the available space to accommodate the installation took considerably more time and effort than we had anticipated. The fact that our chosen model is not exactly compact did not make the task any easier.
The end result is good, although not perfect. Like every other upgrade, it had to be squeezed into the limited space available on a 39-foot yacht. In the end, however, functionality matters far more than appearance. Everything works exactly as intended, and this season we are already producing our own fresh water and are completely independent of marinas’ facilities.
For those interested in the technical side of things—why we chose this particular watermaker and how we installed it—we’ll cover the entire project in a separate article.
Engine Service
During the winter, we also carried out the engine’s scheduled maintenance. This included replacing the coolant, cleaning the exhaust elbow, adjusting the valve clearances, and servicing the fuel injectors.
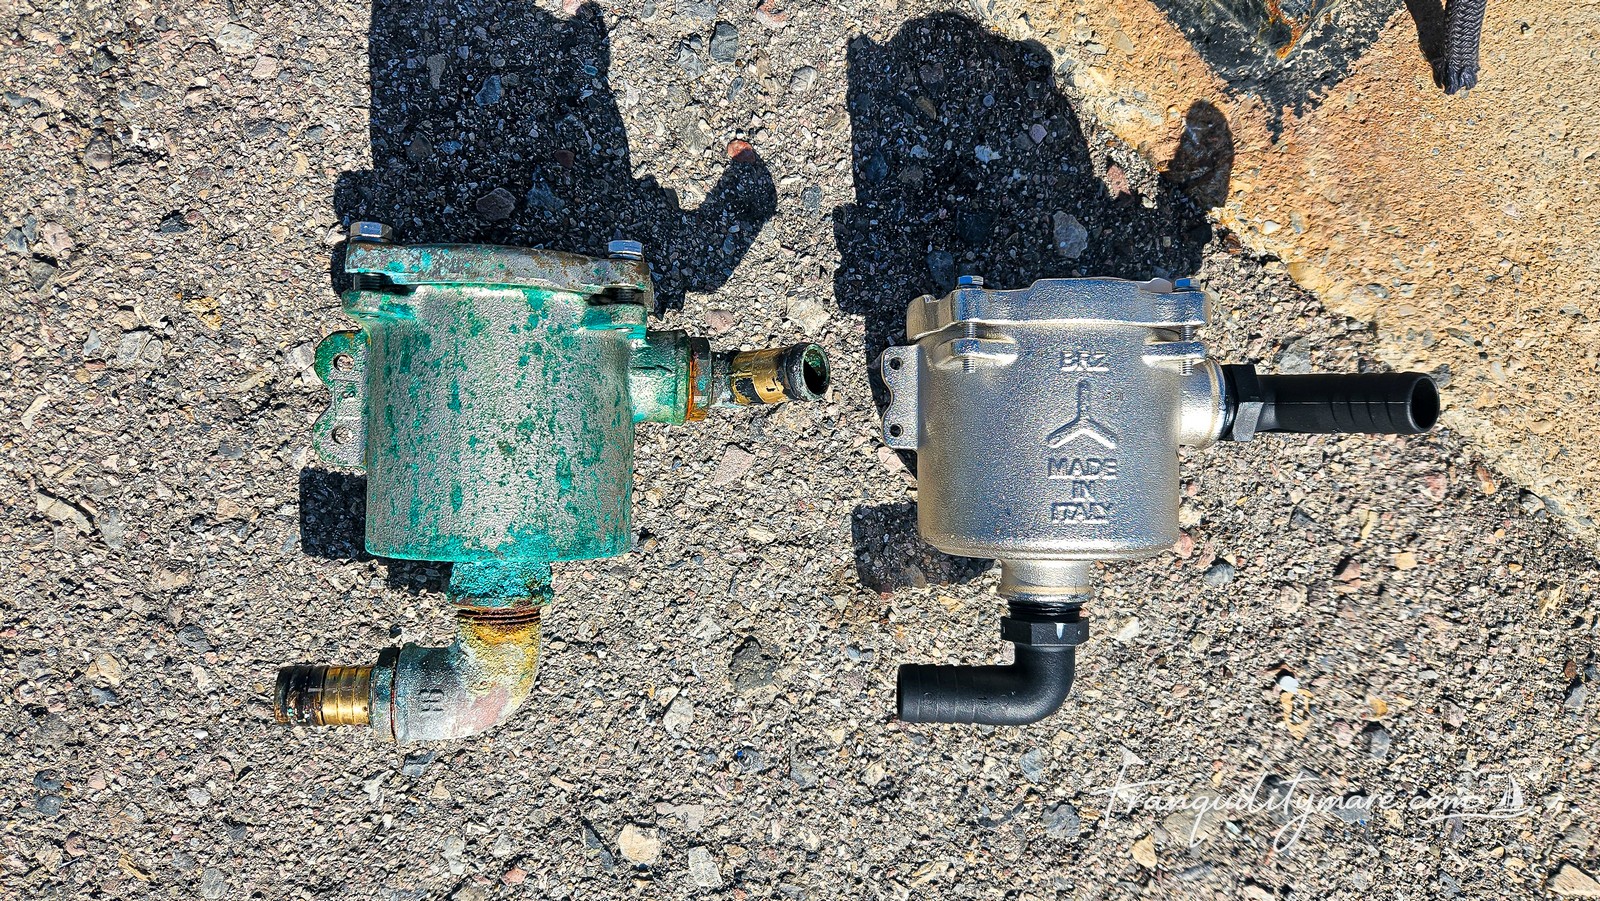
Replacing the Engine Sea Strainer
This year we also replaced the engine sea strainer located below the waterline. Although we were keen to install a composite model to eliminate any future corrosion concerns, the layout of our plumbing unfortunately did not allow us to fit one. In the end, we opted for exactly the same model from Maestrini that had been installed originally.
We chose the bronze version (you do not use brass below the waterline!) with a glass inspection lid that allows for quick visual checks without disassembly.
While working on seawater intake systems, we also installed an additional strainer on the toilet’s seawater intake line. The goal is to prevent debris, leaves, and other foreign objects from being drawn into the system along with the seawater. Such material can eventually clog the outlet from the black water holding tank, which is something we would very much prefer to avoid. Clearing a blocked toilet discharge from the outside of the boat is not among our favourite maintenance jobs.
Heating System Service
Our Eberspächer heater also required servicing after a season of heavy use in northern waters. In addition, we had to replace the entire exhaust system, as the old one was no longer gas-tight. Exhaust fumes were leaking into the locker and could potentially be drawn back into the heating system.
The replacement turned out to be far from straightforward. The rigid exhaust hose, which is relatively large in diameter, had to be routed through two lockers and carefully positioned along its entire length. We also ran into challenges when sealing the hull outlet. Unfortunately, we were unable to find high-temperature gaskets that matched the installation perfectly. Adapting alternative solutions took some time and required a fair amount of trial and error.
We carried out all of this work despite the fact that we do not expect to use the heater very often in the near future. We are heading for warmer climates after all. However, we believe that keeping all of the boat’s systems in full working order is an important part of proper yacht maintenance. Leaving broken or worn-out equipment “for later” usually ends with it never being fixed at all.
Corrosion Around the Solar Panels
This winter we re-mounted the solar panels on the stern arch. Why? During the original installation in Poland, the aluminium panel frames had been mounted directly onto the stainless steel structure of the arch. The result was predictable: galvanic corrosion of the aluminium caused by direct contact between two dissimilar, unprotected metals.
Fortunately, we spotted the problem early enough that a full replacement was not necessary. We cleaned everything up and made a few changes to prevent it from happening again. Rubber isolation washers were added between the aluminium and stainless steel components. All fasteners were treated with Tef-Gel, a product specifically designed to prevent corrosion between dissimilar metals.
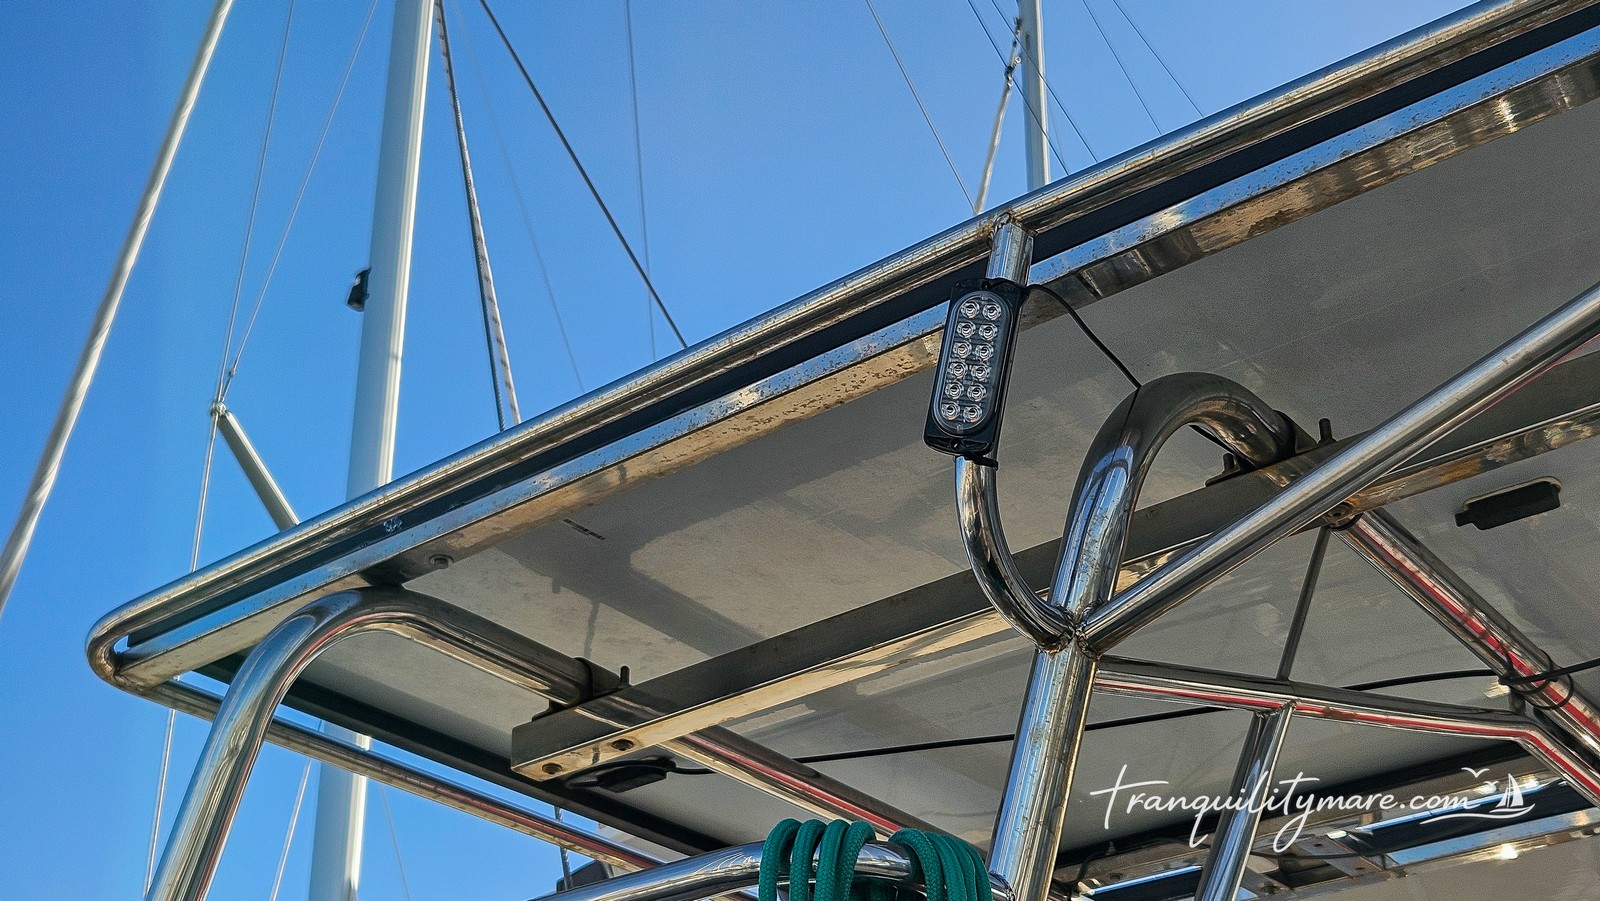
Additional Lighting
While working around the stern arch, we also installed additional flashing lights equipped with dusk sensors. When anchored, there are times when the anchor light blends into shore lights or gets lost in heavy traffic. The additional lights help make the boat more visible.
We know that opinions differ when it comes to fitting extra lights on yachts, but we believe that the principle of “see and be seen” outweighs those concerns. We chose lights designed for heavy trucks, so now we’ll see how well they stand up to the marine environment.
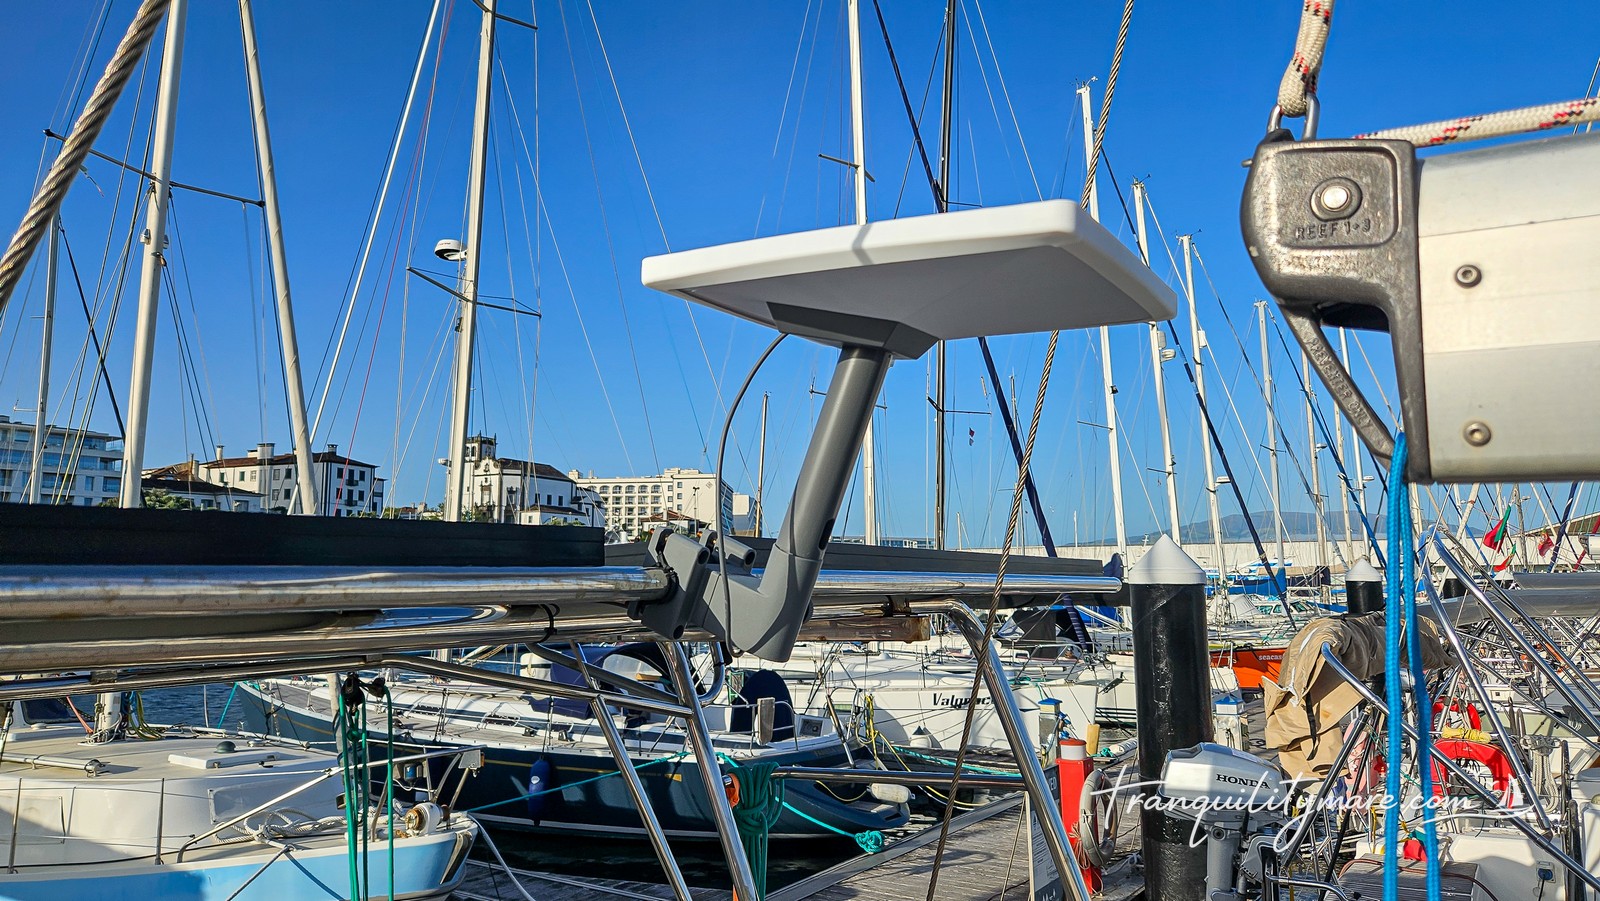
Starlink Mount
This year we also installed a permanent mount for our Starlink antenna. During the previous season, the dish had been attached beneath the deck hatch using a suction mount originally designed for car windscreens. While the setup worked surprisingly well, rainwater collecting on the acrylic hatch significantly degraded signal quality.
The Starlink is now mounted at roughly the same height as the solar panels. It has an unobstructed view of the sky without creating shade on the panels themselves. Rather than fabricating a custom welded bracket, we opted for an off-the-shelf stainless steel mount designed to clamp directly onto a tube. So far, it has performed very well—including surviving winds in excess of 50 knots.
Other Projects
In addition to the jobs described above, we completed dozens of smaller projects that would be impossible to list in full. As every boat owner knows, fixing one thing usually reveals three more that need attention. A significant amount of time was also spent on the annual cycle of servicing, cleaning, and organising various systems, lockers, and installations throughout the boat.
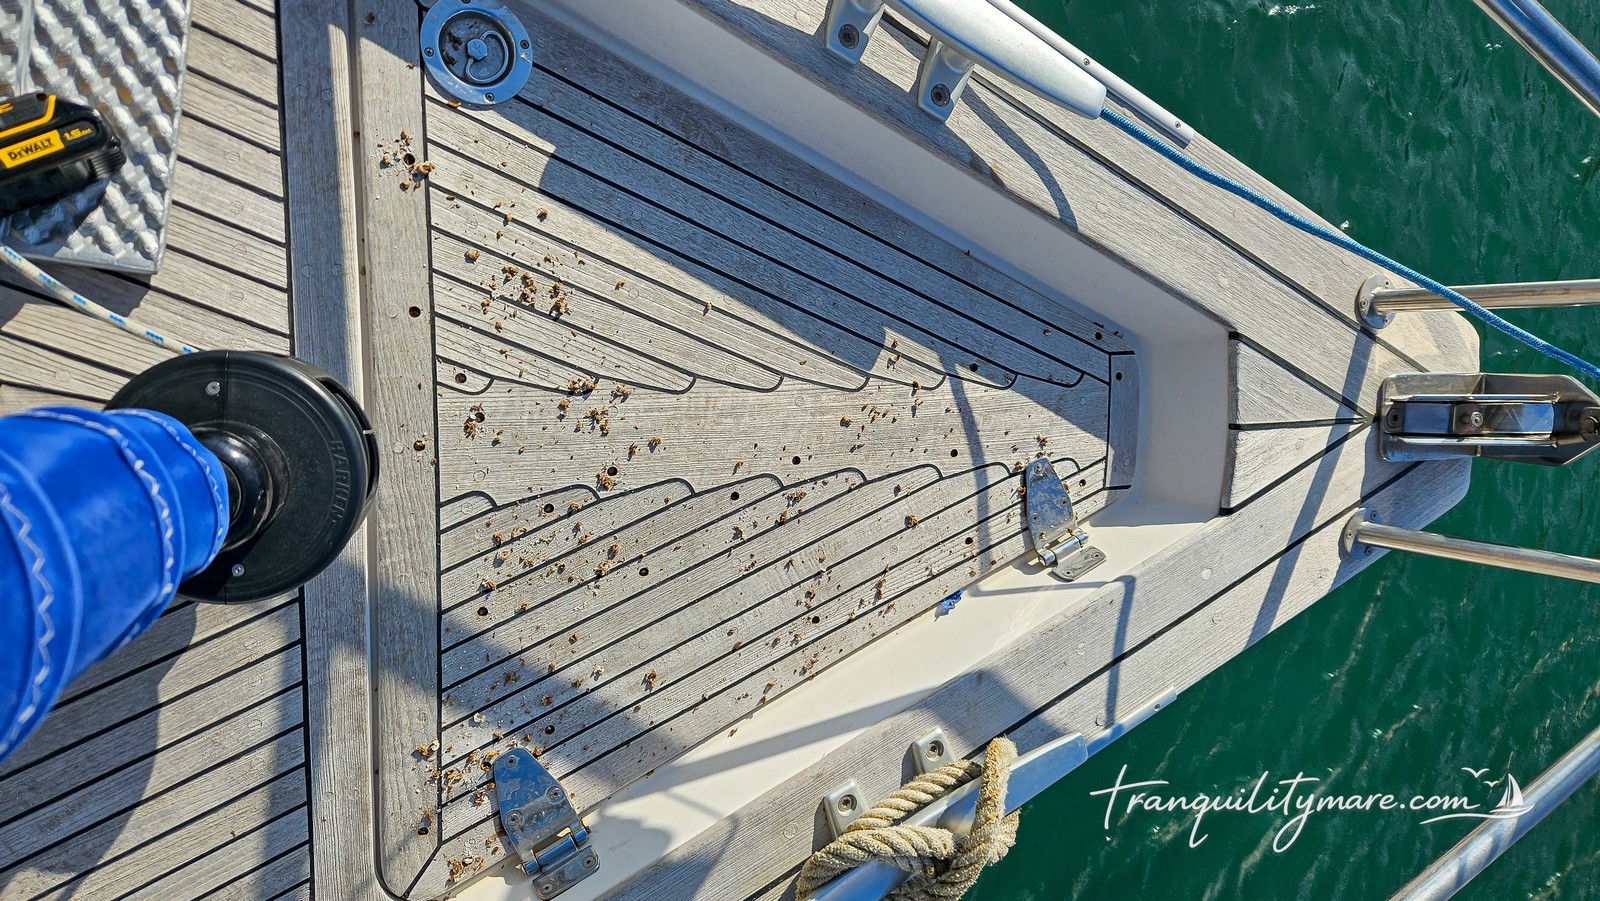
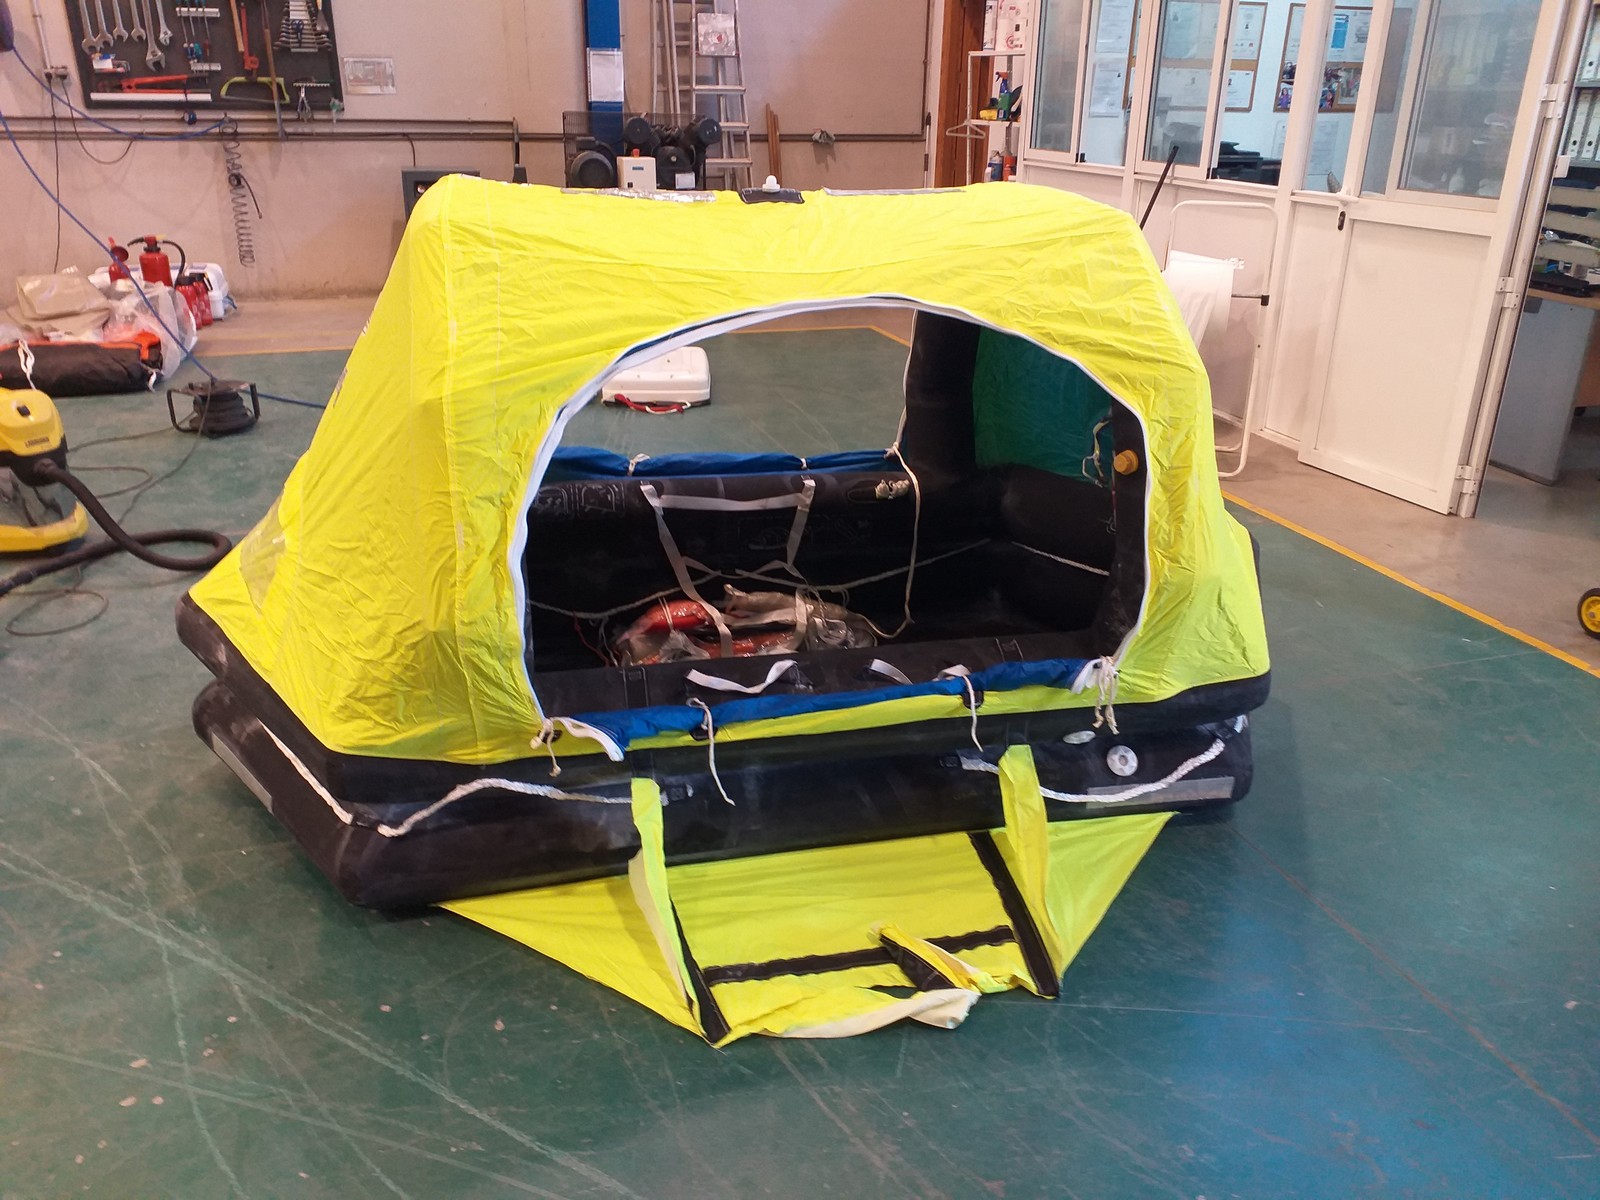
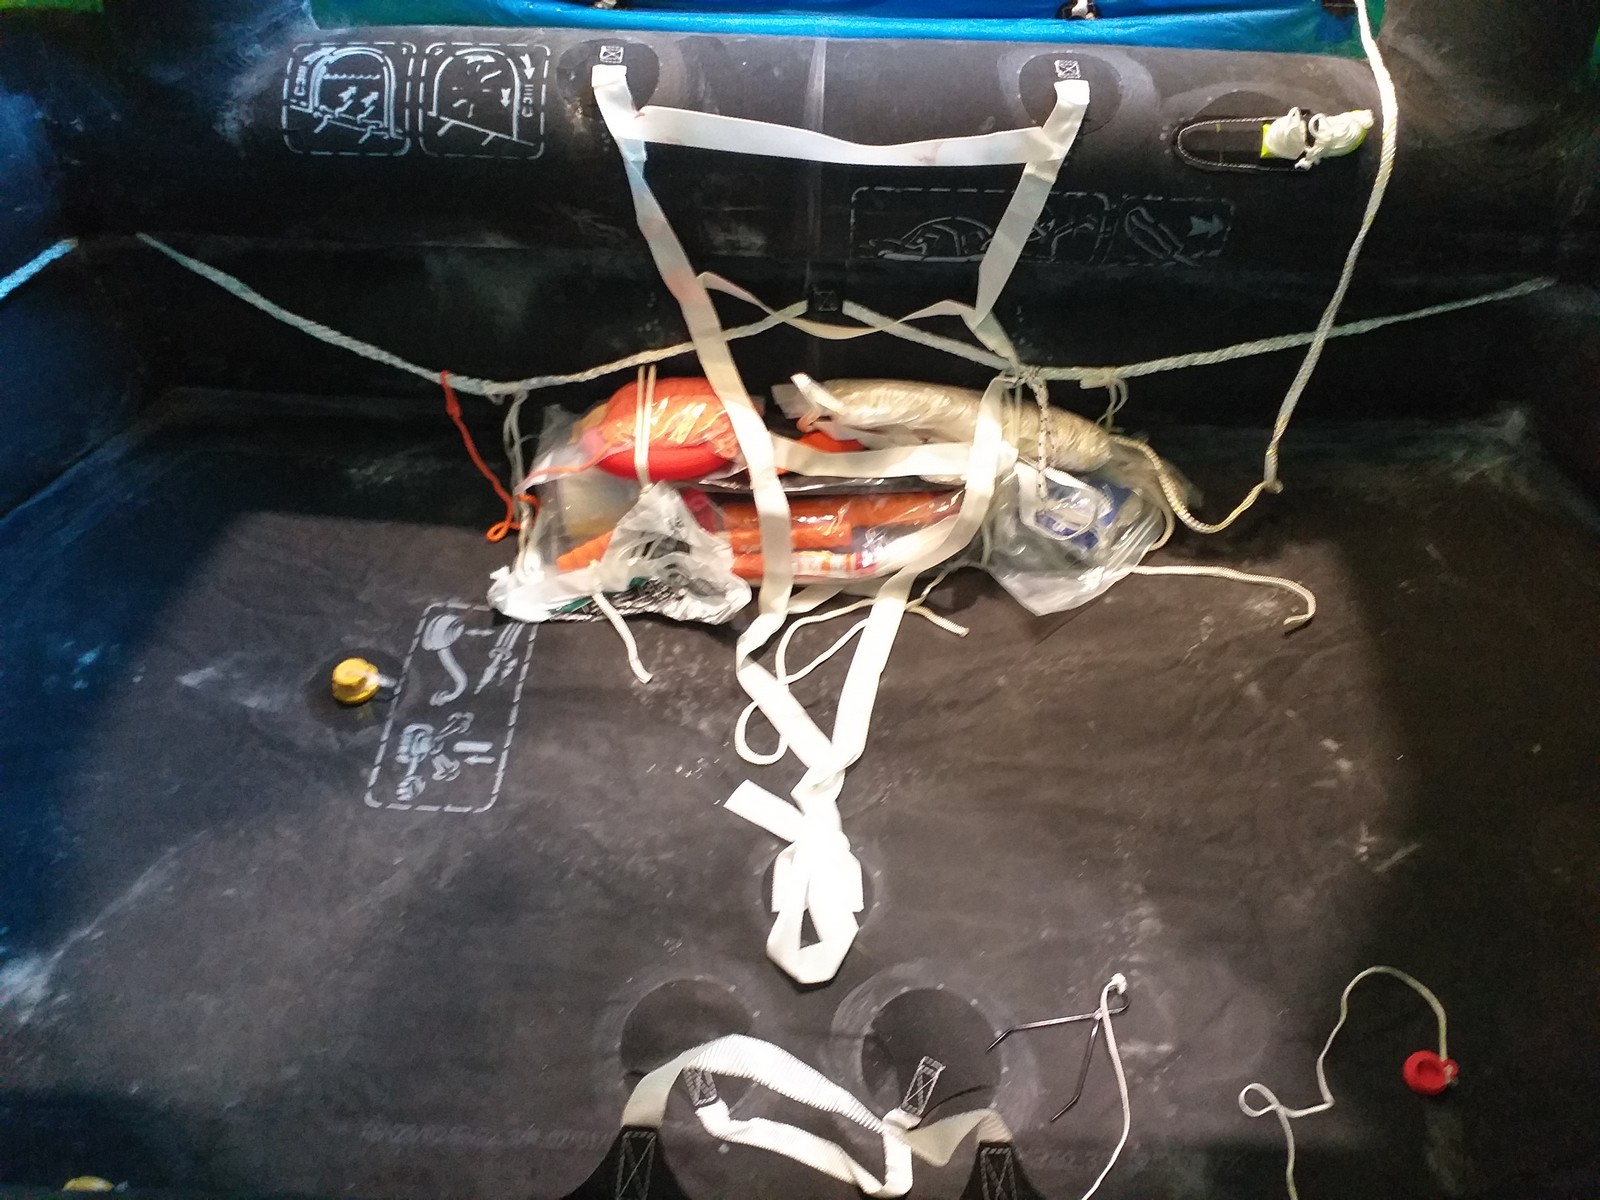
As in previous years, we replaced another batch of teak deck plugs (we wrote about that process here). We also treated the deck with Boracol to eliminate any microorganisms that might be developing within the wood. We serviced all of the winches—a job we carry out every two years. After three years of use, our liferaft was due for inspection and servicing. It was sent to an authorised Viking service centre.
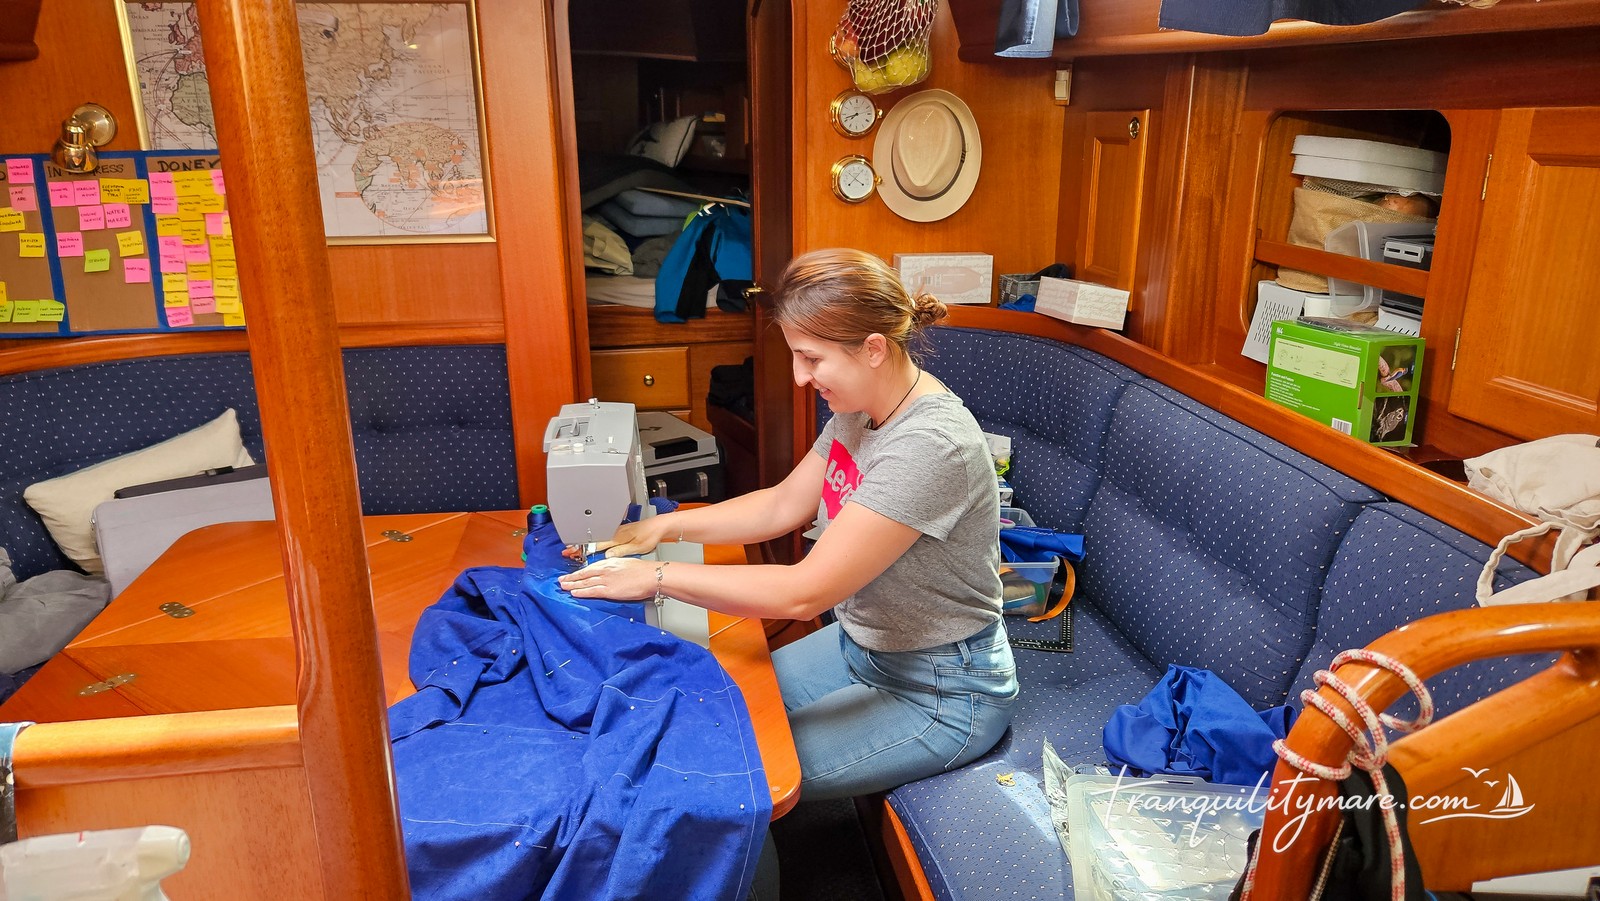
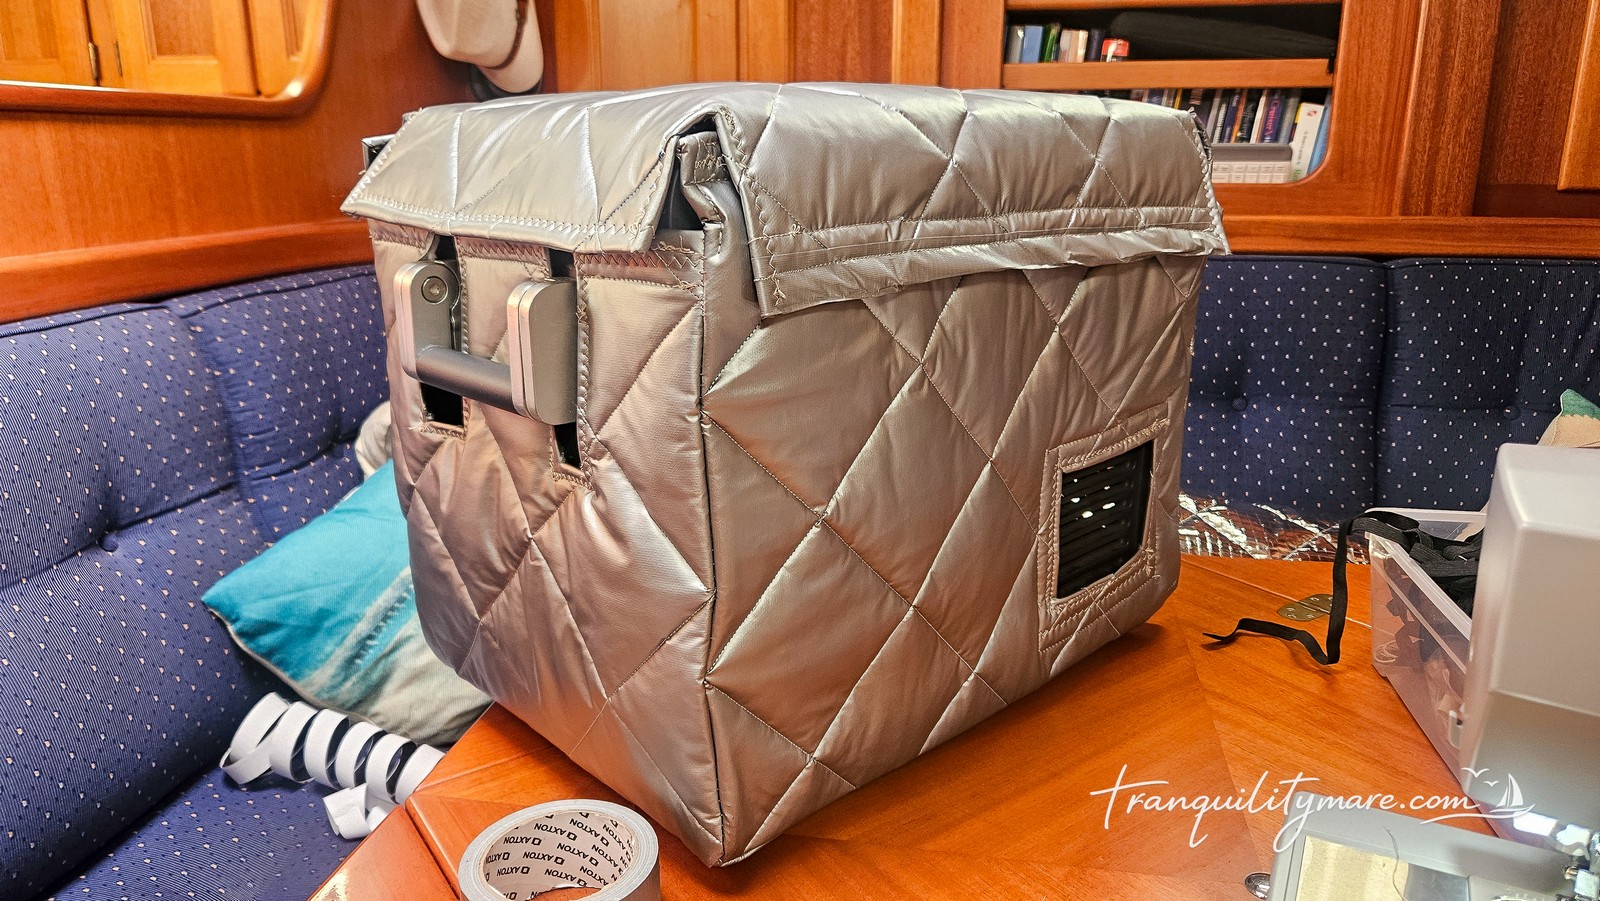
We replaced worn and leaking seals in several areas. We renewed deteriorated Sikaflex around the sprayhood, made a number of improvements to the storage box for our diving compressor, carried out various sewing projects, replaced damaged locker hinges, and fitted a new engine start battery. Additional fans were installed below deck and around the inverter to improve cooling.
Hull Repair
Just when we thought there would be no fiberglass repairs this year, we came back from Poland to a rather unwelcome surprise. Well, perhaps not a complete surprise. Thankfully, our friend from S/Y Gerlach had already given us a heads-up about it. Once again, thank you for that.
Unfortunately, while we were away, the wooden fender board we use to protect the fenders against the dock came loose during a storm and rubbed against the hull, gouging into the gelcoat.
Fortunately, after last year’s repairs we still had some perfectly colour-matched gelcoat left over. Once the damaged area had been filled with fairing compound, we applied fresh gelcoat and restored the hull to a condition arguably better than before the damage occurred. The process was time-consuming: cleaning, sanding, surface preparation, waiting for the material to cure, sanding again, applying additional layers, and finally polishing. In the end, however, the repair blended in almost perfectly.
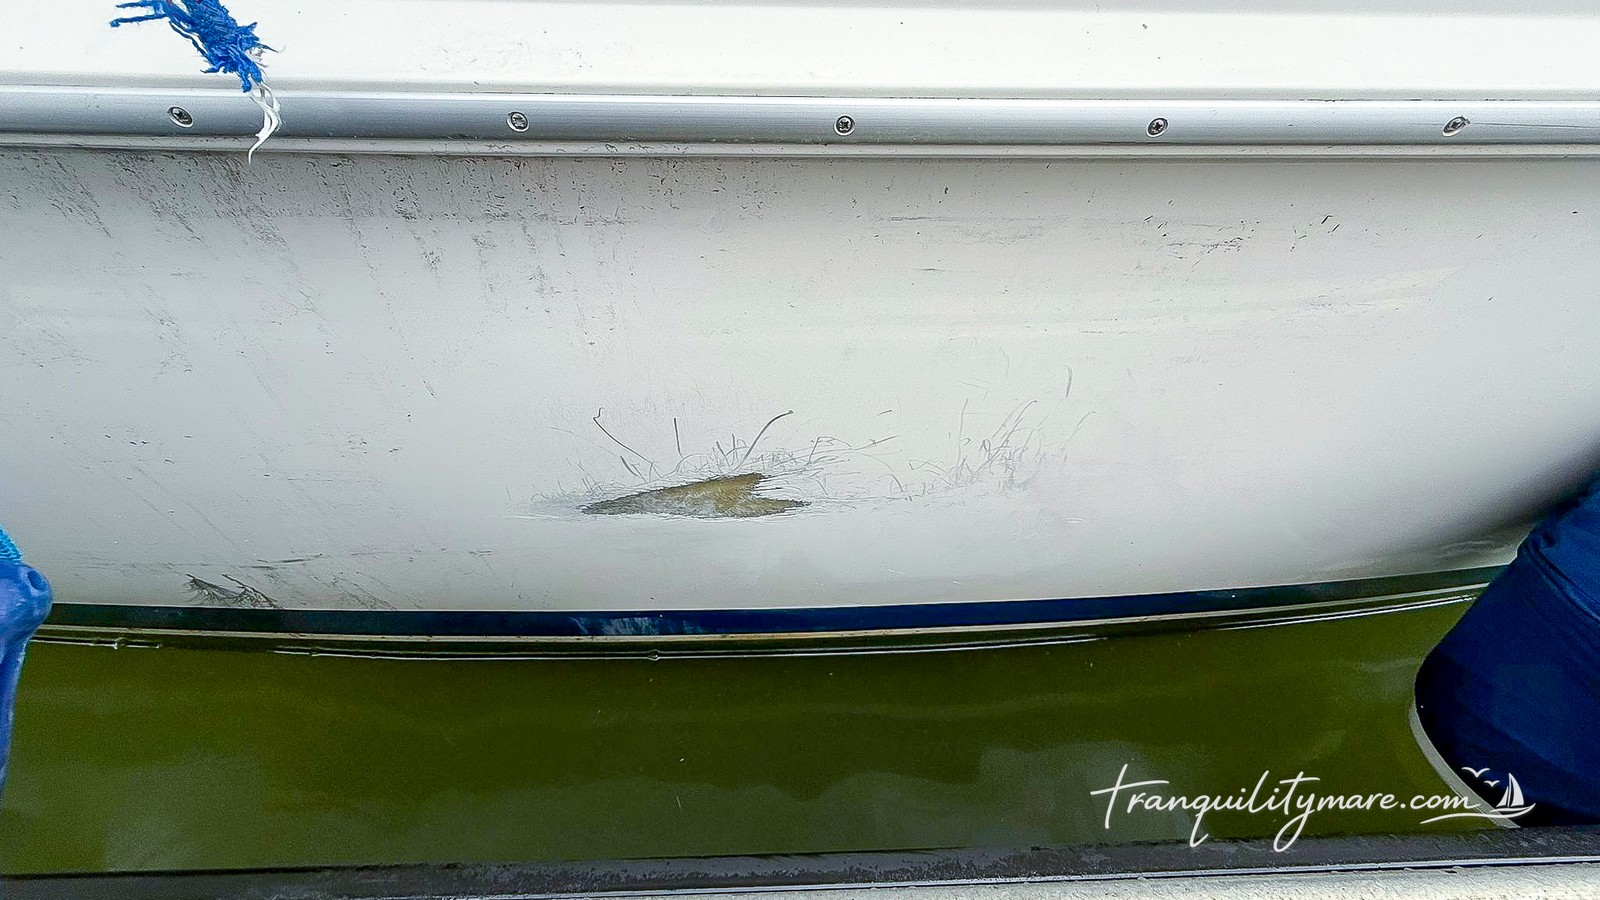
Could this have been avoided? In a way, yes. But not entirely. During a previous stay, we had not used the fender board, which allowed the dock’s rubber to rub directly against our fenders. The black rubber residue was then transferred onto the hull and worked into the gelcoat, leaving dark marks. That would have required good polishing anyway.
Summary
The third winter refit season was the final stage of the plan we put together before leaving Europe. We can now confidently say that the plan has been completed.
Although this last winter was by far the most demanding in terms of workload, motivation, and sheer fatigue, we are proud that Tranquility is now as well-equipped and as well-maintained as we could realistically make her. Especially considering that the vast majority of this work was carried out by ourselves. Along the way we learned an enormous amount—often through trial and error—refining solutions, searching for alternatives, and testing them in real-world conditions.
If you’re planning upgrades or a refit of your own yacht—whether for offshore passages or simply for more comfortable cruising—we’d be happy to help. Feel free to get in touch and take advantage of our Cruising Consulting.


No responses yet