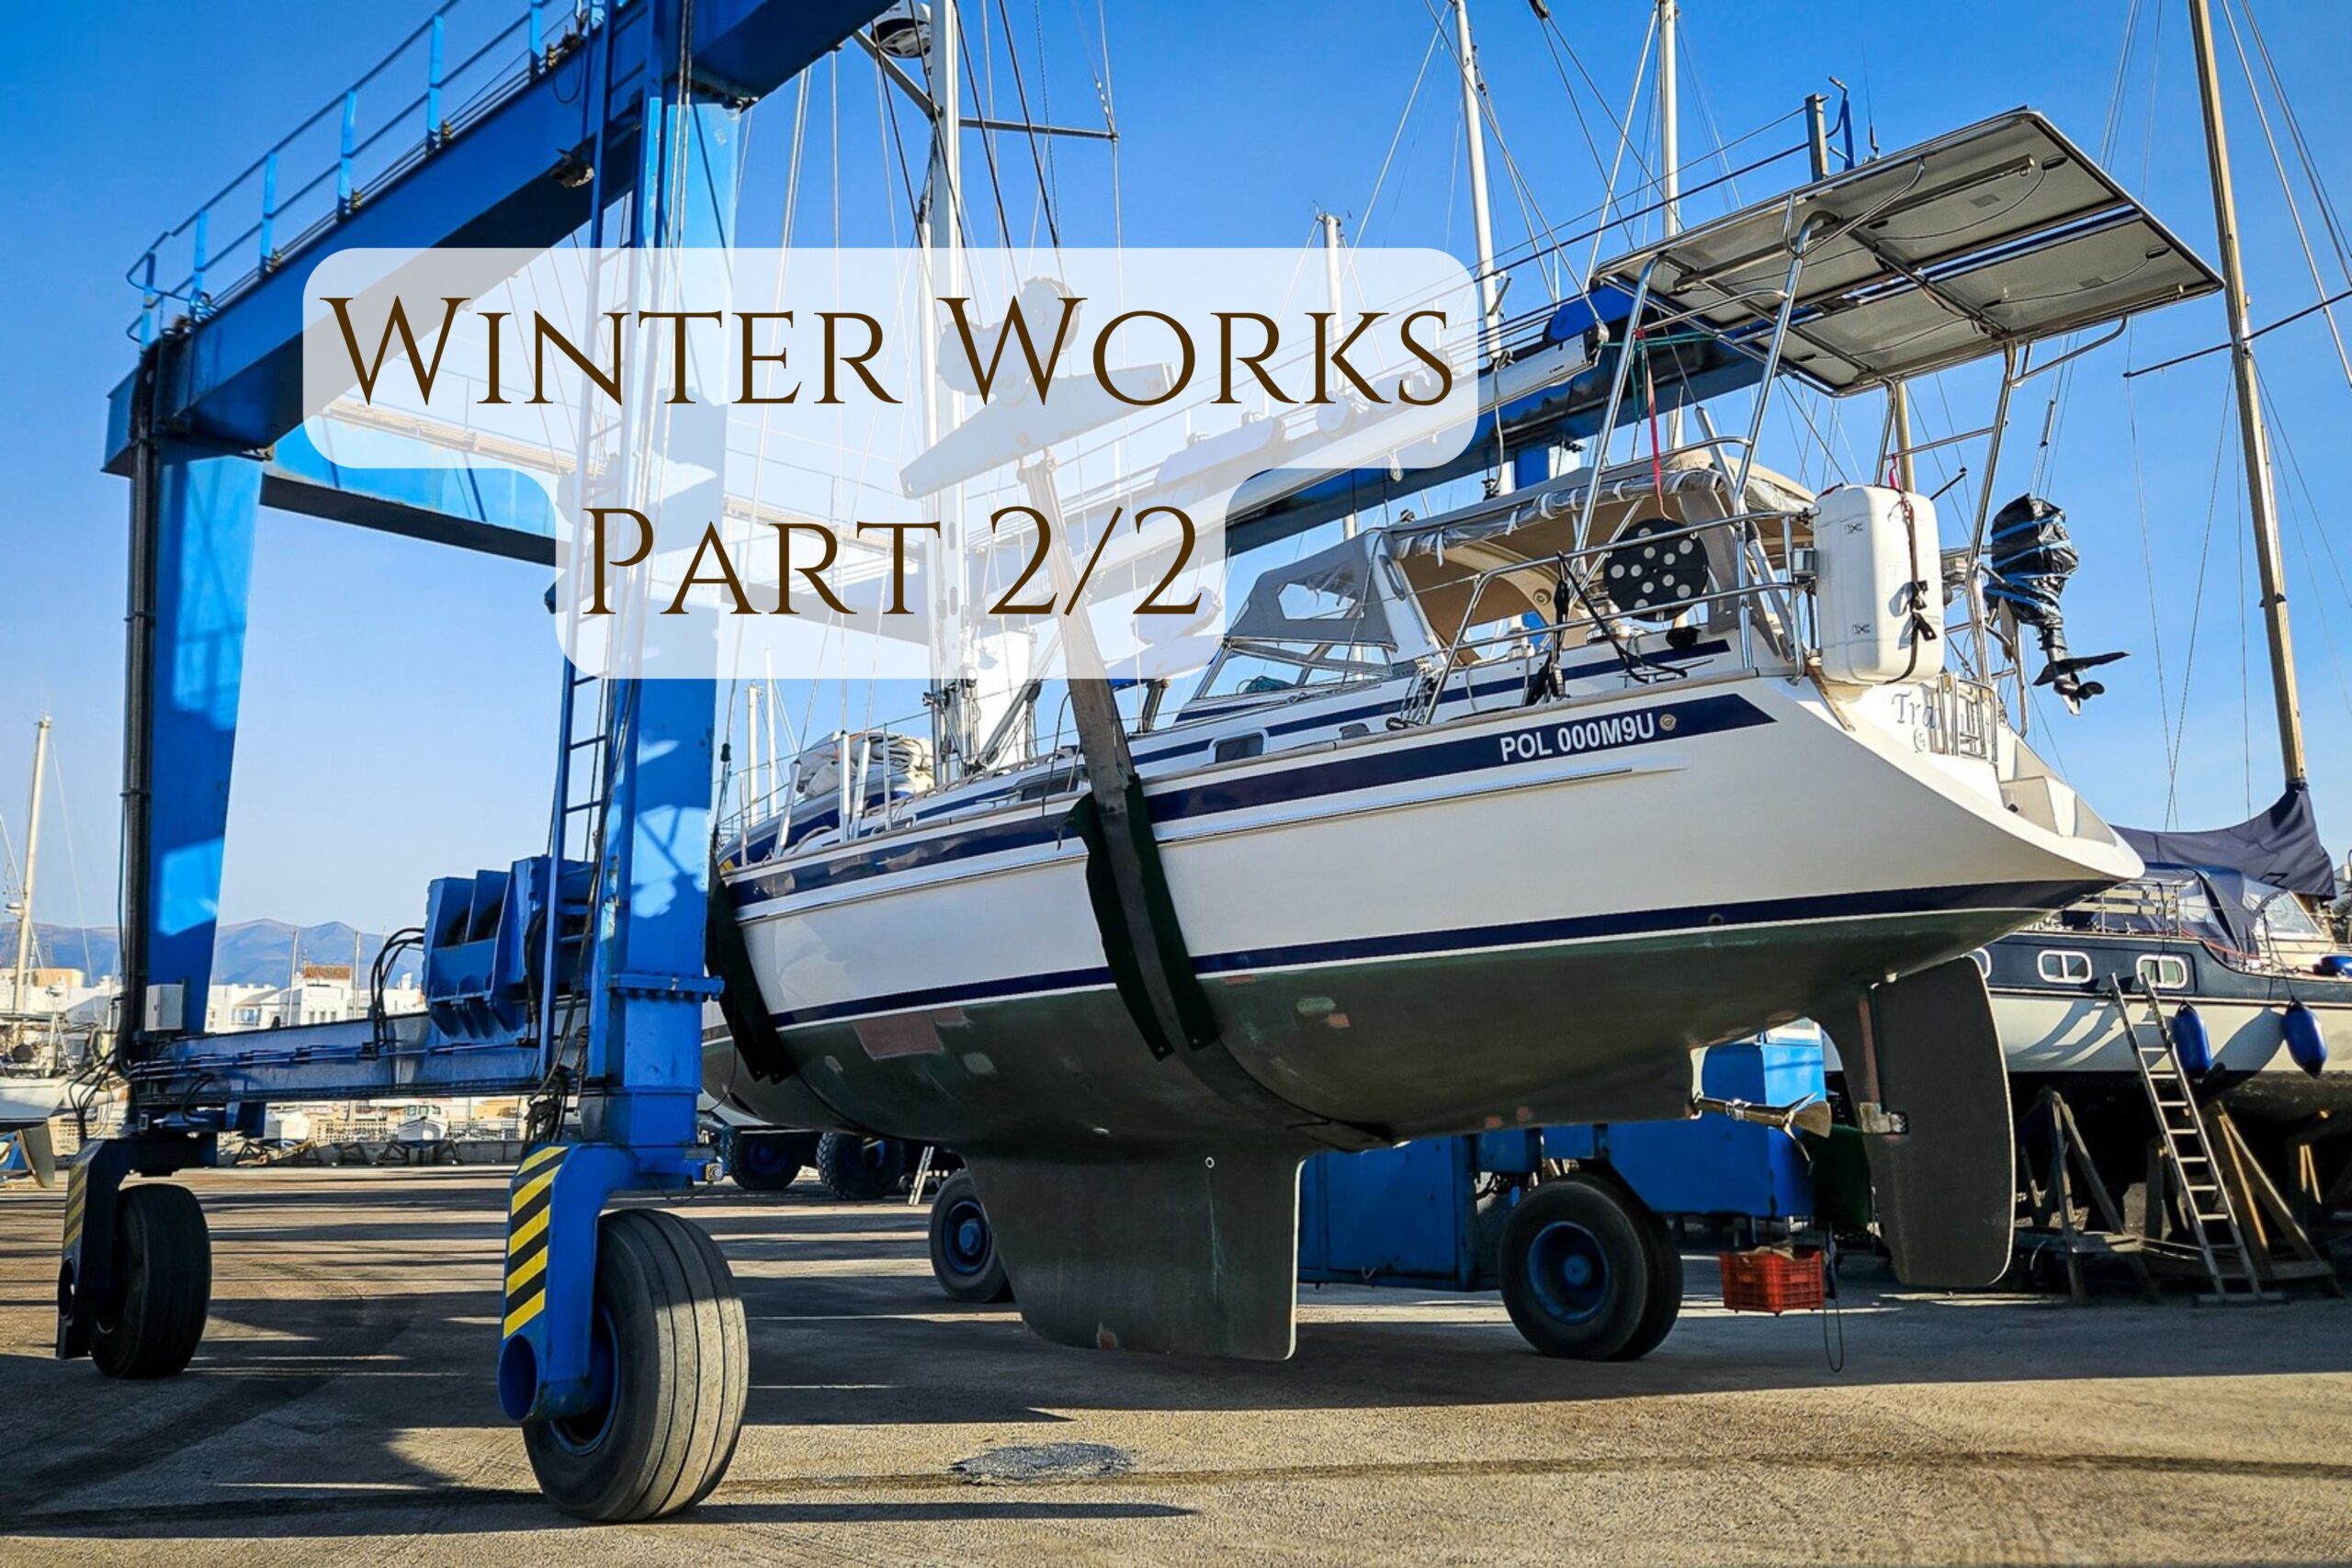
Let’s start with the second part of our boatyard work, which we carried out during the winter of 2024/2025 on our Malo 39. If you haven’t read the first part yet, we encourage you to check it out first – here, we described all the upgrades we made to our yacht. In this post, however, we will focus on repairs and servicing of various systems.
Repairs and maintenance on Malo 39
As with any yacht, different installations and components wear out over time, and intensive sailing throughout the year only accelerates this process. It’s natural that winter brings a few necessary repairs. Of course, we try to fix urgent issues immediately during the season, but anything that can wait for a thorough repair – when we have more time and better conditions – is postponed until the winter period.
Want to know what broke this time? Let’s dive in!
Fixing the rub rail and a fender strip
Damages to the rub rail
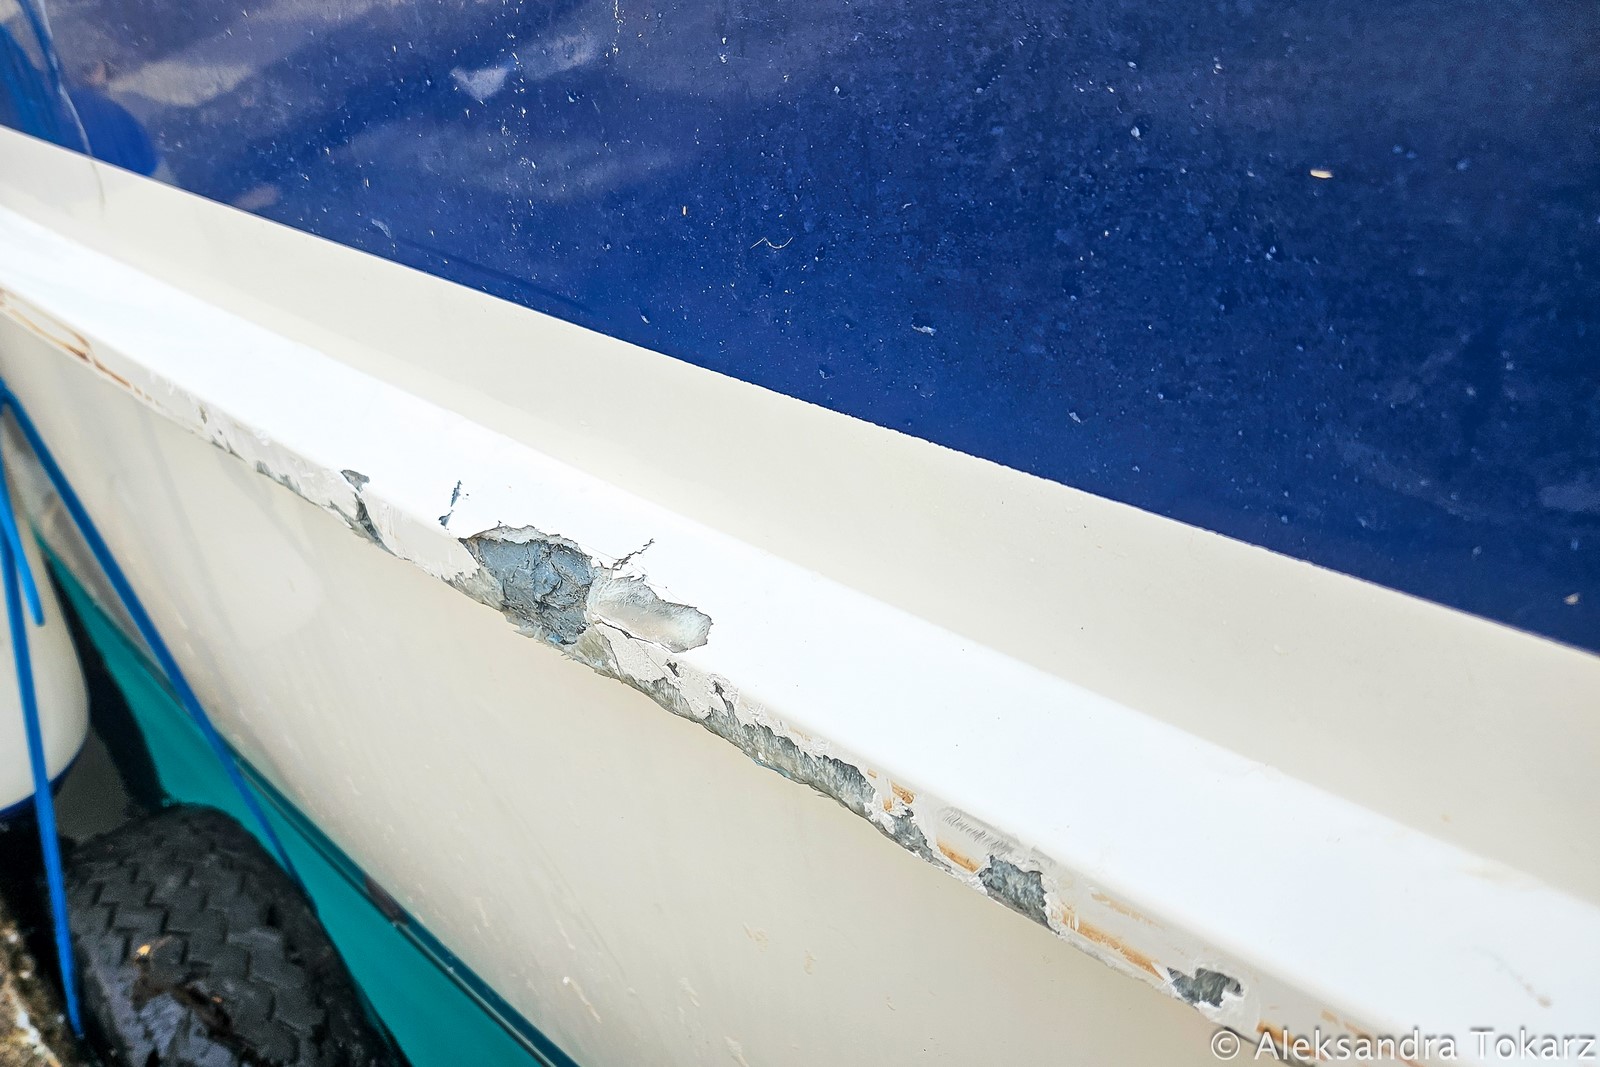
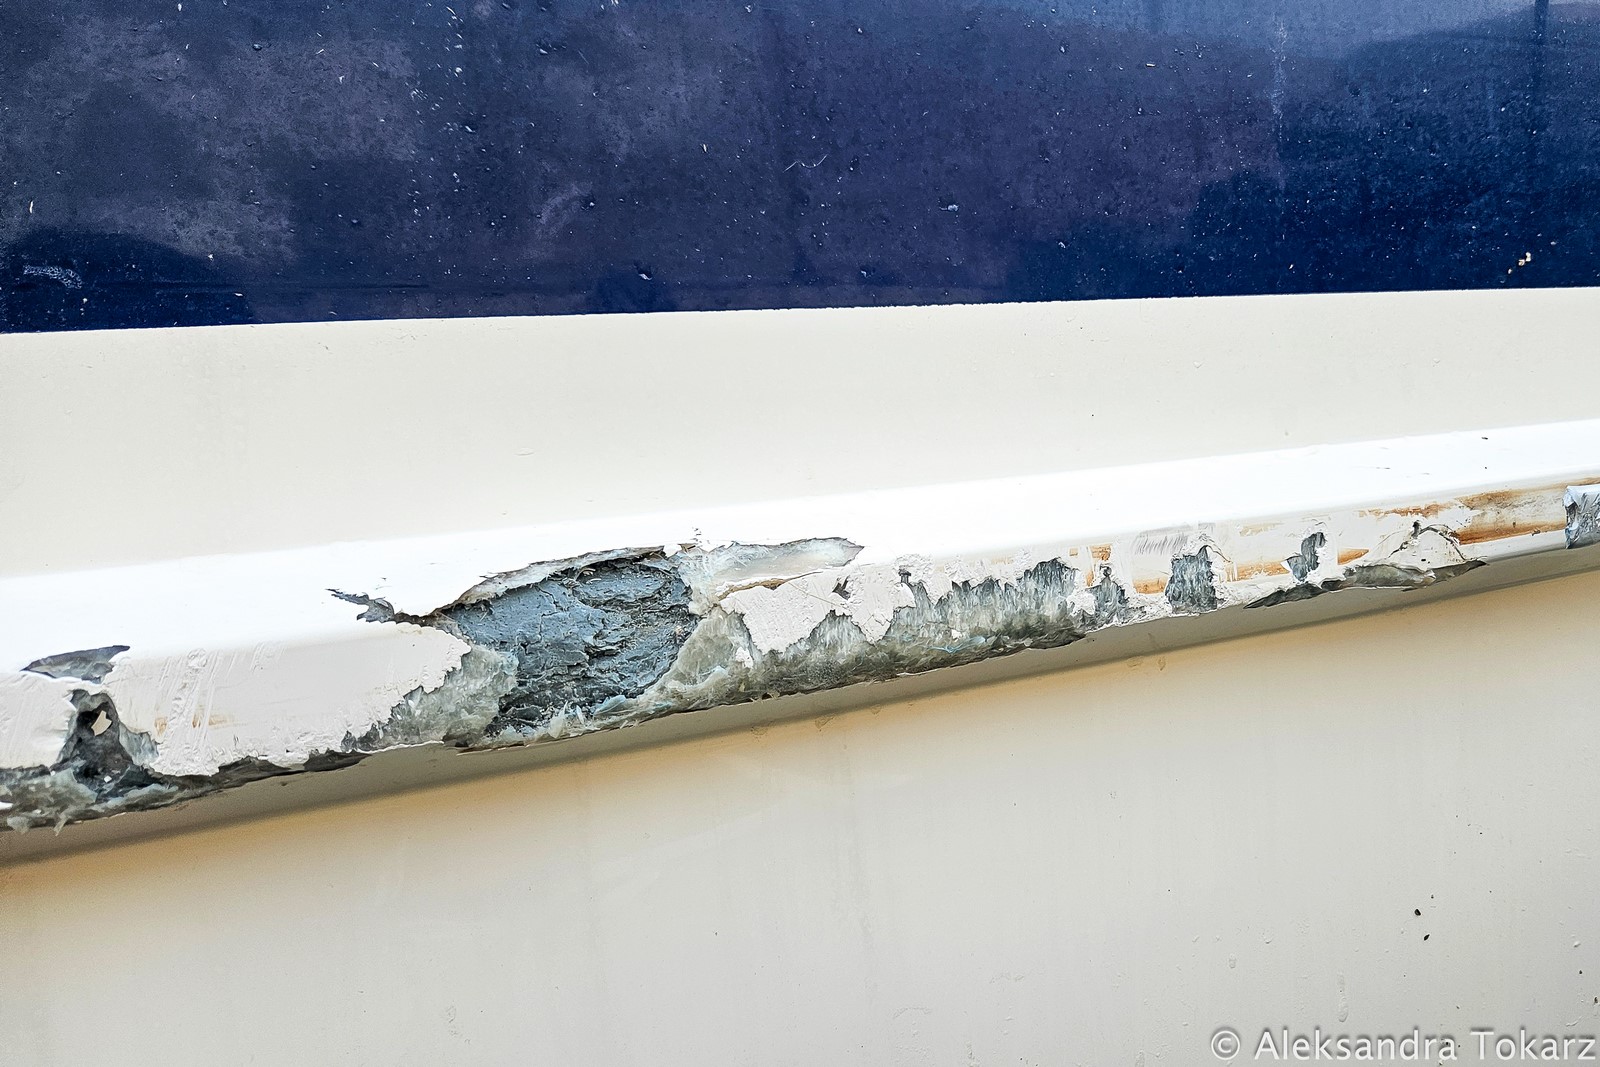
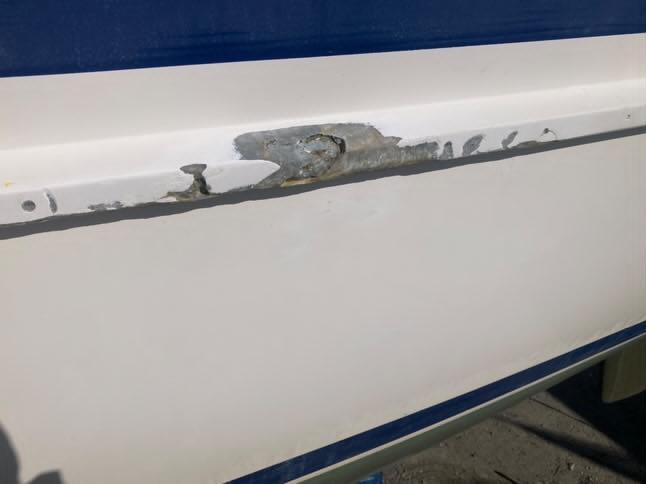
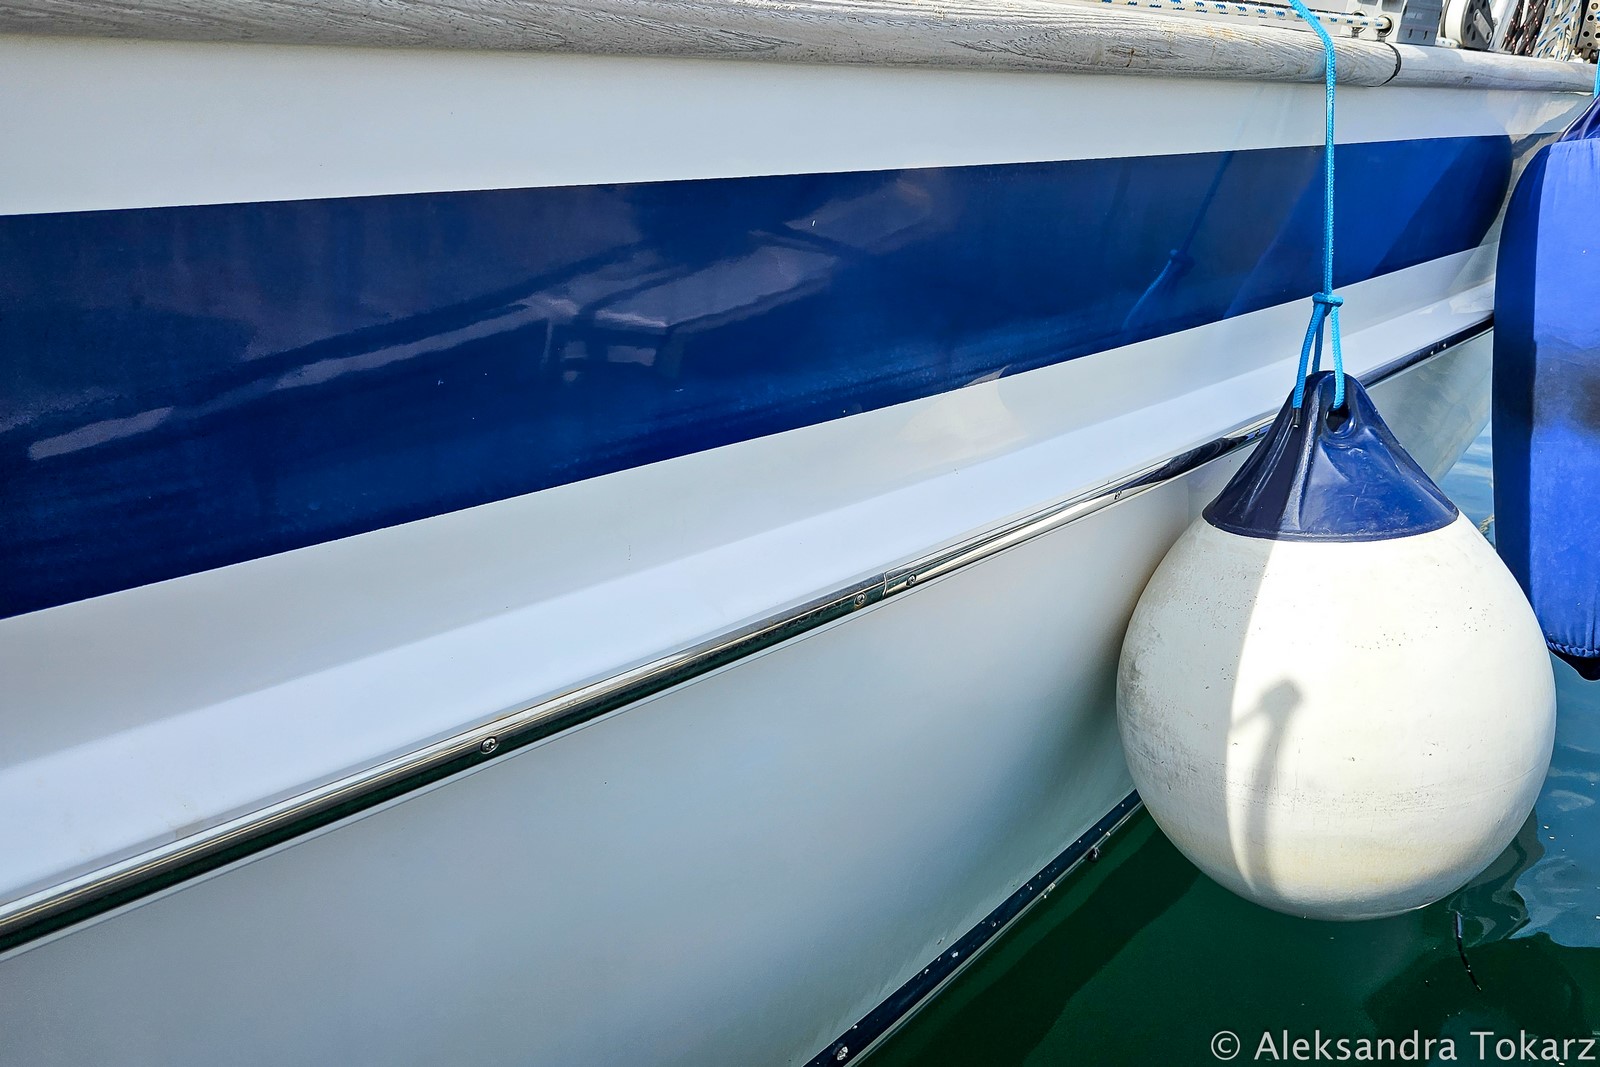
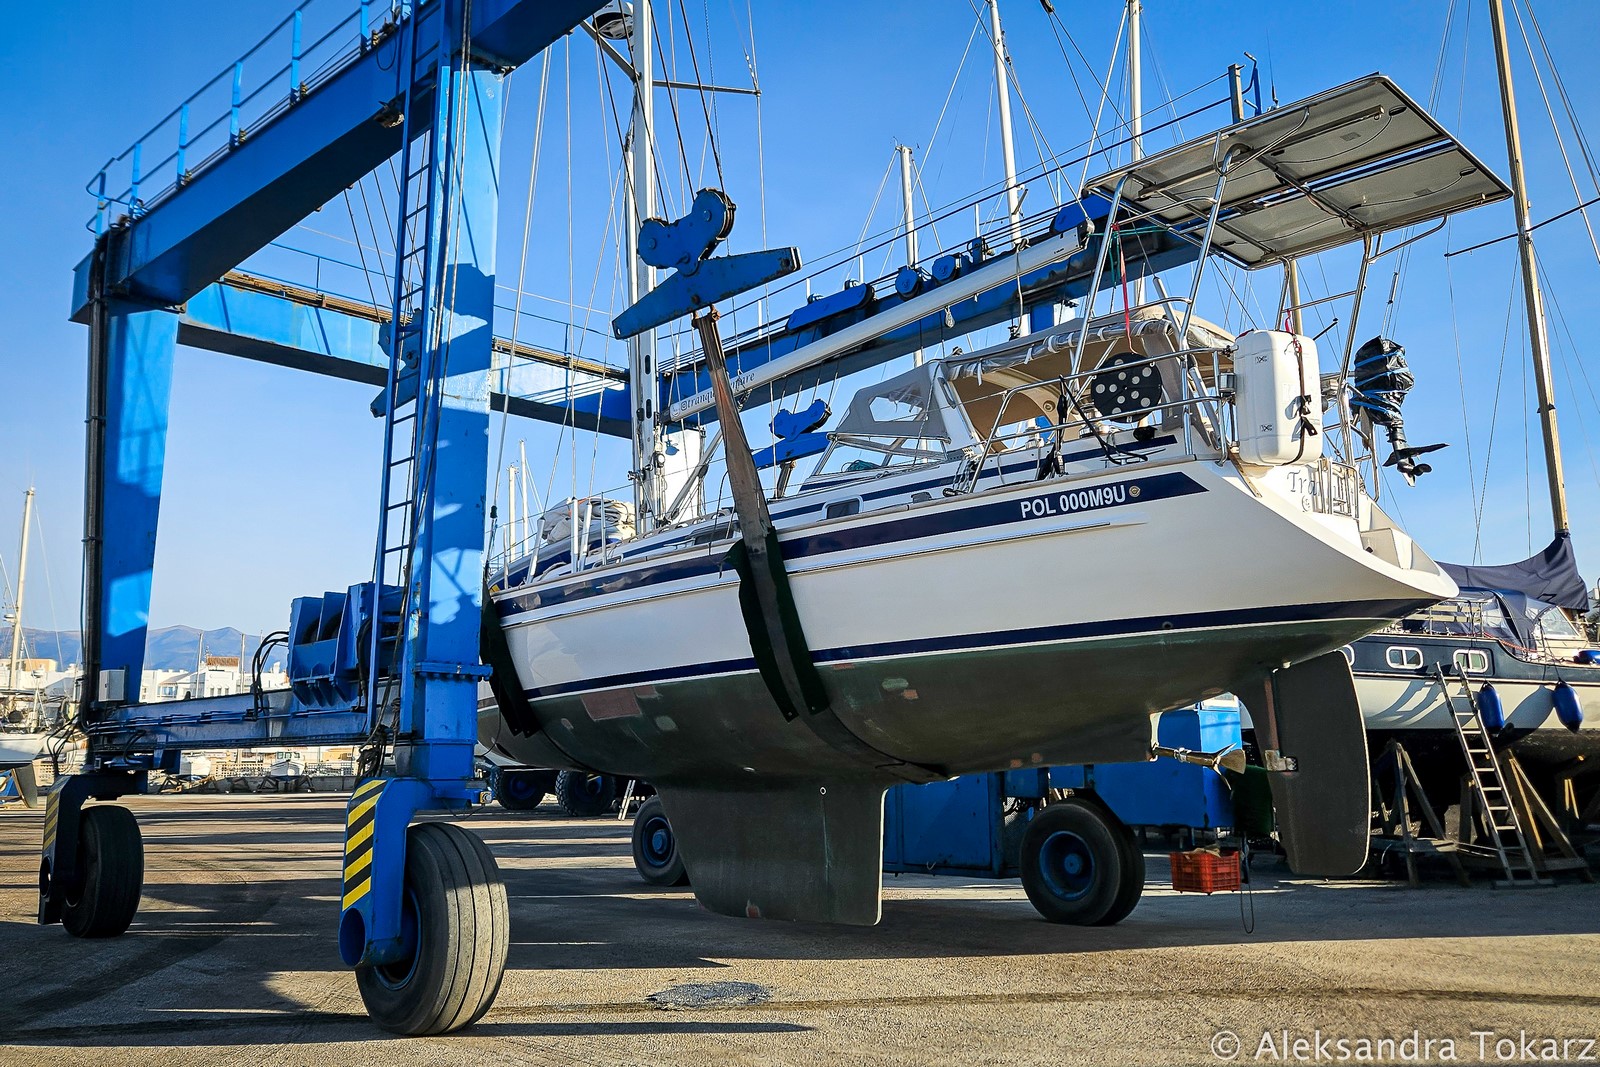
The most significant repair we had to tackle this winter was fixing the hull—specifically, the rub rail, which took a hit after an unfortunate encounter between our yacht and a concrete dock during a storm. This less-than-pleasant incident occurred last year in Kalamata, on the Peloponnese peninsula in Greece, when an unexpected 50-knot wind struck the port. You can find a detailed account of that event in our Sailing Mediterranean 2024: Highlights and Lessons from a Year at Sea, so we won’t repeat the whole story here.
The impact damaged the rub rail in two places, along with the aluminum profile on top of it. Ironically, this was actually good news! The rub rail on Malo 39 is designed to absorb impact and protect the yacht’s hull. Our temporary fix at the time involved sealing the damage with epoxy resin to prevent water from seeping into the structure.
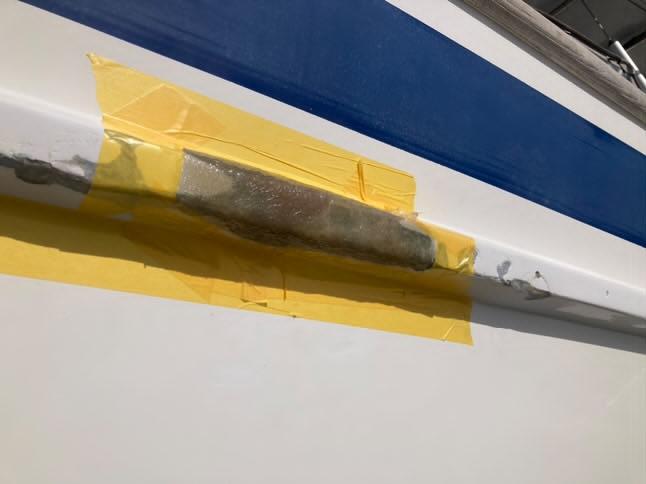
Re-building the rub rail
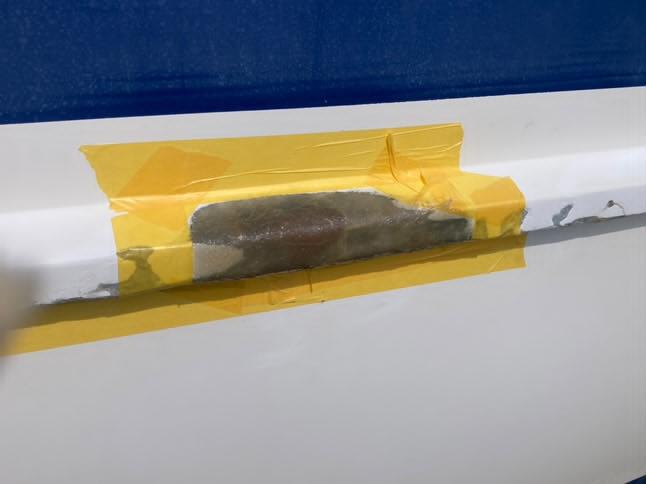
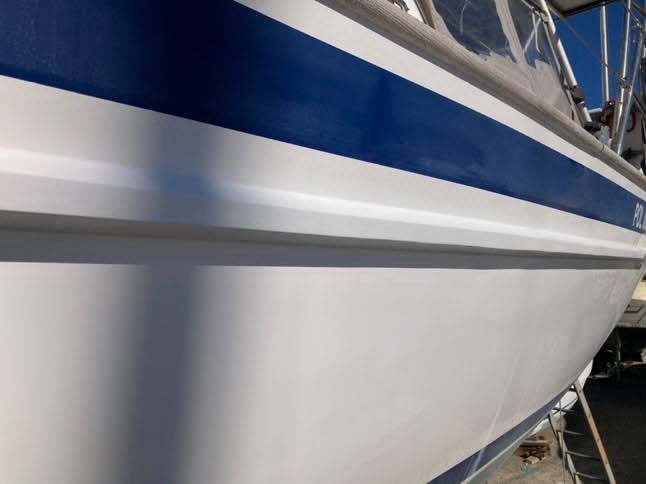
Winter was the perfect time for a proper, long-lasting repair. We started by removing all loose fragments and the temporary filler. Next, we reinforced the damaged areas with a filler-mixed resin, applied two layers of fabric for extra strength, and finished with a fresh coat of gelcoat. We handle most repairs ourselves, but in this case, we sought help from a specialist—not because laminating is particularly difficult, but because color-matching gelcoat is an art of its own. Since this was a highly visible area, we didn’t want to take any chances.
Getting the perfect shade of white requires gradually adding tiny amounts of yellow and black pigment to a base white until it matches the yacht’s exact color. Otherwise, the repaired section would stand out awkwardly. Since we’re definitely not artists, we left this part to a professional who does it daily. The result? A flawless finish! Plus, we now have two jars of perfectly matched gelcoat on hand—just in case. Hopefully, we won’t need them anytime soon!


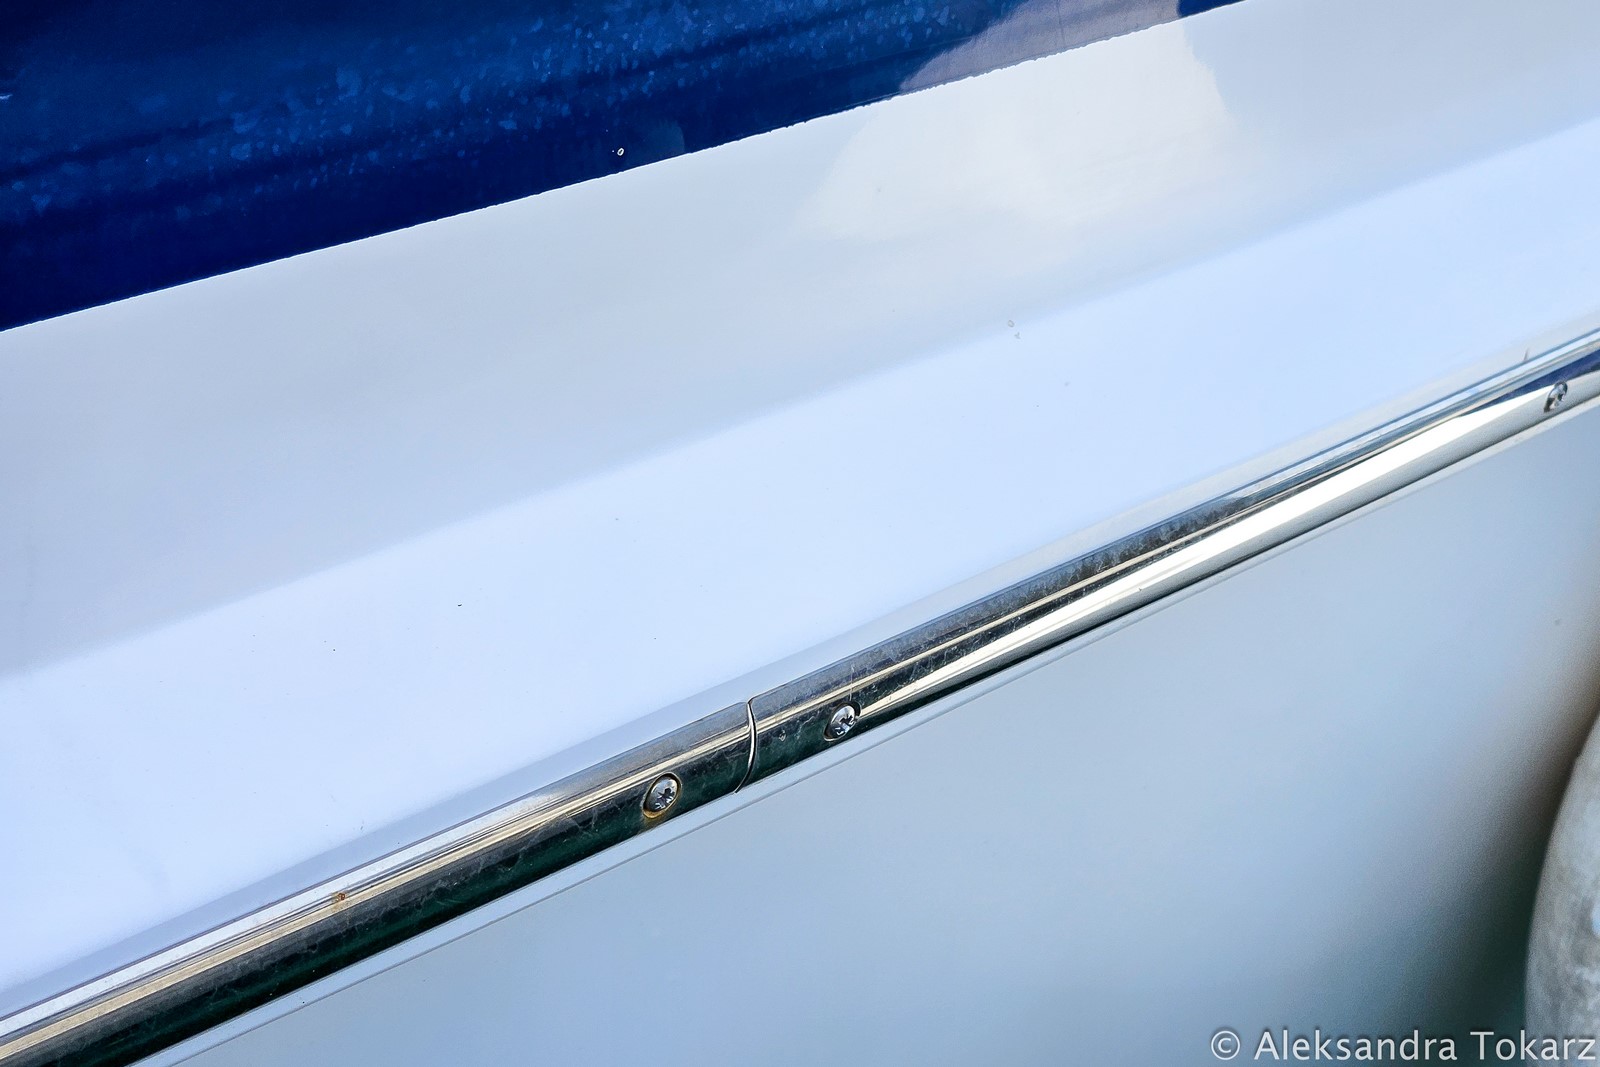
Aluminium Fender Strip for Malo 39 Hull
The real challenge came with finding the right aluminum profile that runs along the rub rail. Since more than half of the original profile was still in good condition, we hoped to replace only the damaged sections. Unfortunately, an identical match was nowhere to be found. Tomek even reached out to former employees of the Malo shipyard in Sweden, who kindly searched their old factory for us, but with no luck.
In the end, we decided to order a replacement profile in matte stainless steel, assuming the difference would be nearly unnoticeable. Unfortunately, this is where things got frustrating. The marine store Toplicht—which, after this season, we definitely cannot recommend—sent us highly polished strips instead. To make matters worse, they also mixed up the profile shapes while packing our order. After a rather unproductive and unpleasant back-and-forth with customer service, we discovered that, despite selling us matte rails, they never actually stocked them.
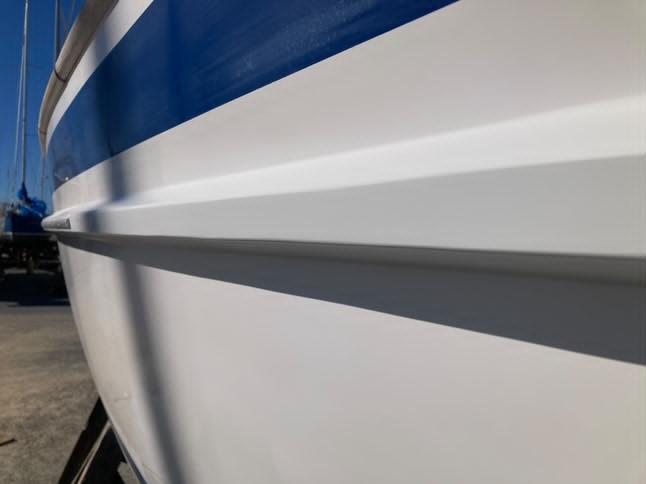
We attempted to dull the polished rails ourselves, but the difference between our old aluminum profile and the treated stainless steel was still too obvious. Ultimately, we had no choice but to replace the entire rub rail along the hull.
This significantly delayed the project, as we had to wait for another shipment from Germany. The final rail was installed on a Sunday afternoon—the day before launching the yacht back into the water. Replacing the entire profile also drove up the repair costs considerably. But at least it’s done, and the yacht is looking better than ever!
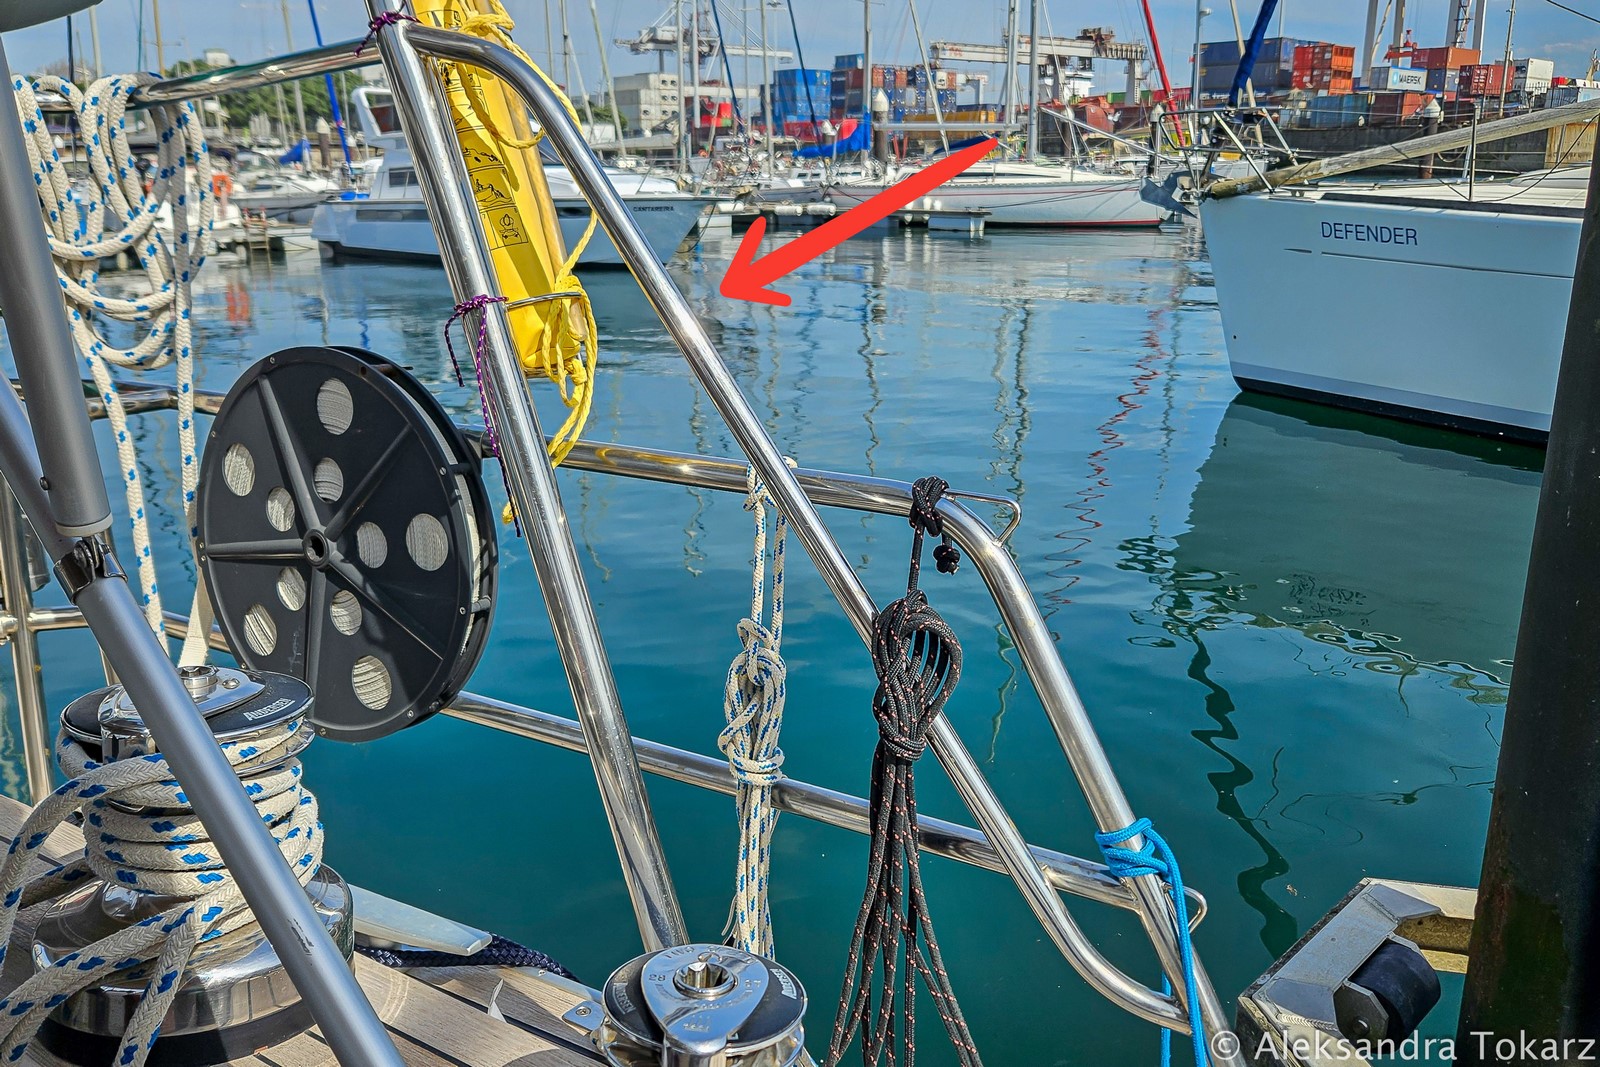
The Solar Arch
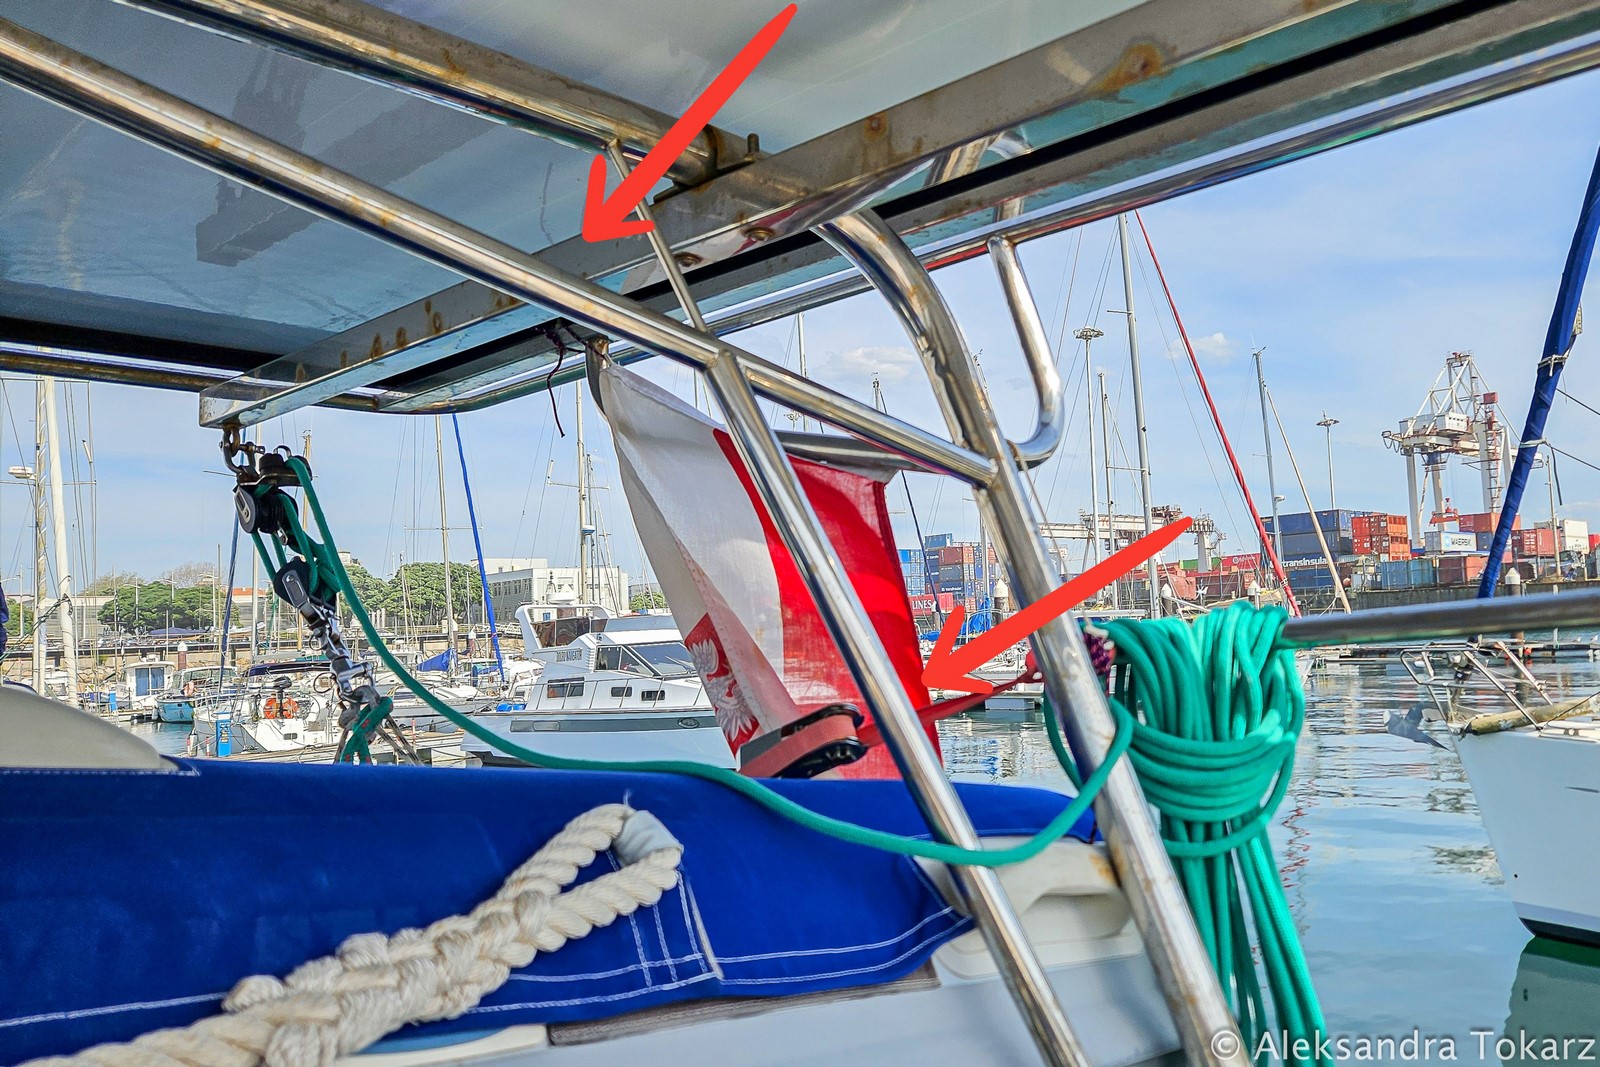
The stainless-steel solar arch mounted at the stern of our yacht serves two crucial functions: holding the solar panels and storing the dinghy. It was custom-built just before we set sail from Poland, and we wrote about the process in detail here.
Unfortunately, with time, we’ve come to realize that the arch does not meet our expectations. Both the design and execution leave much to be desired. While the fabricator had experience working with stainless steel, they had never built yacht structures before. As a result, the arch was supported in the wrong places, which caused significant vibrations while sailing. Even worse, within just six months, rust spots began to appear on the tubing—meanwhile, other stainless-steel components on our yacht, some over 20 years old, showed no such signs of corrosion. Unfortunately, at the time of installation, we had no way to verify the quality of the materials used.
Ideally, we would replace the entire arch, as it’s the one element of our yacht we’re least happy with. However, that would mean considerable costs and further modifications to the boat’s structure—new mounting holes, installation work, and so on. Instead, we opted for a practical solution: reinforcing the existing structure with the help of the stainless-steel specialist we mentioned in the Part 1. Together, we devised a plan to add diagonal braces and additional supports, significantly improving the arch’s stability. While it will never be perfect, we’ve managed to achieve a result we’re satisfied with.
As for the poor-quality stainless steel used in Poland, there’s nothing more we can do—aside from regular polishing and rinsing with fresh water to slow down corrosion.
Coppercoat Minor Fixes
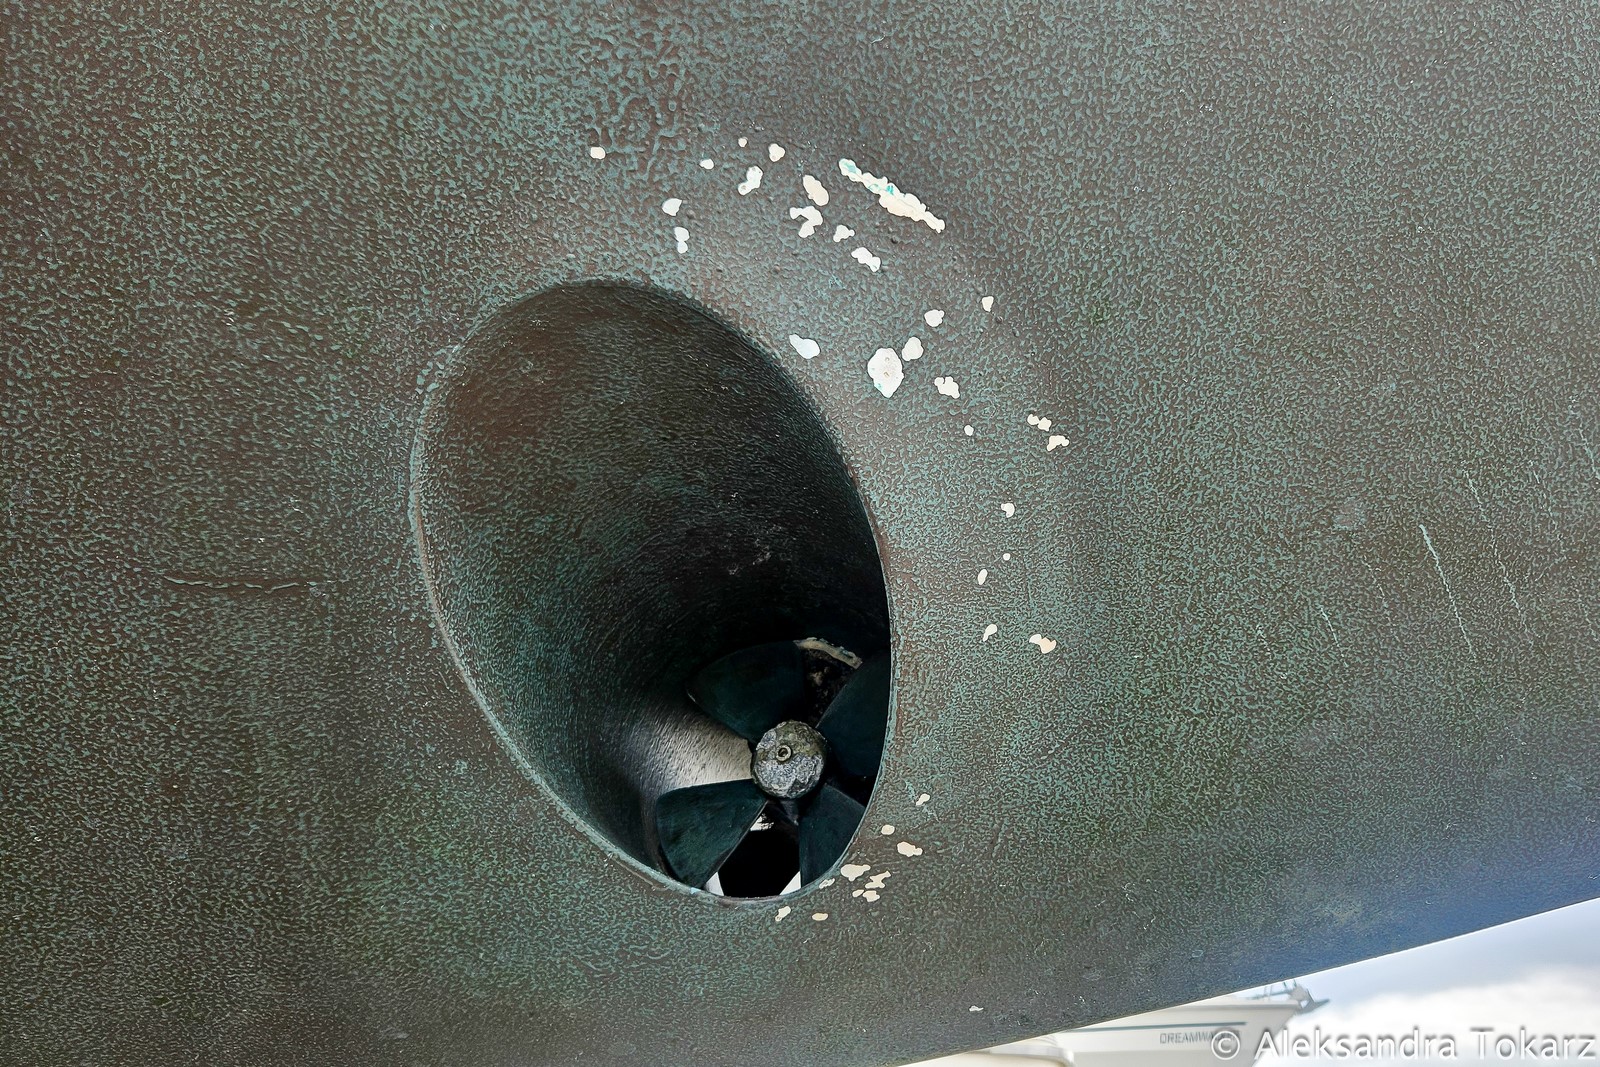
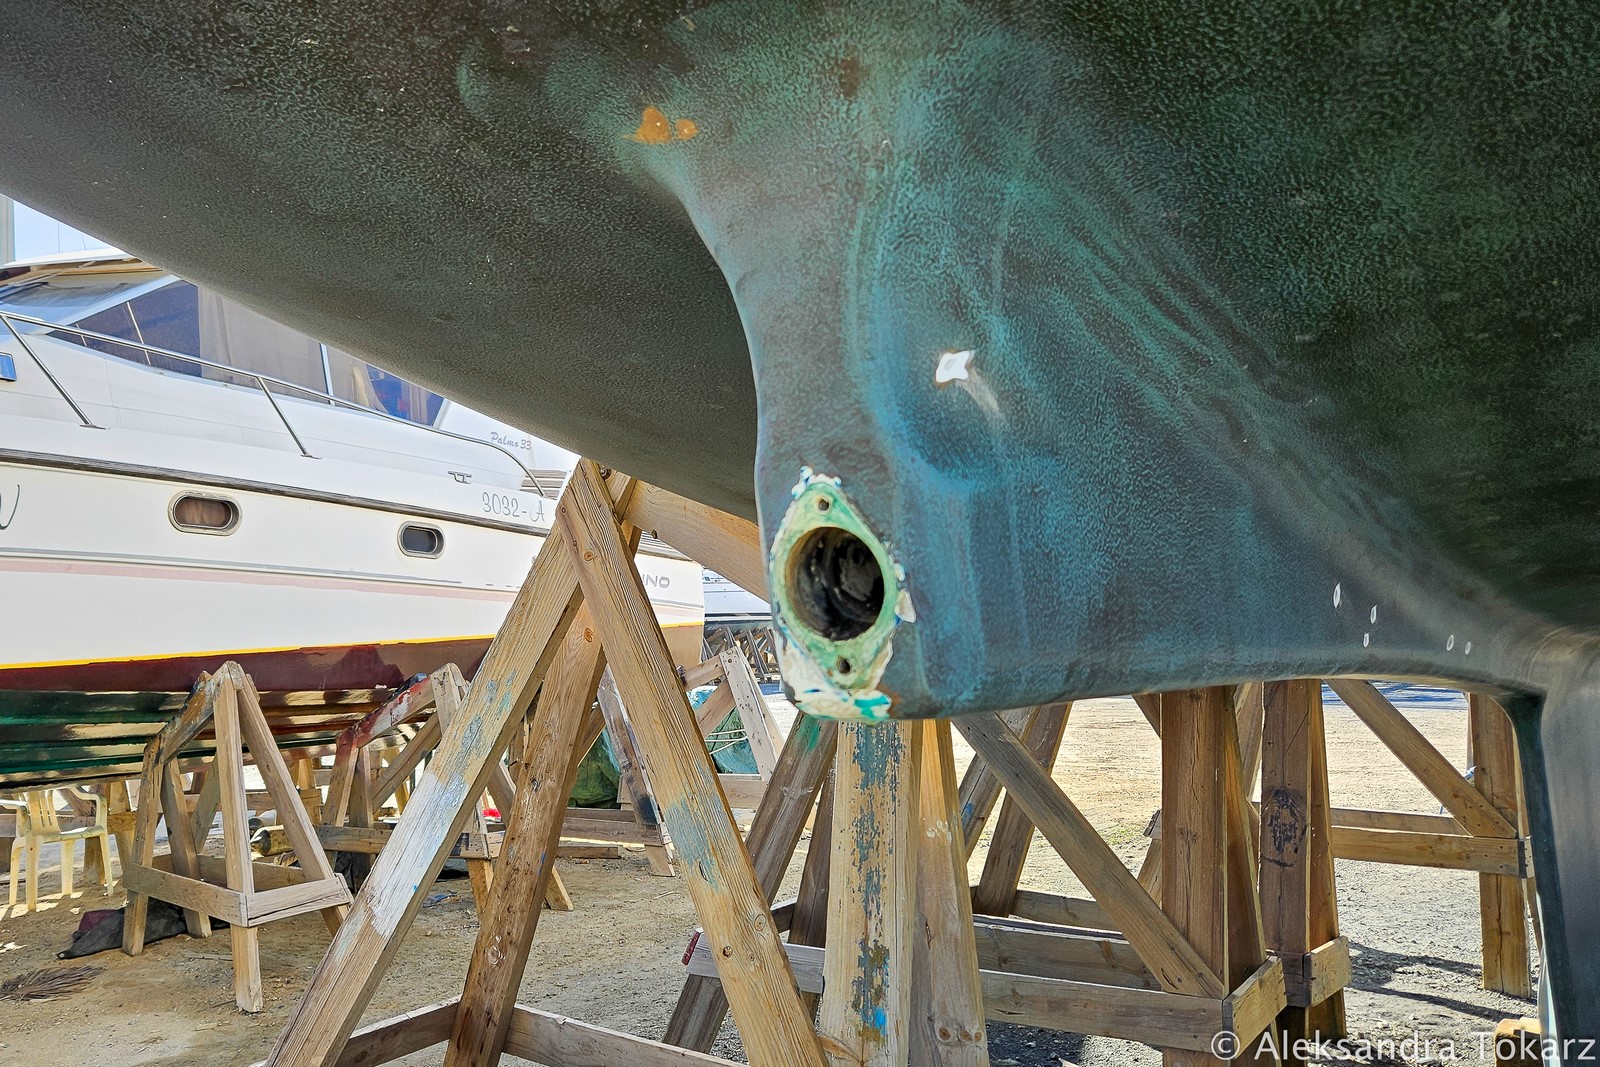
Our copper-based anti-fouling coating, Coppercoat, required some minor repairs. Small bulges and blisters appeared around the bow thruster area, which partially cracked during the underwater hull cleaning in-season, and then got further damaged due to pressure washing after haul out.
Although these were minor damages that didn’t require immediate repair, the fact that the yacht was already in the yard, out of the water, made it the perfect opportunity to address them. A detailed description of the entire process can be found in a separate article, where we share our experiences with Coppercoat – you can find the link to it here. We won’t repeat the information here 🙂
Replacing the Drain Hoses
This winter, we finally got around to replacing all the drain hoses on our yacht. The main reason? Their age, along with the increasingly frequent issues with clogged sinks and drains. We’ll spare you the details (and photos) of what we found inside after cutting them open…
The biggest shock came from the toilet drain hose. We were genuinely surprised that it still worked at all. The 38 mm hose had become so severely clogged over the years that the remaining opening was narrower than a pinky finger, with the rest filled by rock-hard deposits.
Lesson learned! From now on, we’ll be replacing hoses regularly—every few years—before they cause another headache.
Sealing Hatches and the Hard Dodger
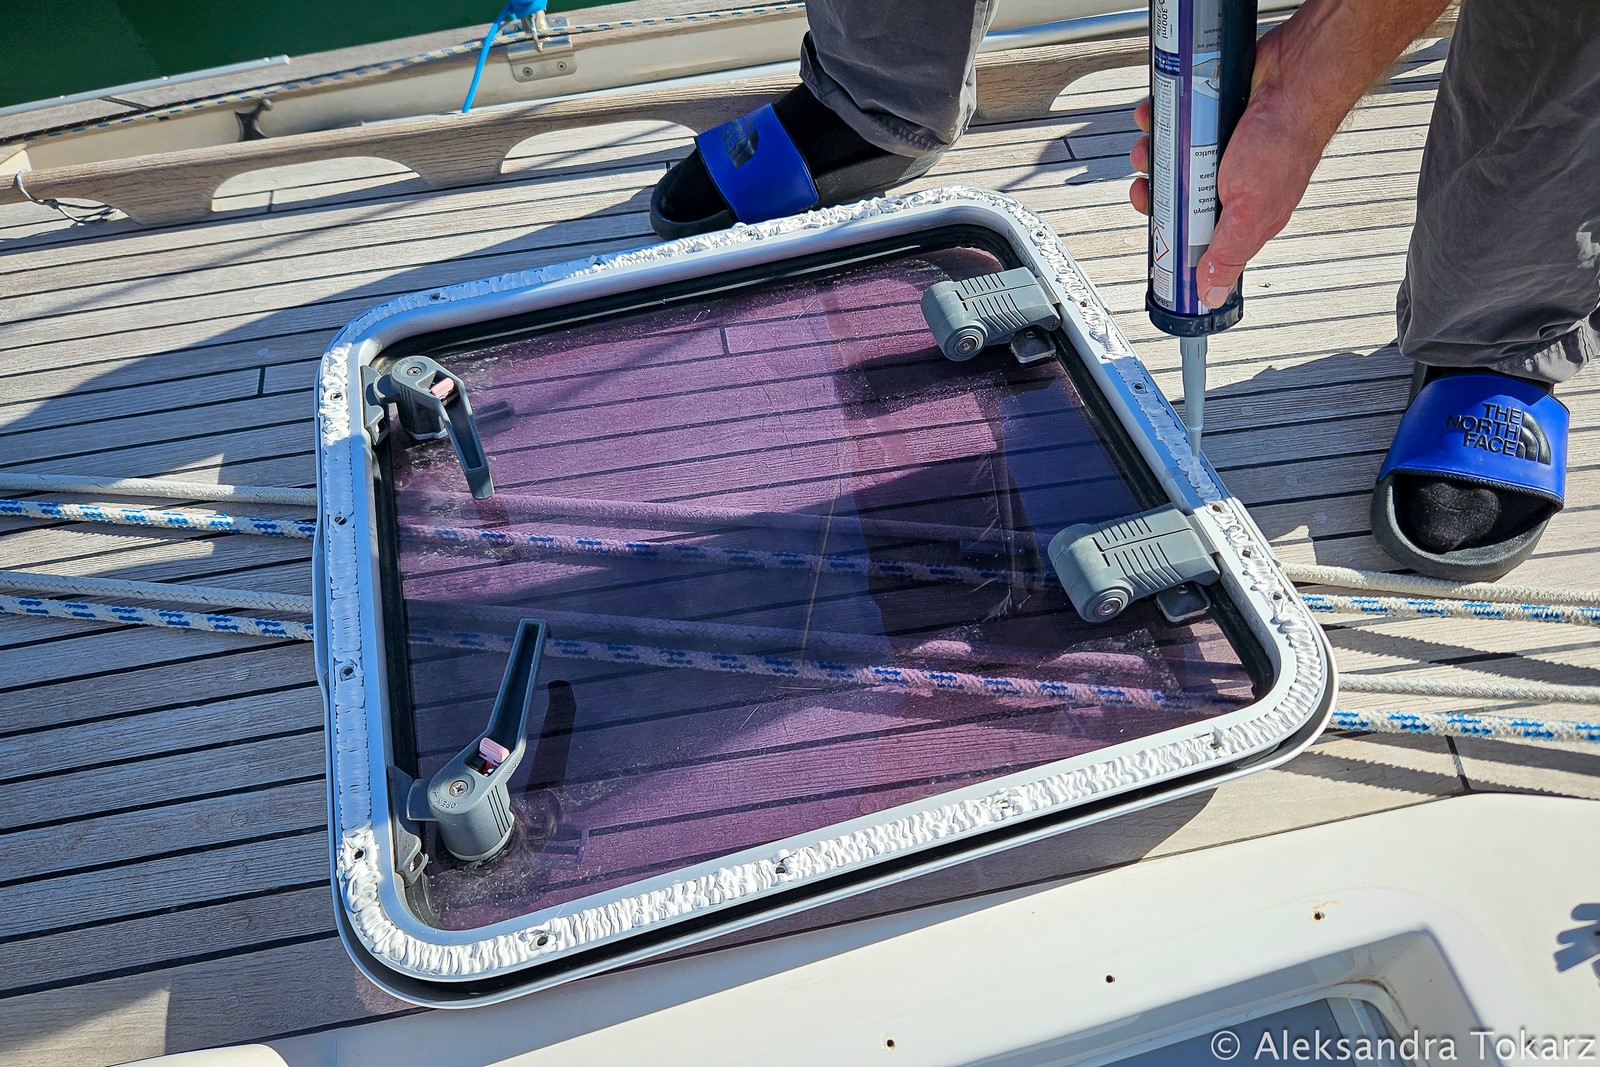
Every now and then, various parts of the yacht need resealing. By the end of the season, two of our windows had started leaking, and the culprit turned out to be old, degraded seals—undoubtedly a result of the relentless Mediterranean sun!
Thankfully, the repair was straightforward. We removed the windows, thoroughly cleaned the frames, applied a fresh layer of sealant (Sikaflex 291), and reinstalled them. The first heavy rains of the season have already put our work to the test—and we passed with flying colors!
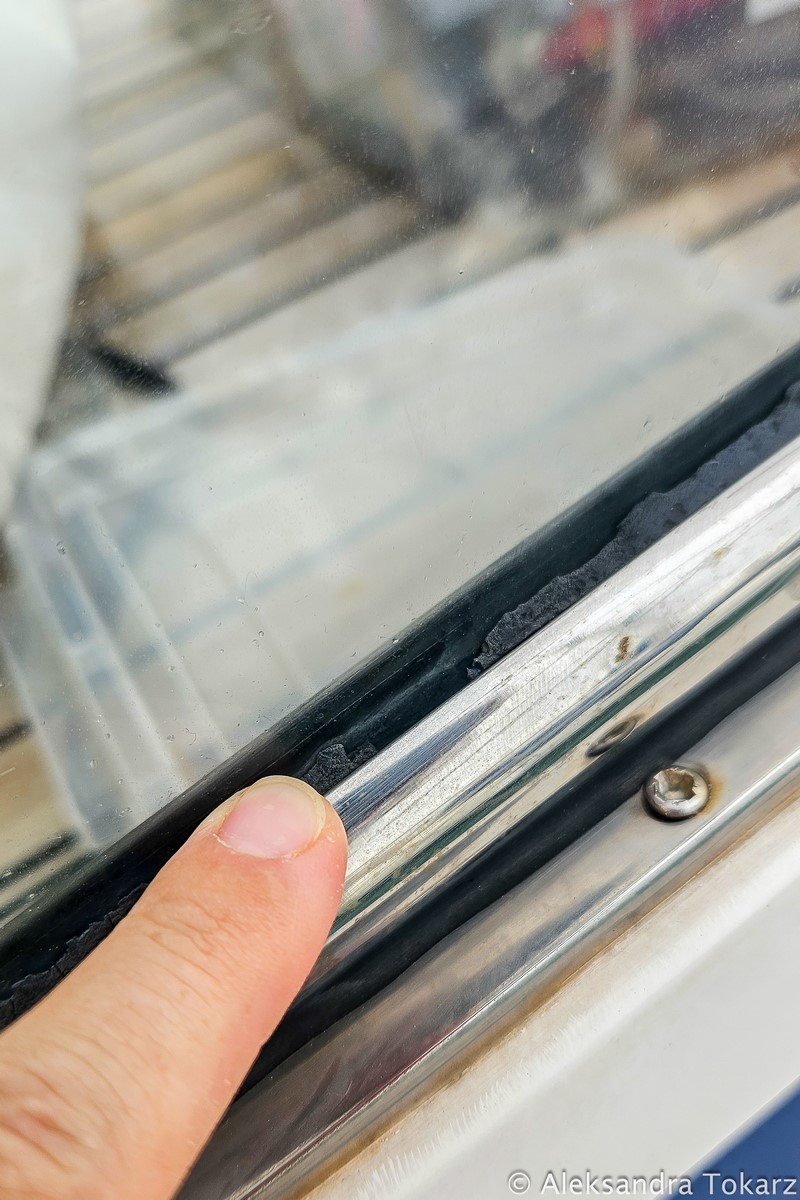
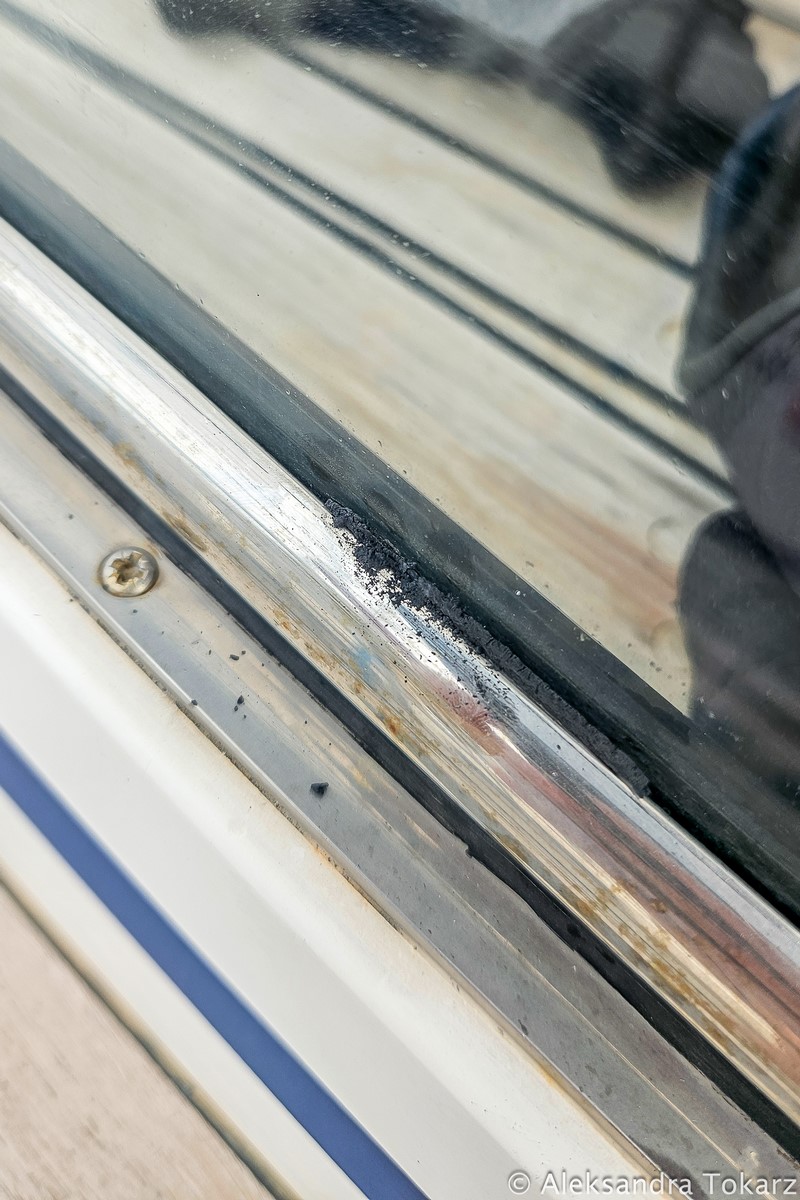
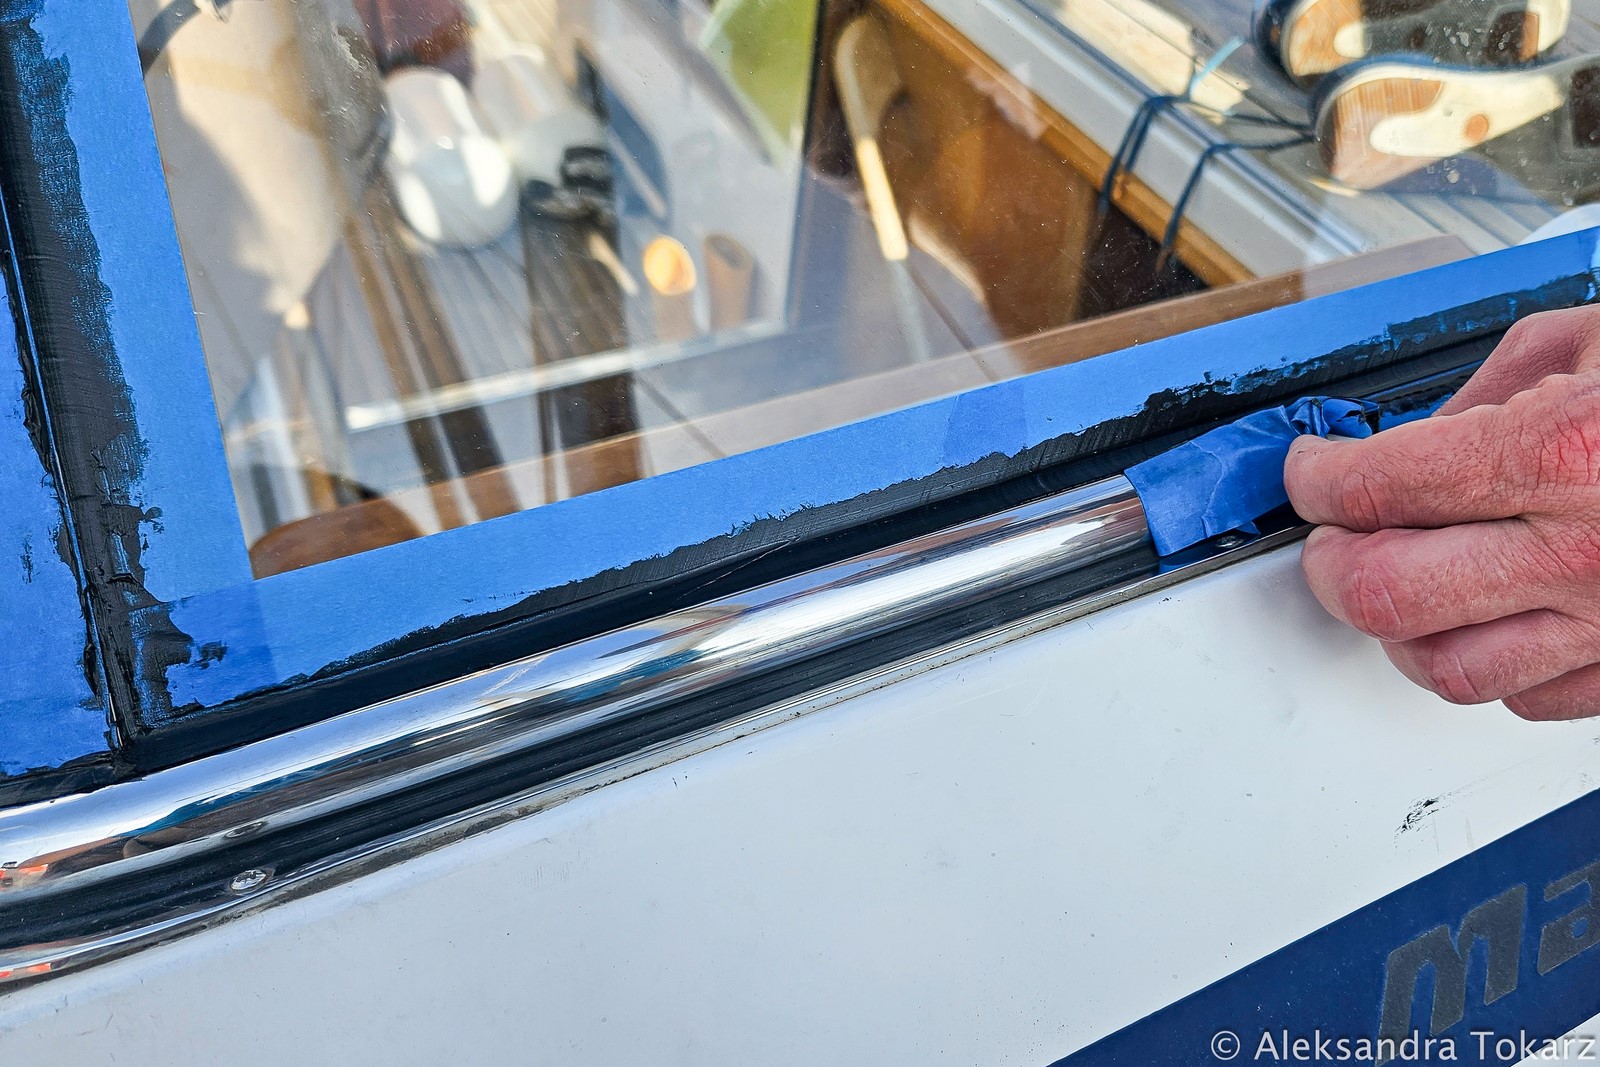
Our hard dodger also needed sealing. The seals between the glass panels and the stainless-steel frame had deteriorated under UV exposure, crumbling at the slightest touch.
Removing the old sealant was quite the challenge, as tiny remnants were lodged in every crevice. After meticulously cleaning and degreasing the surface with acetone, we carefully masked off the glass and frame before filling the gaps with Sikaflex 295. Ideally, we would have used Sikaflex 296, which is specifically designed for mineral glass, but it was nearly impossible to find in small quantities.
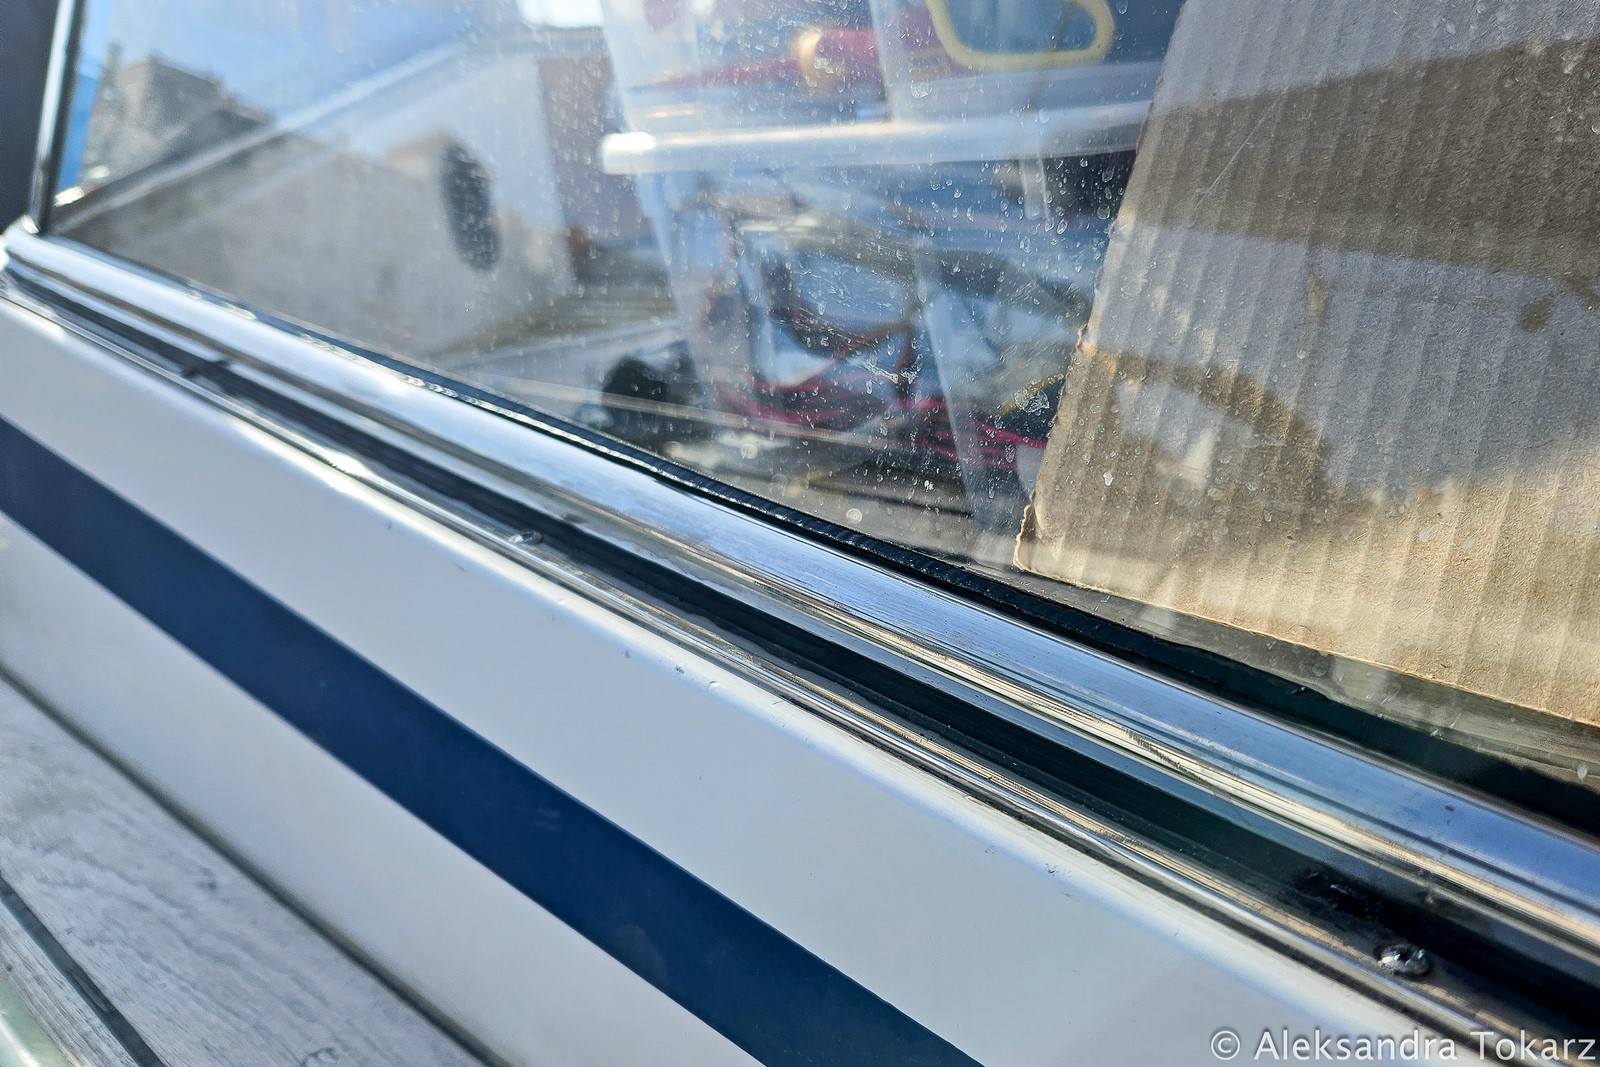
The result? Surprisingly neat and tidy! That said, the hard dodger will need additional sealing in other areas, which we hope to tackle soon.

Preventive Maintenance On Malo 39
Our Aviation Mindset at Sea
The last category of work on the yacht involves preventive maintenance—all the proactive measures we take to avoid failures at sea. If we’re being honest, we’re probably a little too proactive, a habit we’ve carried over from aviation.
Sometimes, to the disbelief of others, we replace things that are still technically working. But we firmly believe this approach will pay off in the long run, ensuring trouble-free sailing. The phrase “It’s still working” just isn’t enough for us!
Cutlass Bearing and Dripless Seal
One of our key maintenance tasks this winter was replacing the cutlass bearing and servicing the dripless seal. As with many yacht systems, we had no records indicating if or when these components had last been serviced or replaced.
We opted for a composite cutlass bearing. Works required removing the propeller, pulling out the shaft, ordering the correct-sized replacement, and installing the new one. Sounds simple? Not quite. As is often the case on boats, parts that have remained assembled for years can be incredibly difficult to dismantle. It seems someone used Loctite in places where it shouldn’t have been applied. Fortunately, we were still able to replace the cutlass bearing without forcing parts to move.
For Malo 39 owners, the correct cutlass bearing size is 35×47.62 mm.
The dripless seal, on the other hand, was in a good condition, so we only replaced the seals. Malo used a different dripless seal than the popular Volvo or PSS systems. We couldn’t find any servicing information—not even the name of the manufacturer. In the end, we custom-made replacement seals with the help of a nearby seal shop.

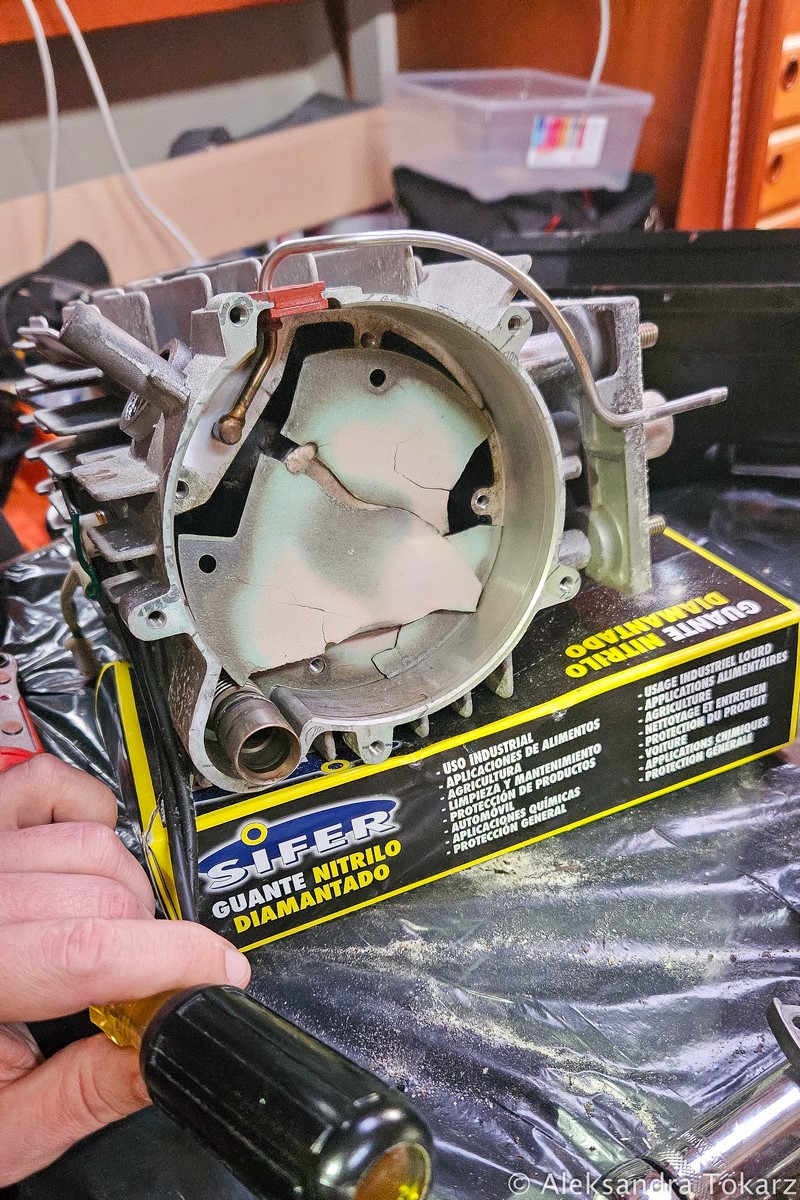
Eberspächer heating system
This winter, our Eberspächer heating system underwent a thorough service. The year before, we replaced a faulty temperature controller – we wrote about it here. Now, it was time for a complete inspection and replacement of worn-out components to ensure the reliability of the system for the upcoming seasons.
We pre-ordered a repair kit, expecting that the 22-year-old heating system would require many part replacements. After disassembling the unit, our assumptions were confirmed – the following parts needed replacement:
- combustion chamber seals,
- glow plug (this part was not included in the standard repair kit),
- glow plug screen,
- heat exchanger seals,
- burner felt.
The entire system was thoroughly cleaned of accumulated soot and dirt. Additionally, after inspection, we ordered extra parts – both for the current repair and for future maintenance, ensuring we have spares for upcoming service needs. If you are looking for spare parts, you can buy them here.
After the work was completed, the heating system works noticeably better – it ignites faster, runs more smoothly, and is more efficient. It has already been tested at the start of the season, and it will surely be invaluable up north!

Boracol – Teak Maintenance on Malo 39
As every year, we treated the entire teak deck with Boracol – a chemical agent that eliminates algae and growths that may develop in the wood.
We belong to the group of people who oppose oiling teak wood. The only maintenance we apply is washing with mild soap (or baby shampoo) and a soft brush. Once a year, we apply Boracol to prevent the growth of microorganisms inside the wood. We are very pleased with the results and do not plan to use any detergents, impregnators, or oils in the near future.
If you plan to use Boracol, remember to order it in advance – it’s not available for private users in every country.
Rig Inspection
As we plan to replace our standing rigging next year, we still decided to carry out a thorough rig inspection this winter. Why? Our rigging is already 22 years old, and we have some demanding sailing challenges ahead this season.
The result? After 22 years, the rigging still looks good! Of course, we know that appearance isn’t everything. We can’t see material fatigue, for example—but we’re confident that it’s safe to sail with this standing rigging for another year. Additionally, working with professionals—an experience we always try to actively engage in—has taught us new details and nuances about rig maintenance.
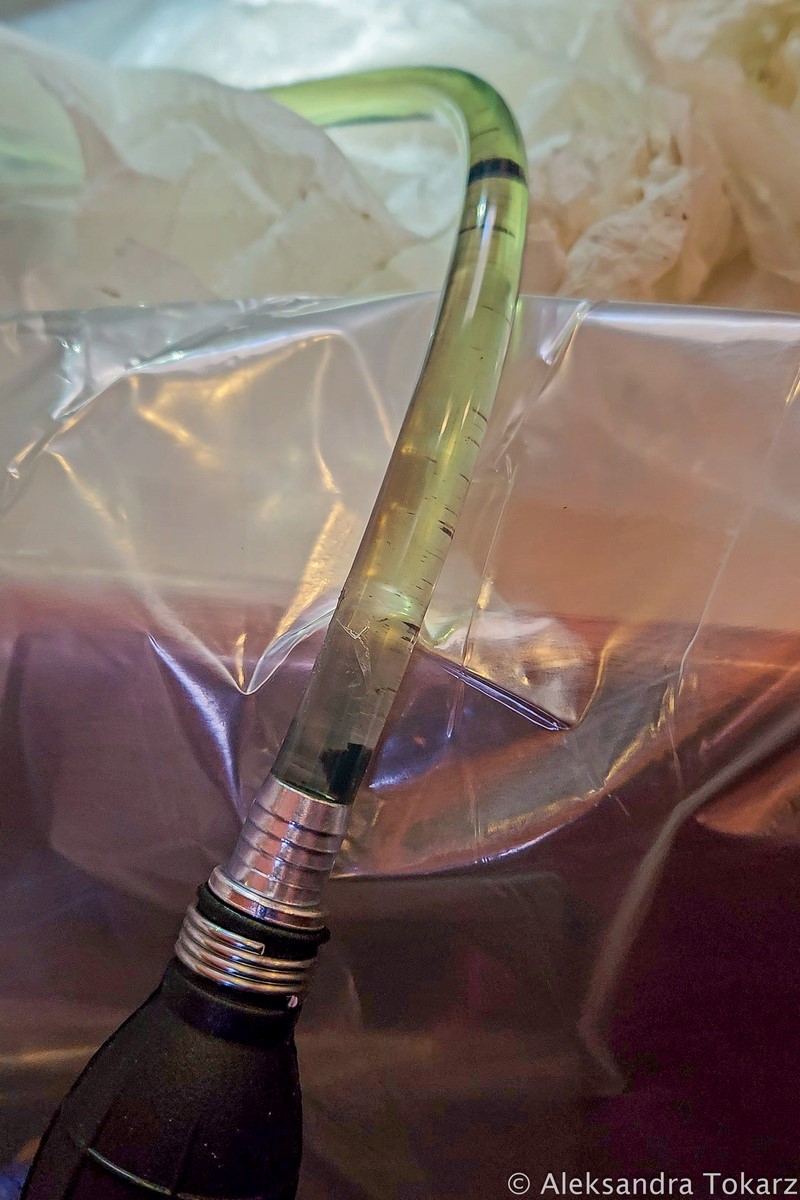
Fuel Tank Cleaning
Alongside upgrading our fuel filter (which we wrote about in the first part), we also thoroughly cleaned the fuel tank and removed any dirt and sediment that had accumulated at the bottom over the years.
For this, we used a hose with a hand pump attached to a steel rod, carefully moving it across the bottom of the tank to suction out contaminants. We removed about 12 liters of fuel, continuing until the extracted fuel was completely clean.

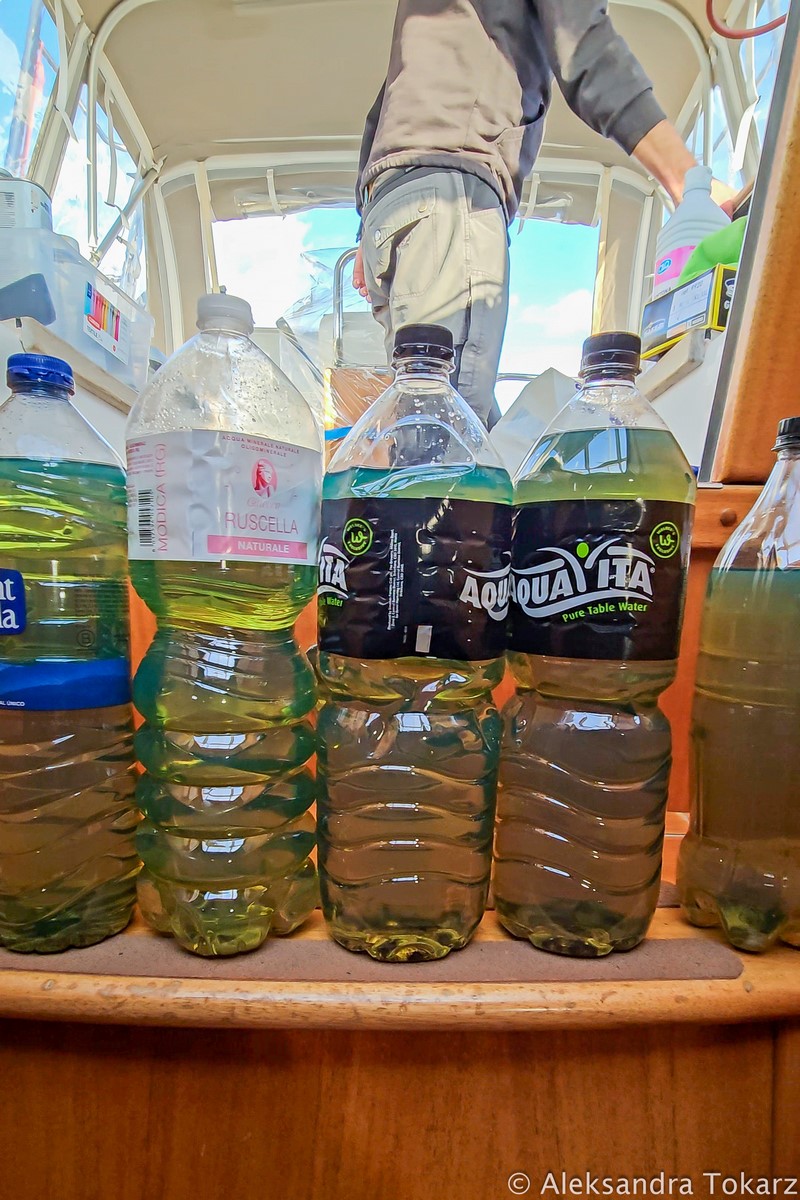
Both the deep cleaning of the tank and the installation of a Racor filter have significantly improved the safety of our sailing. A reliable fuel system is a crucial aspect of yacht safety—in emergency situations, the engine must work flawlessly. As sailors, we want to be sure that it won’t fail us at a critical moment or shut down when we need it most. As Nigel Calder writes in the Bible for yacht owners “Boatowner’s Mechanical and Electrical Manual”, the fuel system should be treated like a favorite child!
Fuel and Water Inlet Seals
Continuing the topic of engine reliability, it’s worth paying attention to the fuel and water tank inlets’ seals.
If you’re a yacht owner or user, we highly recommend checking the condition of your fuel and water tank inlets seals right after reading this. These small components are easy to overlook while focusing on larger, more demanding projects. Yet, they play a crucial role—a worn-out seal can allow water to enter the fuel tank, potentially leading to serious engine issues.
Upon inspecting our own seals, we discovered that all three were in terrible condition. Replacing them takes just a few minutes but can prevent costly and time-consuming problems down the line.
For Malo 39 owners, the correct seal size is 36×2.5 mm.
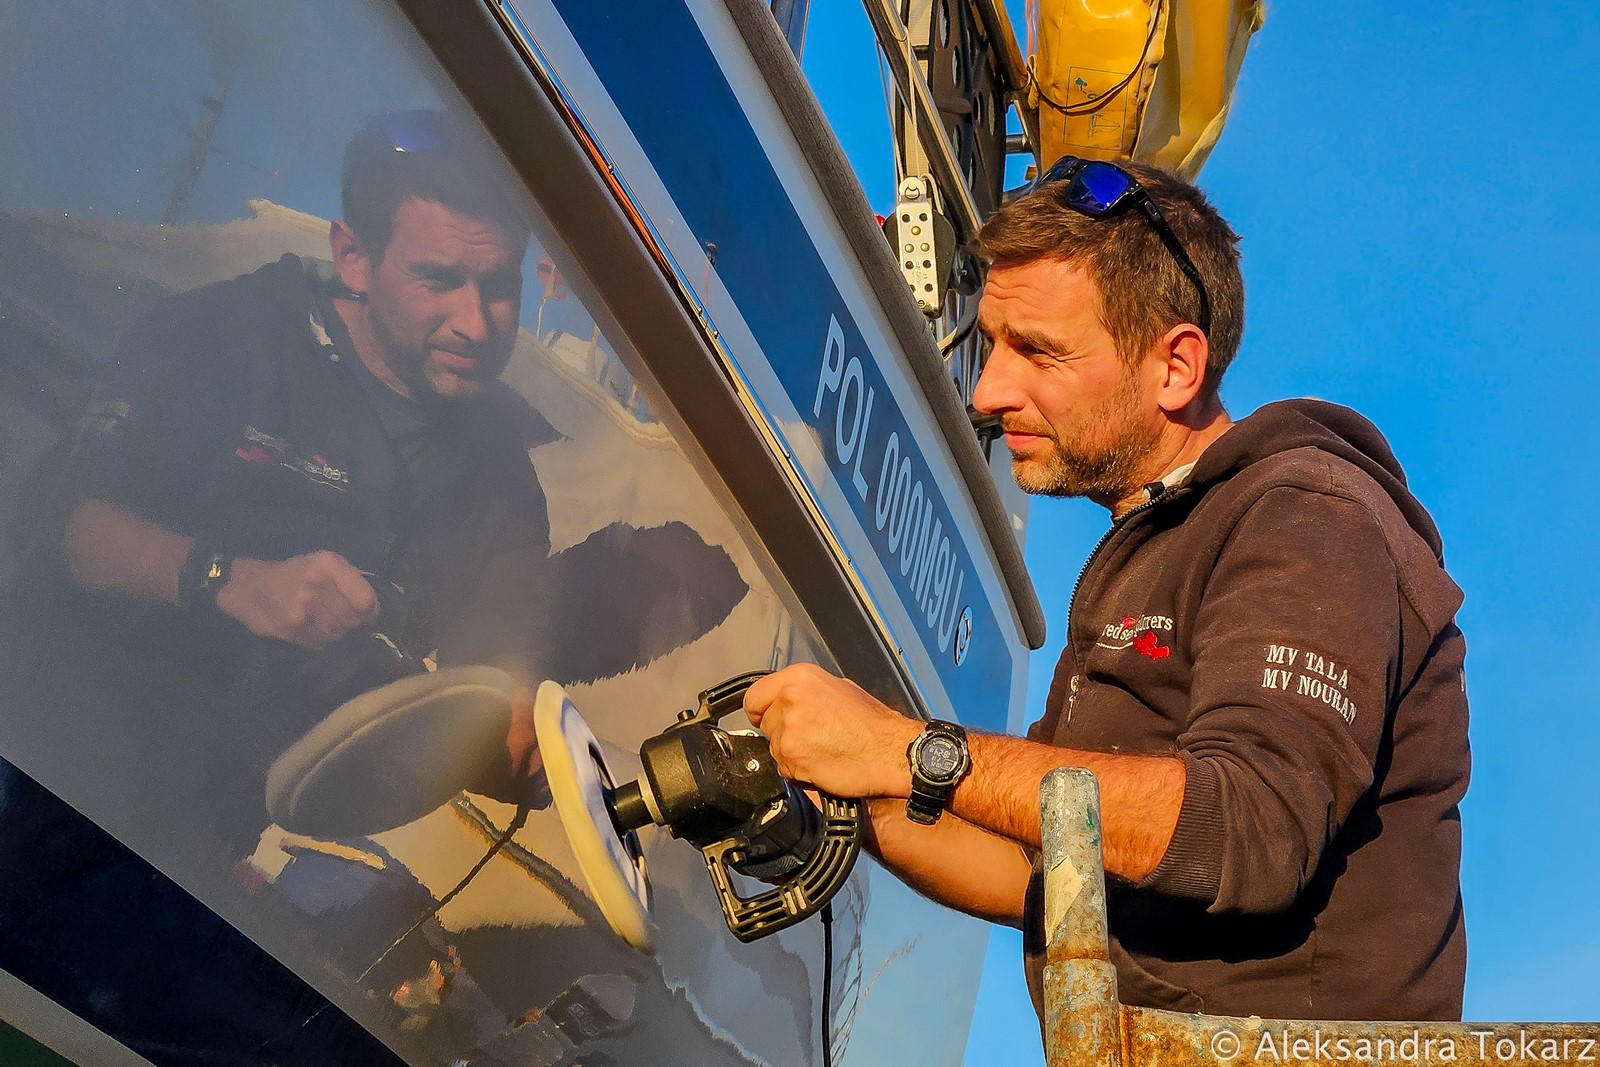
Hull Polishing Malo 39
The hull repair we mentioned earlier led to an unplanned but rewarding additional task—polishing the entire hull. Although it wasn’t an urgent job, and the hull looked quite good already, the transformation after polishing was spectacular. It was only after completing the process that we truly appreciated how worthwhile it was.
Beyond aesthetics, polishing and waxing effectively protect the gelcoat from environmental factors, so it’s a good practice to repeat this process every 2–3 years. And, let’s be honest—since we’re sailing north, it’s nice to keep looking good among the well-maintained Scandinavian boats!
Polishing isn’t exactly our favorite boat job—in fact, I’d say it ranks near the bottom of the list. We tackled it together, using an angle grinder with a polishing disc and a larger polisher designed for the task. We used Mirka’s Polarshine 25 compound. I won’t lie—two long days on scaffolding, with arms raised and heavy equipment in hand, were exhausting. But the final result made every bit of effort worth it.

Winter Repairs and Maintenance on Malo 39 – Summary
That wraps up another season of endless maintenance, repairs, and upgrades on our Malo 39—an unavoidable part of boat ownership. Well, at least for this winter! As soon as we set sail, the to-do list starts growing again. Such is the sailor’s life…
While we undoubtedly prefer sailing over boatyard work, we’ve come to enjoy these projects. By now, we can handle most tasks ourselves, and the steep learning curve has finally leveled out. Our work is well-organized and usually follows the plan—though, as always, everything takes longer than expected. But the most rewarding moment? Watching the yacht launch after a winter of hard work and seeing her float once again.
Winter maintenance round 3 is already on the horizon, even as this season has just begun. But one thing remains unchanged: preparation is always the key.


No responses yet