

Teak decks
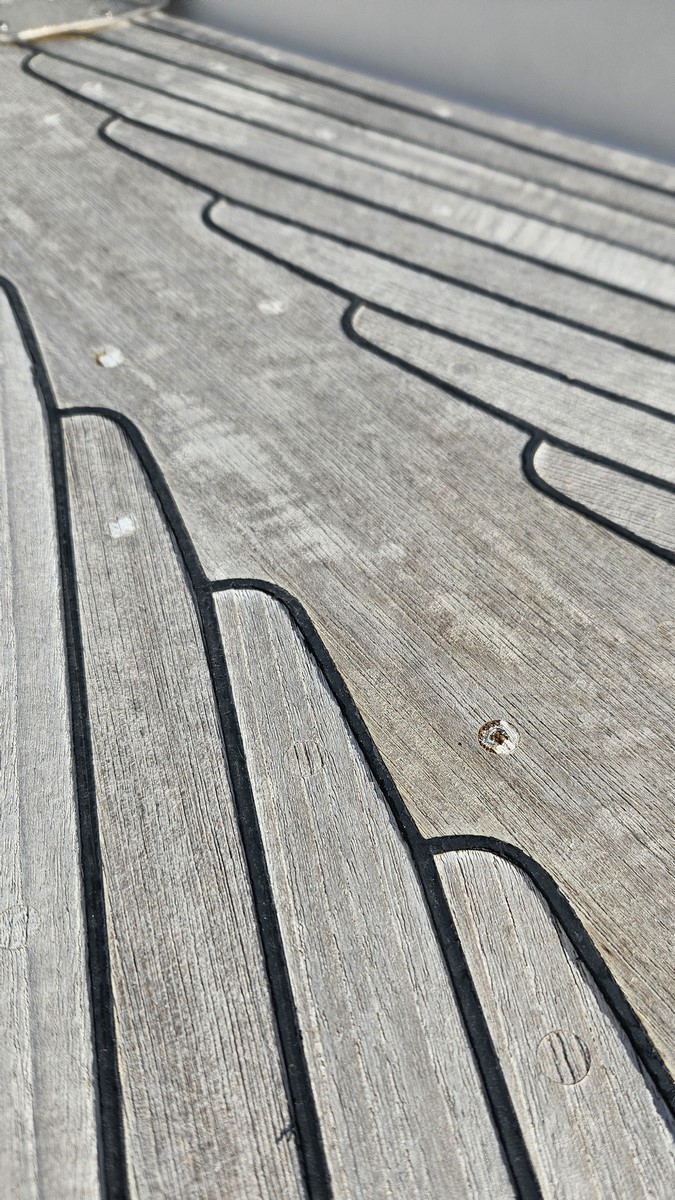
Teak decks are beautiful and although it was not our main criteria when looking for a boat, we are glad that we have it. Nothing can replace the feeling of walking barefoot on wood in a calm morning. But, as in life, there is a cost to pay for that. Teak decks require lots of attention and continuous work. Our 22-years old teak deck is in amazing condition and we are doing everything to keep it in good shape for next years of sailing. That means lots of work, like, for example teak plugs replacement.
Quick explanation for those who are not familiar with teak wood. Teak (lat. Tactona grandis) is a tropical deciduous tree native to south and southeast Asia. Thanks to its high oil content, tensile strength, lightness and weather resistance, it is commonly used for outdoor furniture and boat decks.
Teak bungs replacement
Today we will guide you through the bungs/plugs replacement. It is not a complicated task and you don’t need to hire anybody, even if it’s your first time. However, it’s useful to know some tips which will make your work go smoothly. Proper techniques will pay-off with long lasting, good quality repair.
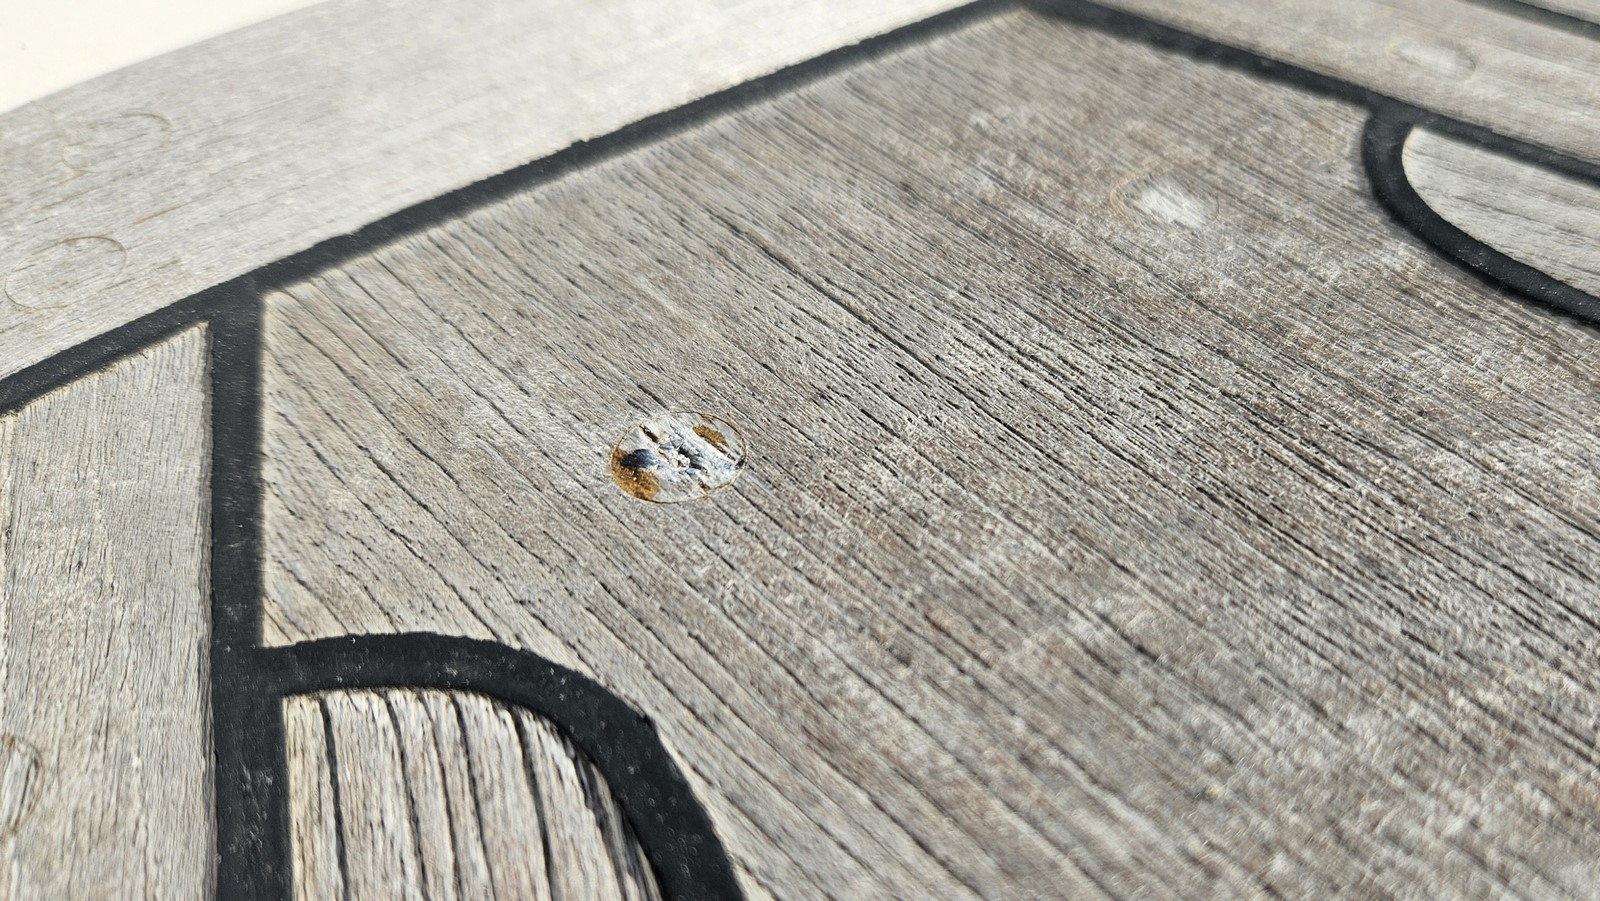
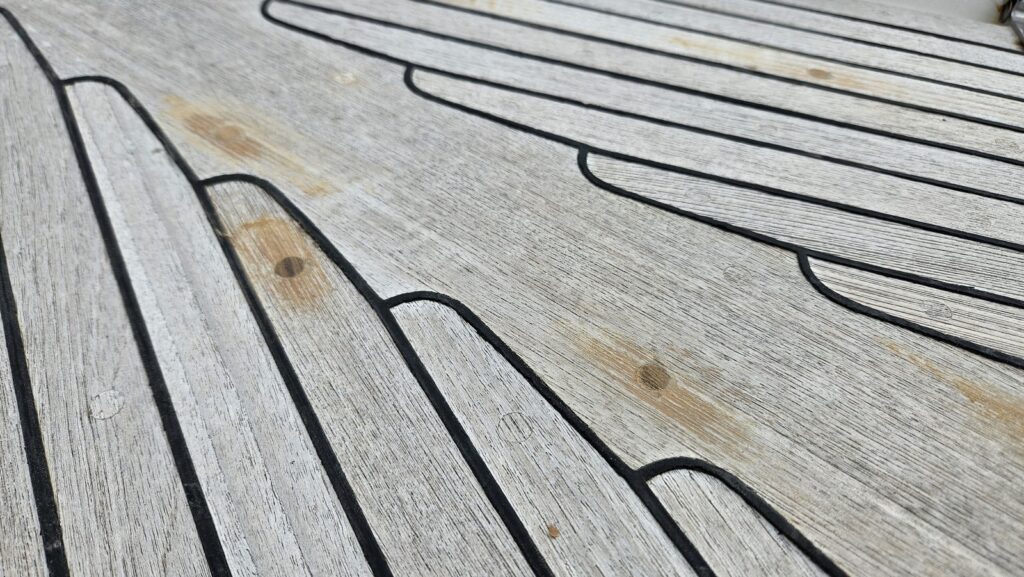
Popped plugs are the most common problem of teak decks. Exposure to the sun, salt water and scrubbing thin teak planks and bungs. At some point, grip becomes insufficient to hold plugs in place and screw heads pop out.

Why is it needed to replace teak plugs?
Why is it necessary to plug a new bung? Exposed screw heads can lead to water ingestion below the teak planks. We all know what trapped water below the teak can do and we should avoid this at all cost.
Replacing teak bungs – step by step guide
1. Teak plugs inspection
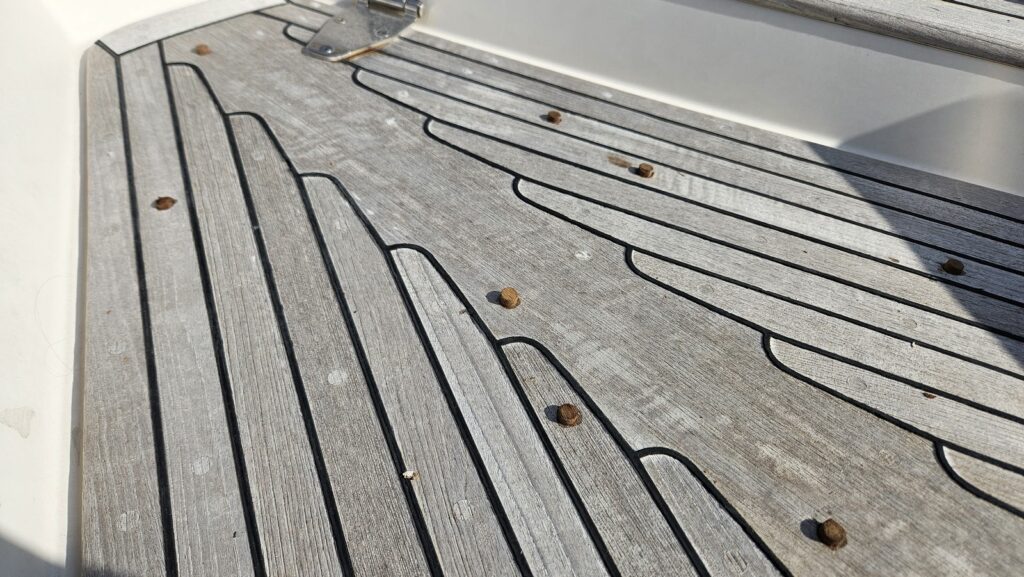
Start with careful inspection of the whole teak. Mark all suspicious teak plugs. We use white marker, so the markings are well visible when you start your work, but you can use literally anything.
Mark only these bungs, which are damaged, deep or the screw is visible. Don’t bother to replace more teak plugs than really needed. It’s a simple job, so you can do it any time and there is no need to replace them precautionary.
Measure the diameter of your teak plugs. The most common are 8 and10 mm.
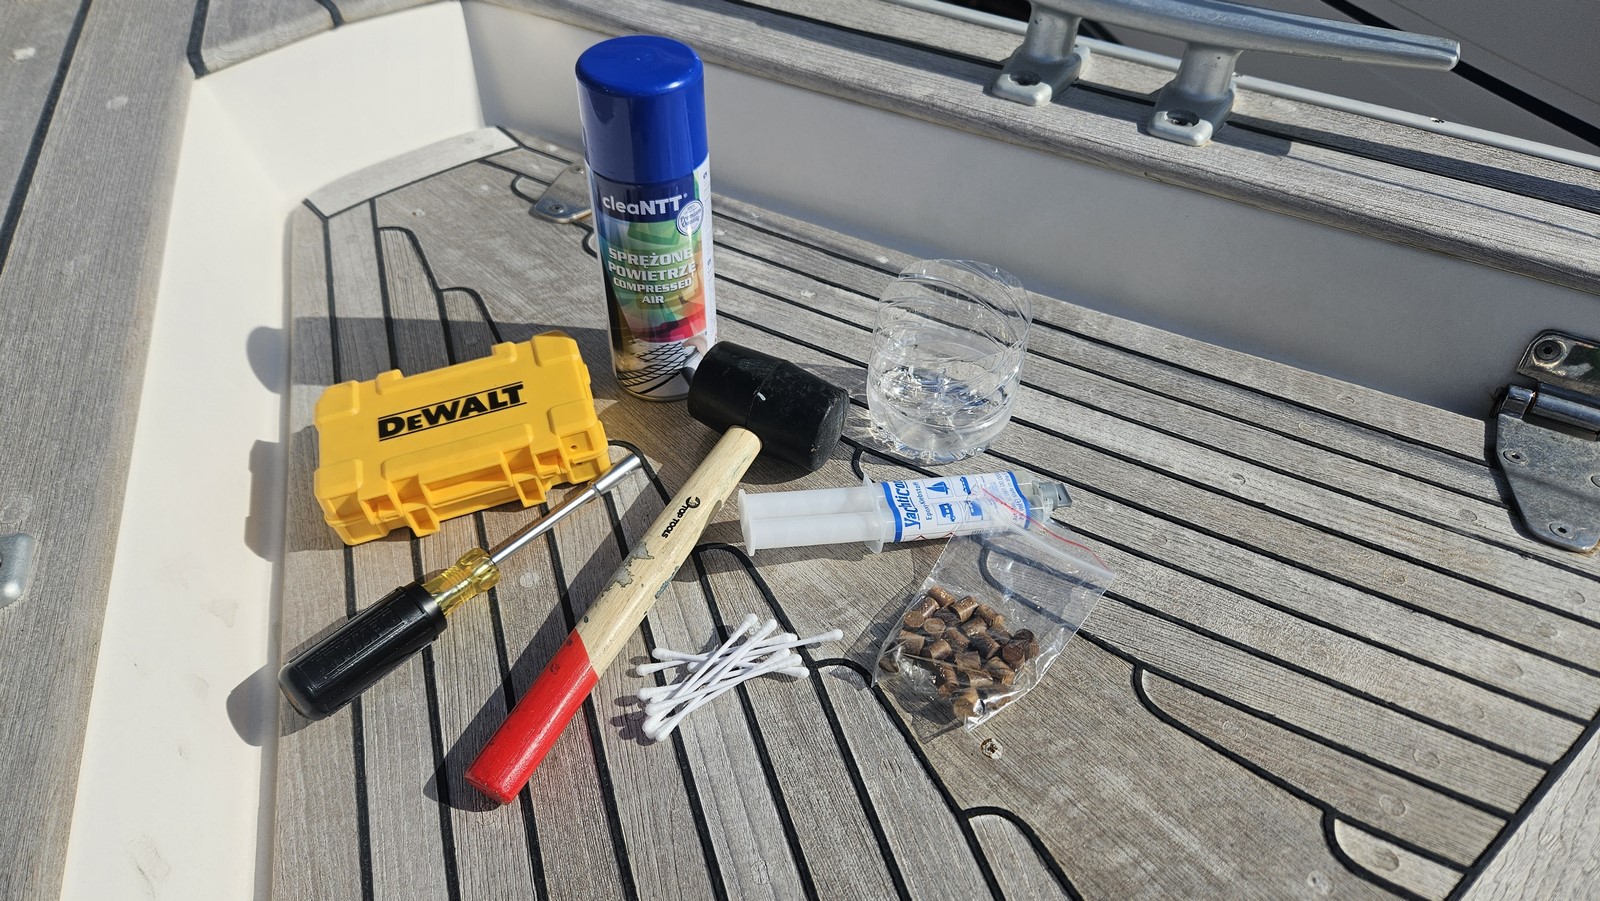
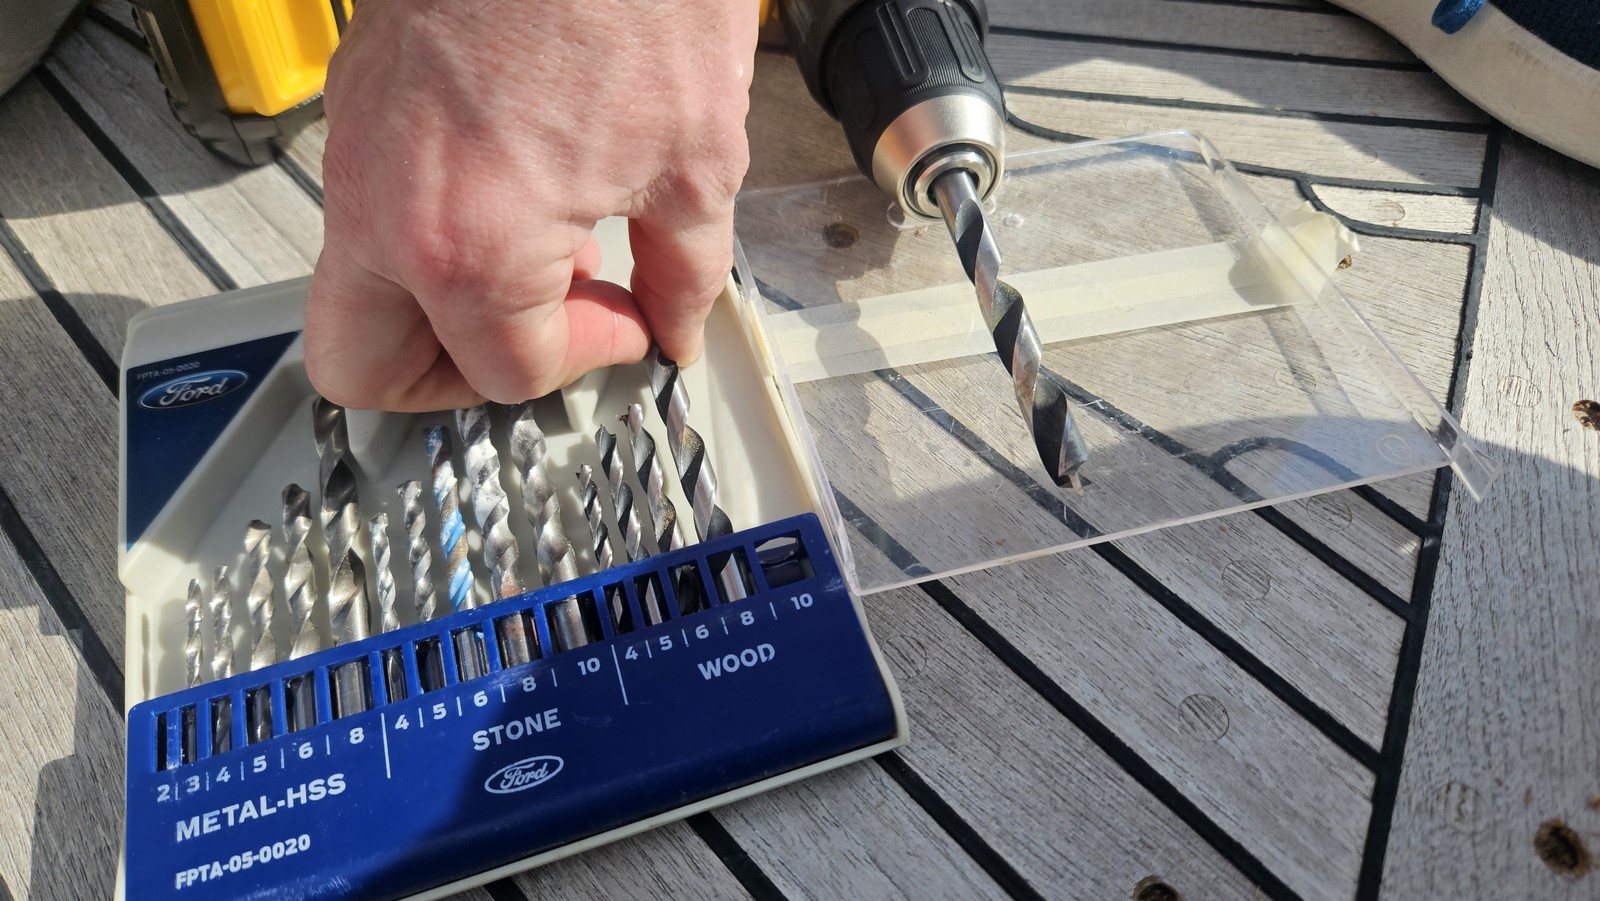
2. Tools needed for teak plugs replacement
Tools needed for teak plugs replacement:
- new set of plugs
- screwdriver
- driller
- vacuum cleaner / compressed air
- masking tape
- ear buds or small brush
- acetone
- epoxy glue or epoxy resin with filler
- small sticks to apply epoxy
- rubber hammer
- chisel
- 120 grade sandpaper
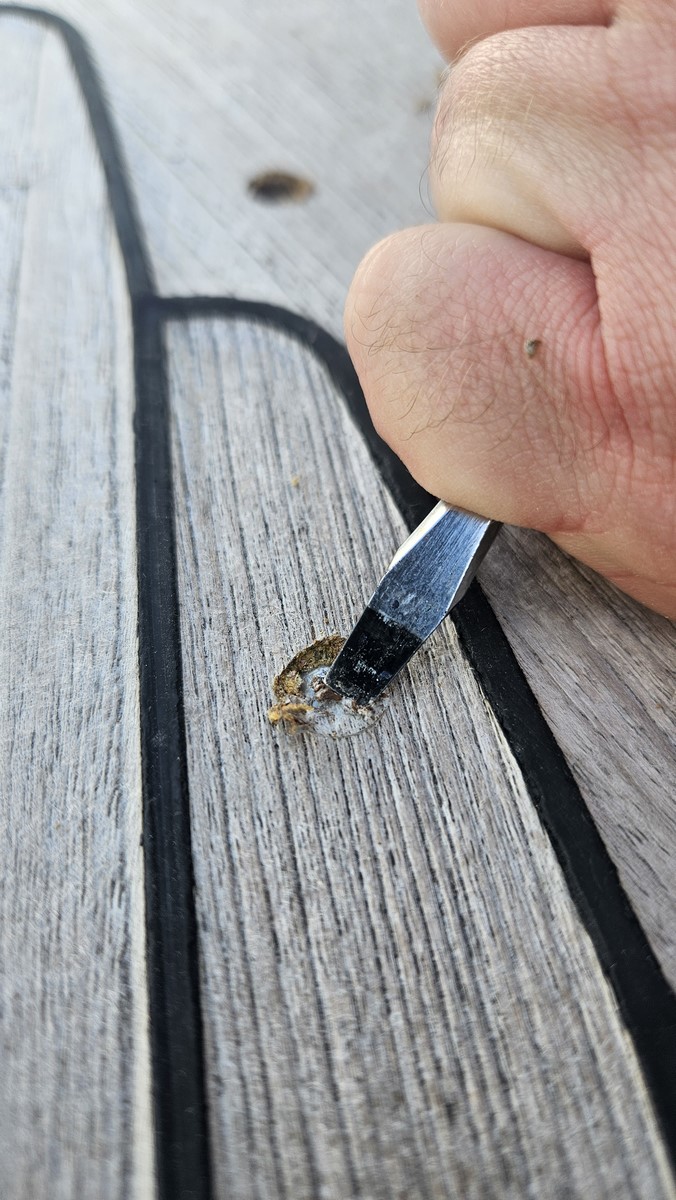
3. Teak plugs replacement – should I remove the old screw?
Next step is to unscrew old screws. First, you need to remove the remains of the old plugs from the top, using a flat head screwdriver. Cautiously remove the old screws, without damaging the head.
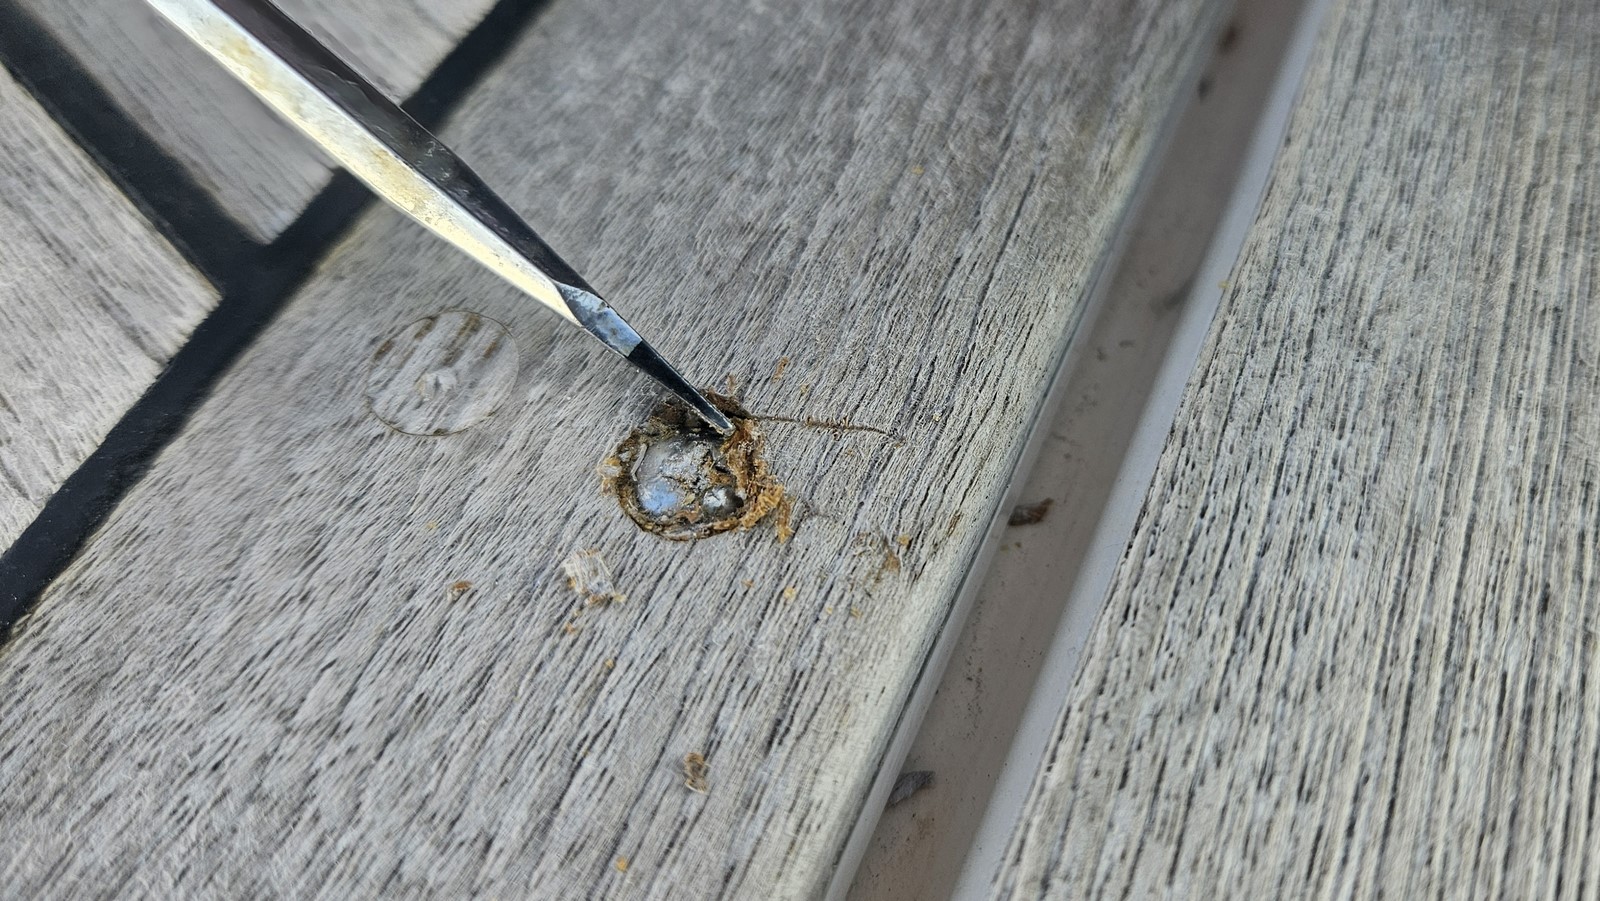
Many sources advise to rebed the screw, however it depends on the teak mounting. On boats with glued teak, screws are technical, which means they’ve been used during teak installation to keep the planks in place before glue bonds. It means that they are not doing any job after that. They can be safely removed and replaced with a deeper plug. Check with your manufacturer how the teak planks are attached to the deck so you know if you should keep the screws or not. Malo 39 has a glued teak, so it is not necessary to keep the screws.
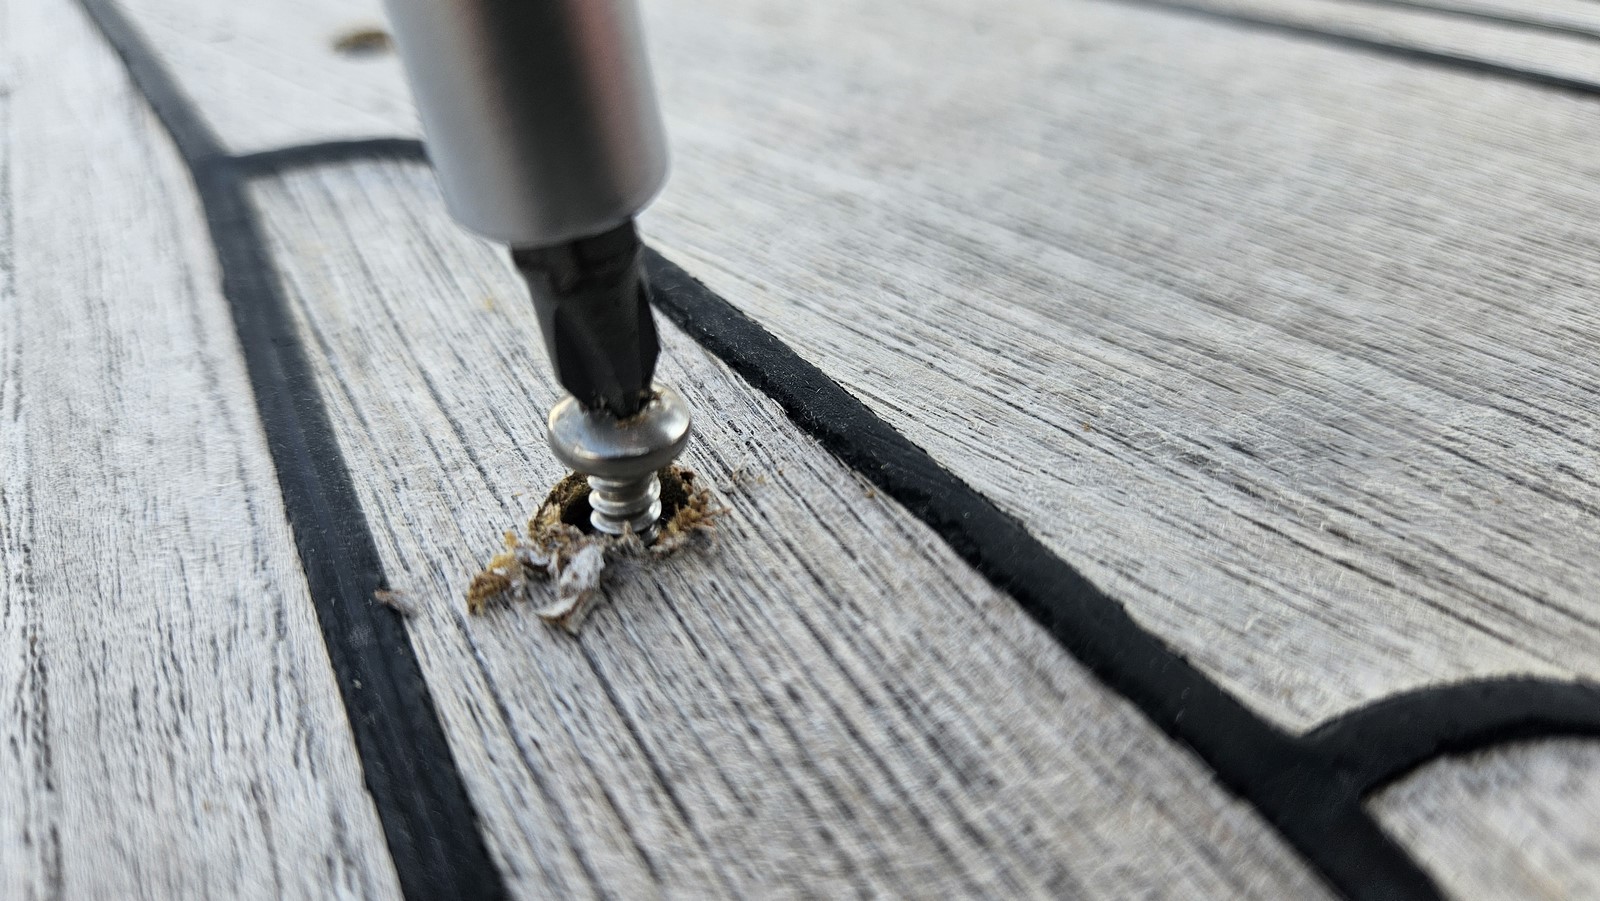
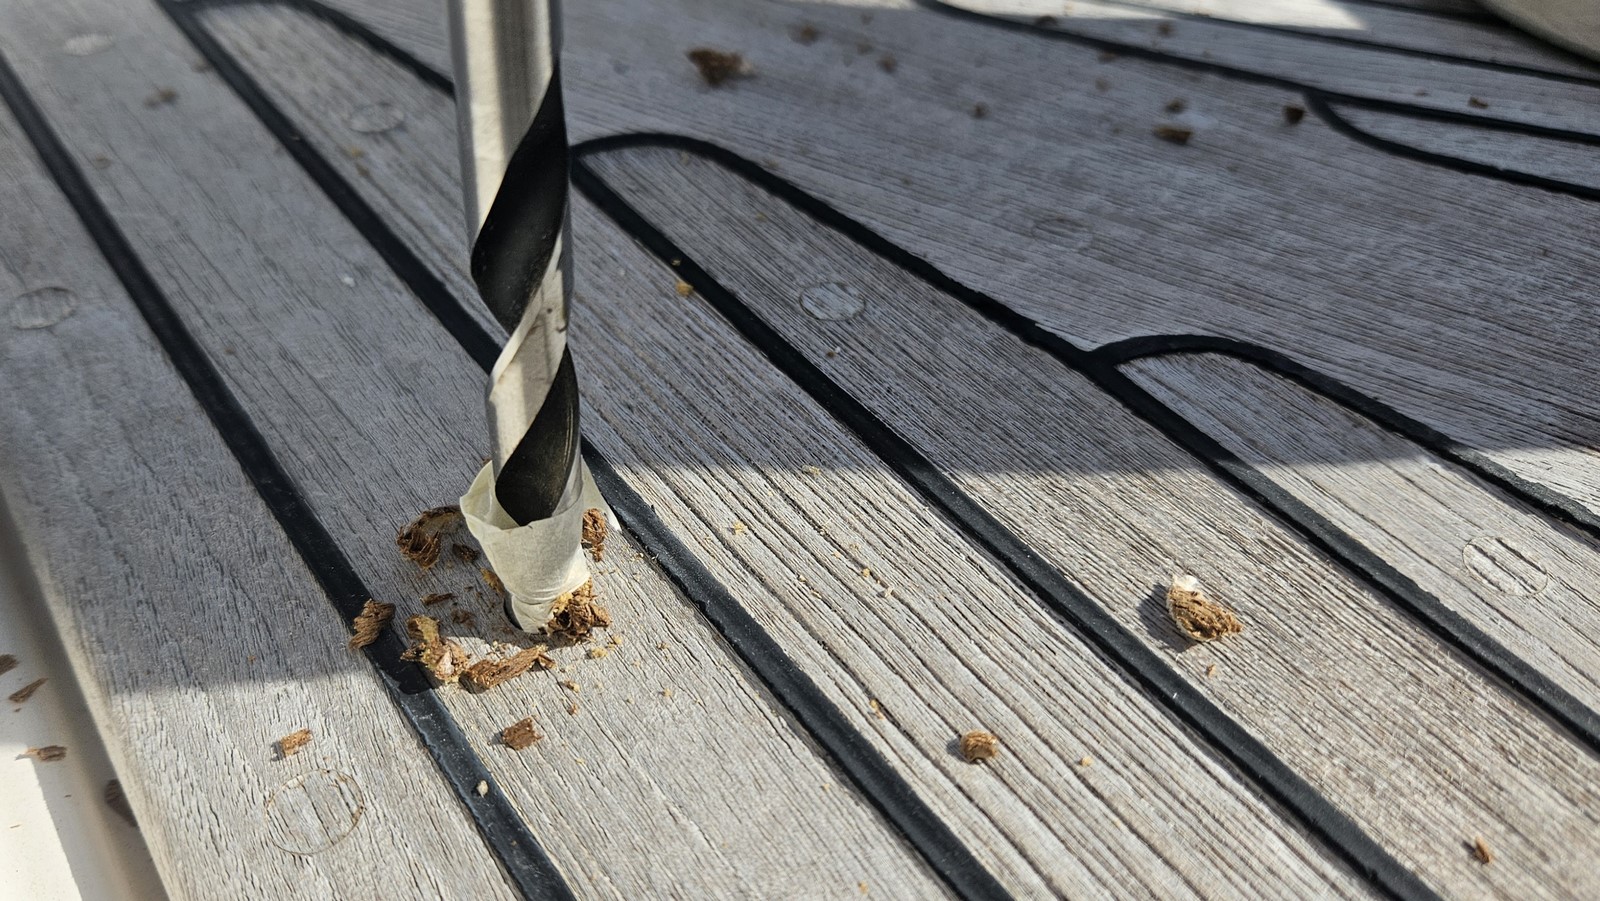
4. Re-drilling the holes while replacing teak plugs
Do this step only if you remove the screws.
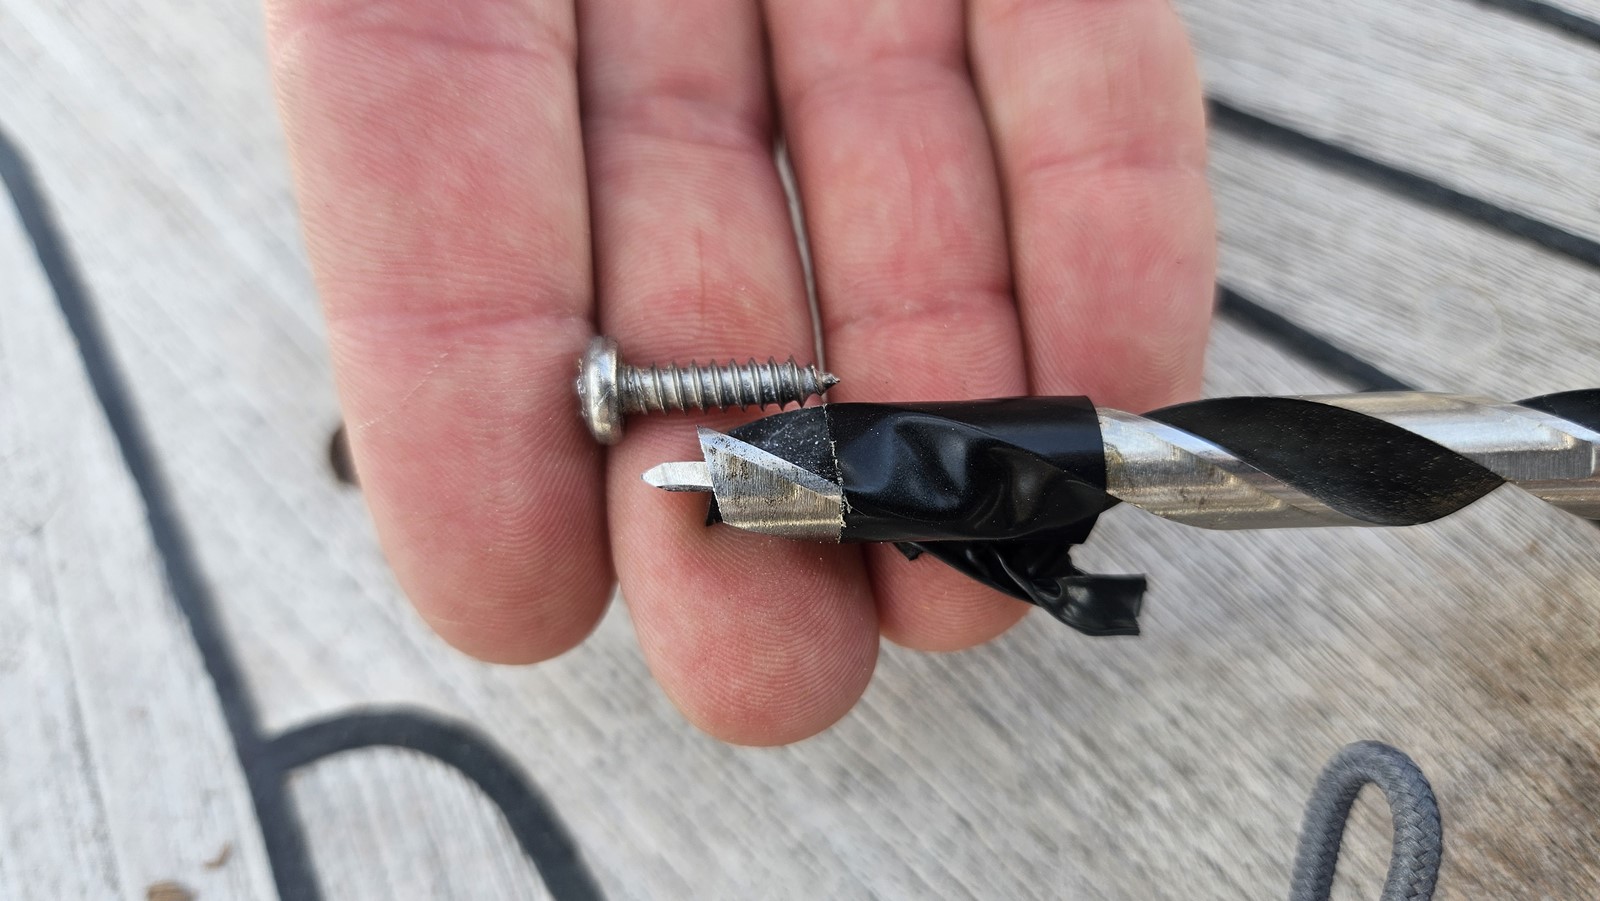
Re-drill the holes. Use a wood drill with diameter corresponding to the diameter of the plug. We use regular one, but you can consider using box drill for wood. It will be easier to drill in line with the old hole. Before drilling, make a depth mark on your drill using a paper or insulating tape, so you don’t go too deep. To know the required depth, measure the old screw. Remember to drill perpendicular to the deck. If you’ve drilled to the correct depth, you should see white gel coat powder. If you see wood scobs only, you need to drill deeper. This step allows you to clear and re-shape the hole, remove all dirt and old sealant residues.
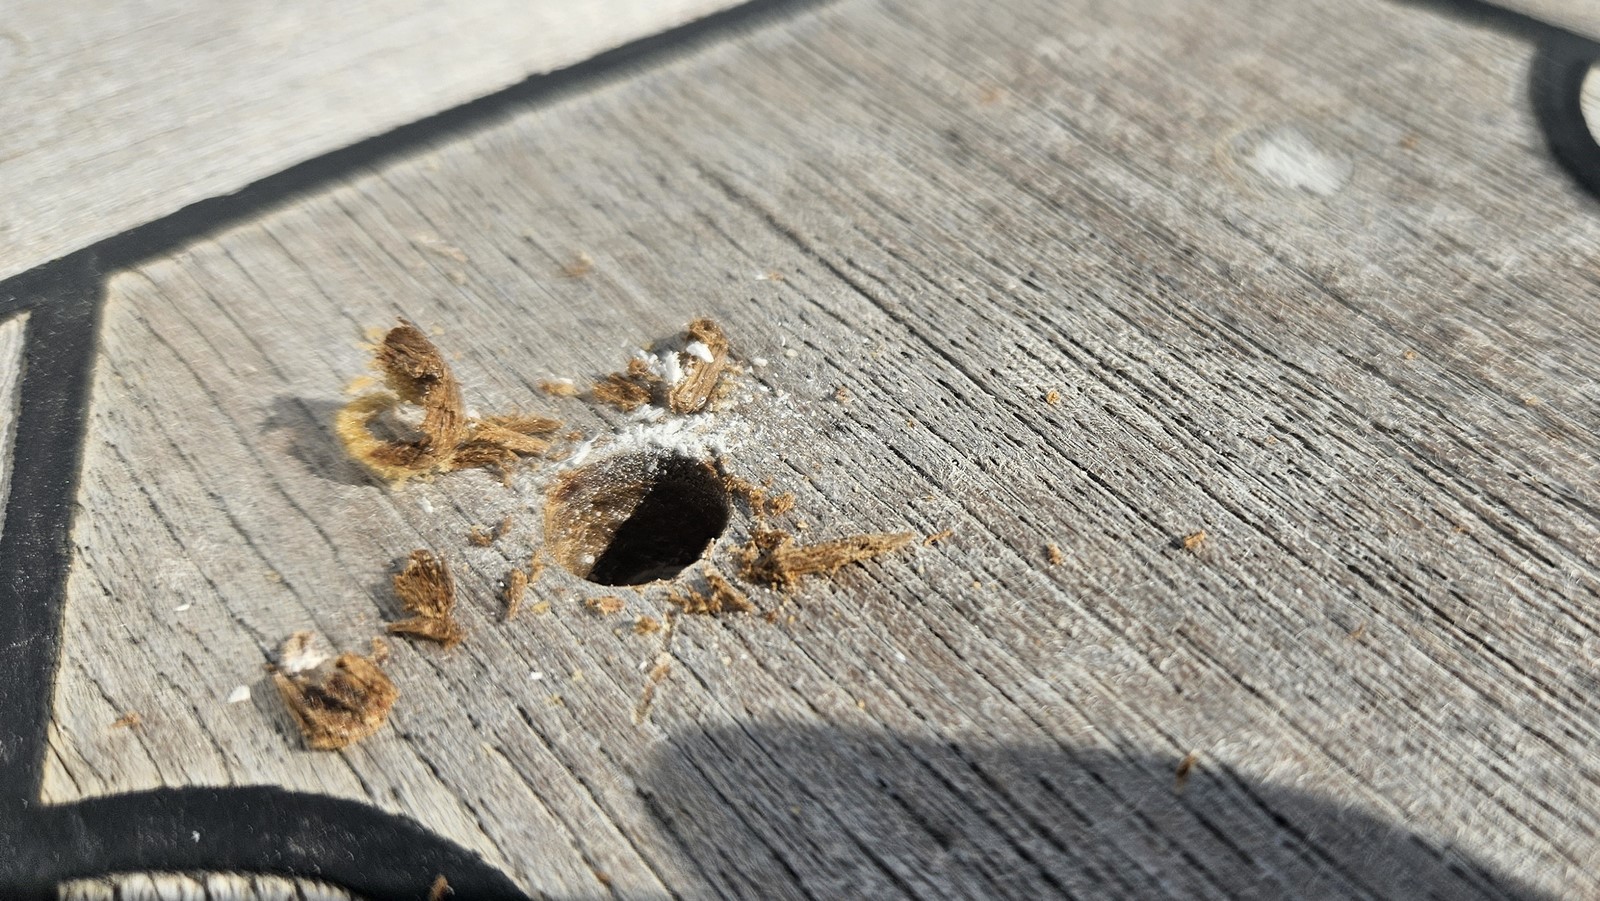
5. Cleaning the hole
Remove all loose scobs and dust from the hole using vacuum cleaner or compressed air.
Clean the hole inside with acetone. You can use ear buds, however a small brush is better as it doesn’t leave cotton fibers inside. Clean new plugs with acetone as well and leave them to dry.


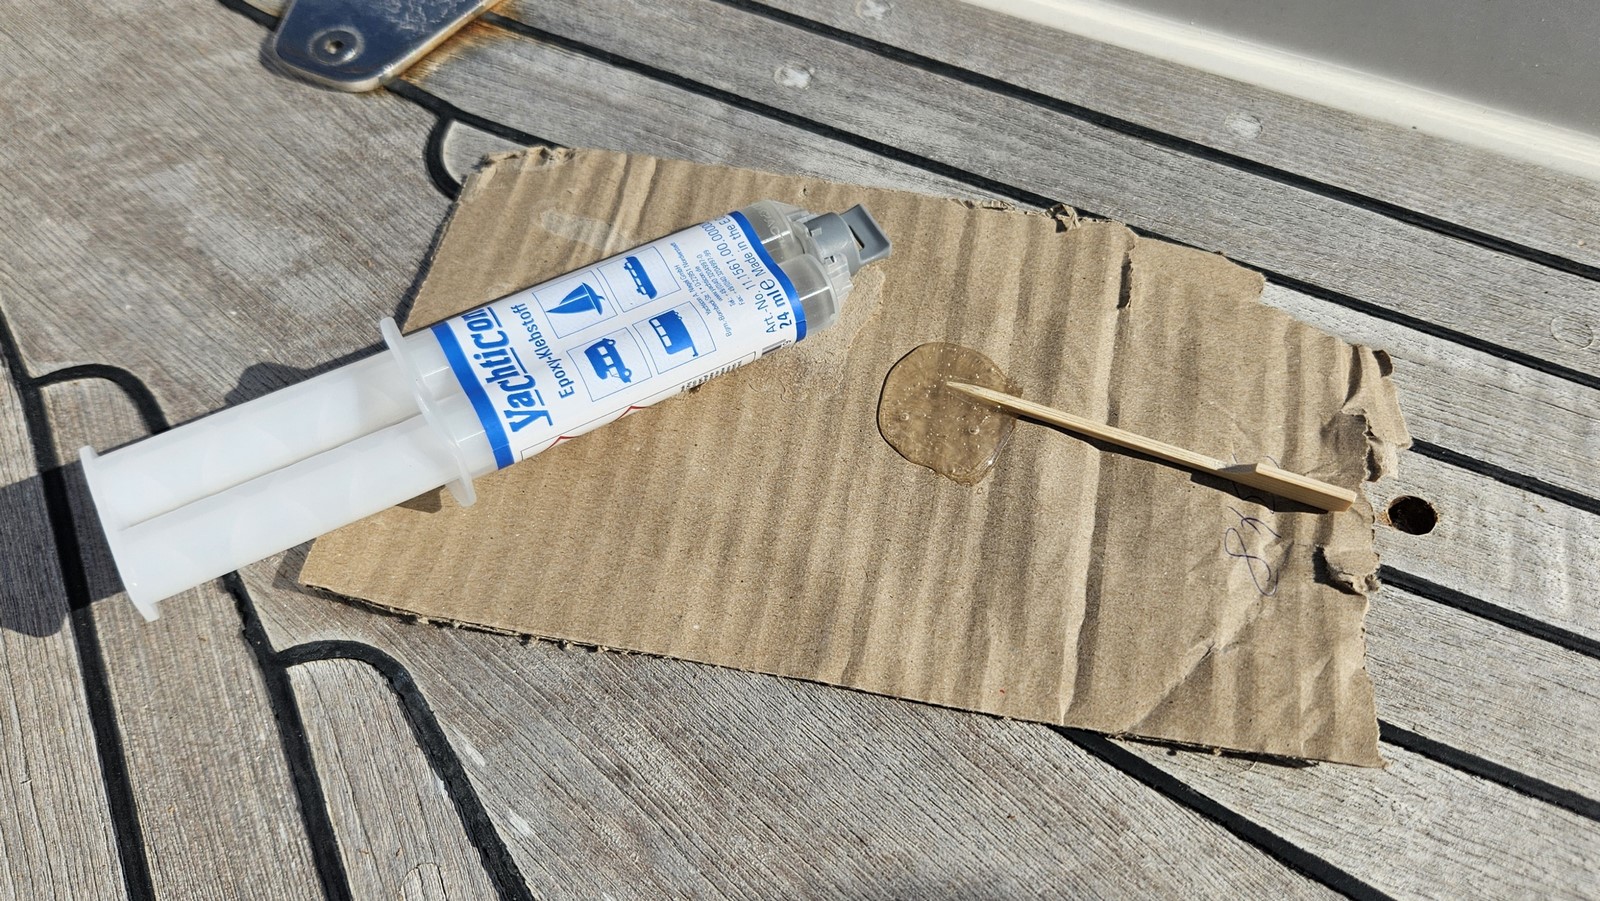
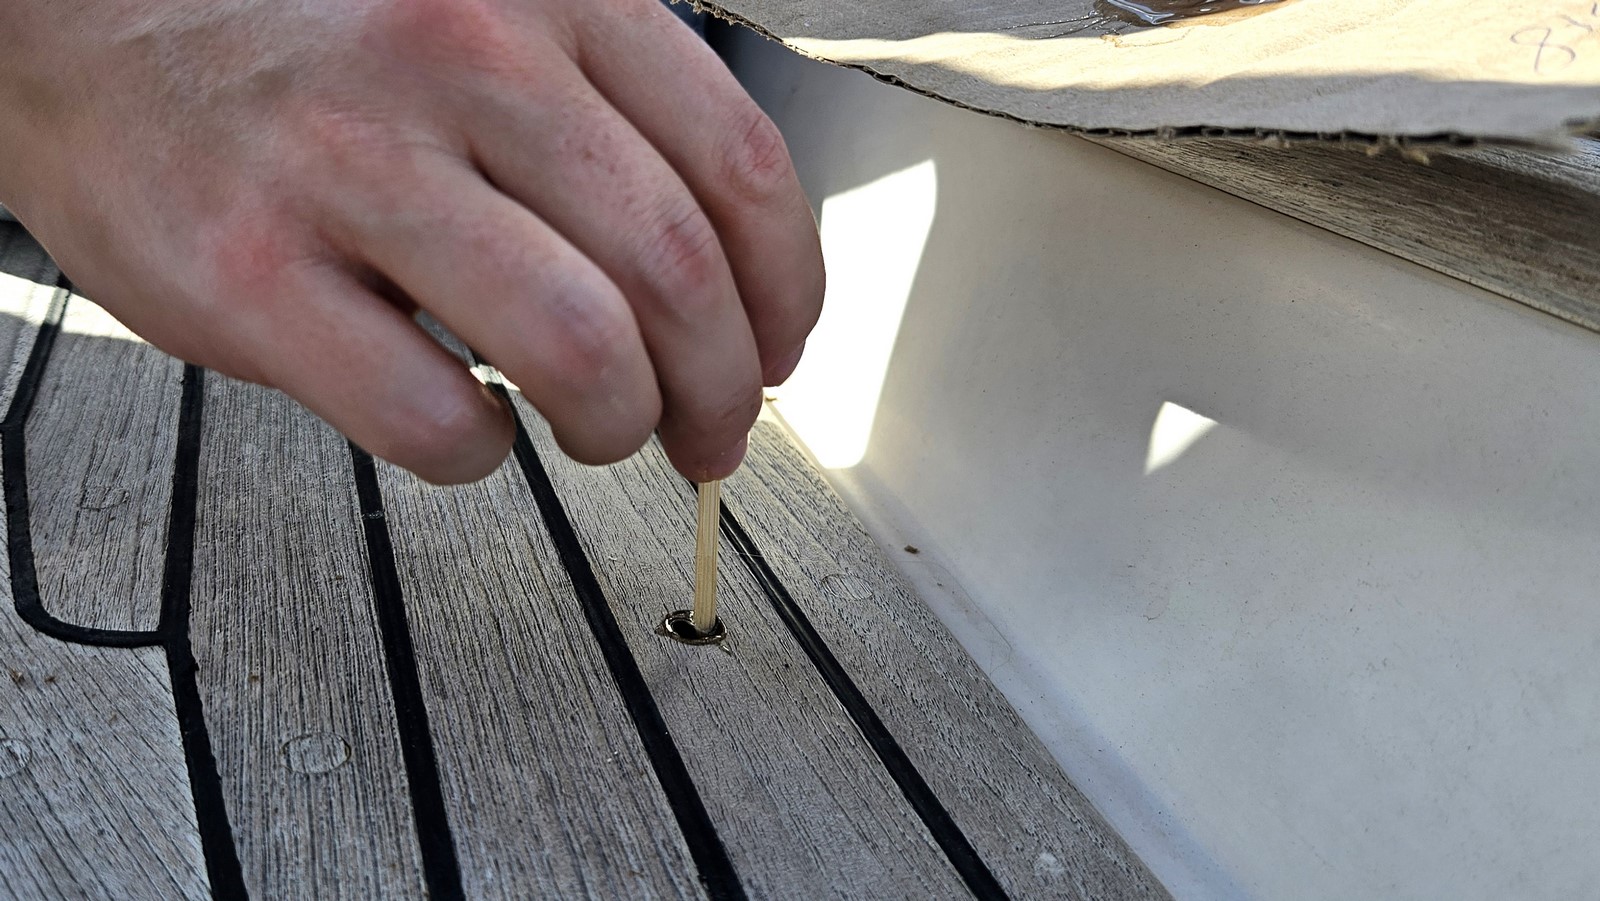
6. Adding epoxy glue and tapping new bungs in
Now, you need to add some sealant to the hole. For teak bungs replacement epoxy glue needs to be used. If you are replacing just a few of them, we recommend buying simple marine epoxy glue in a double tube. If it’s a bigger project, you can use epoxy resin with hardener and a filler (ex. colloidal silica). Both solutions work well.
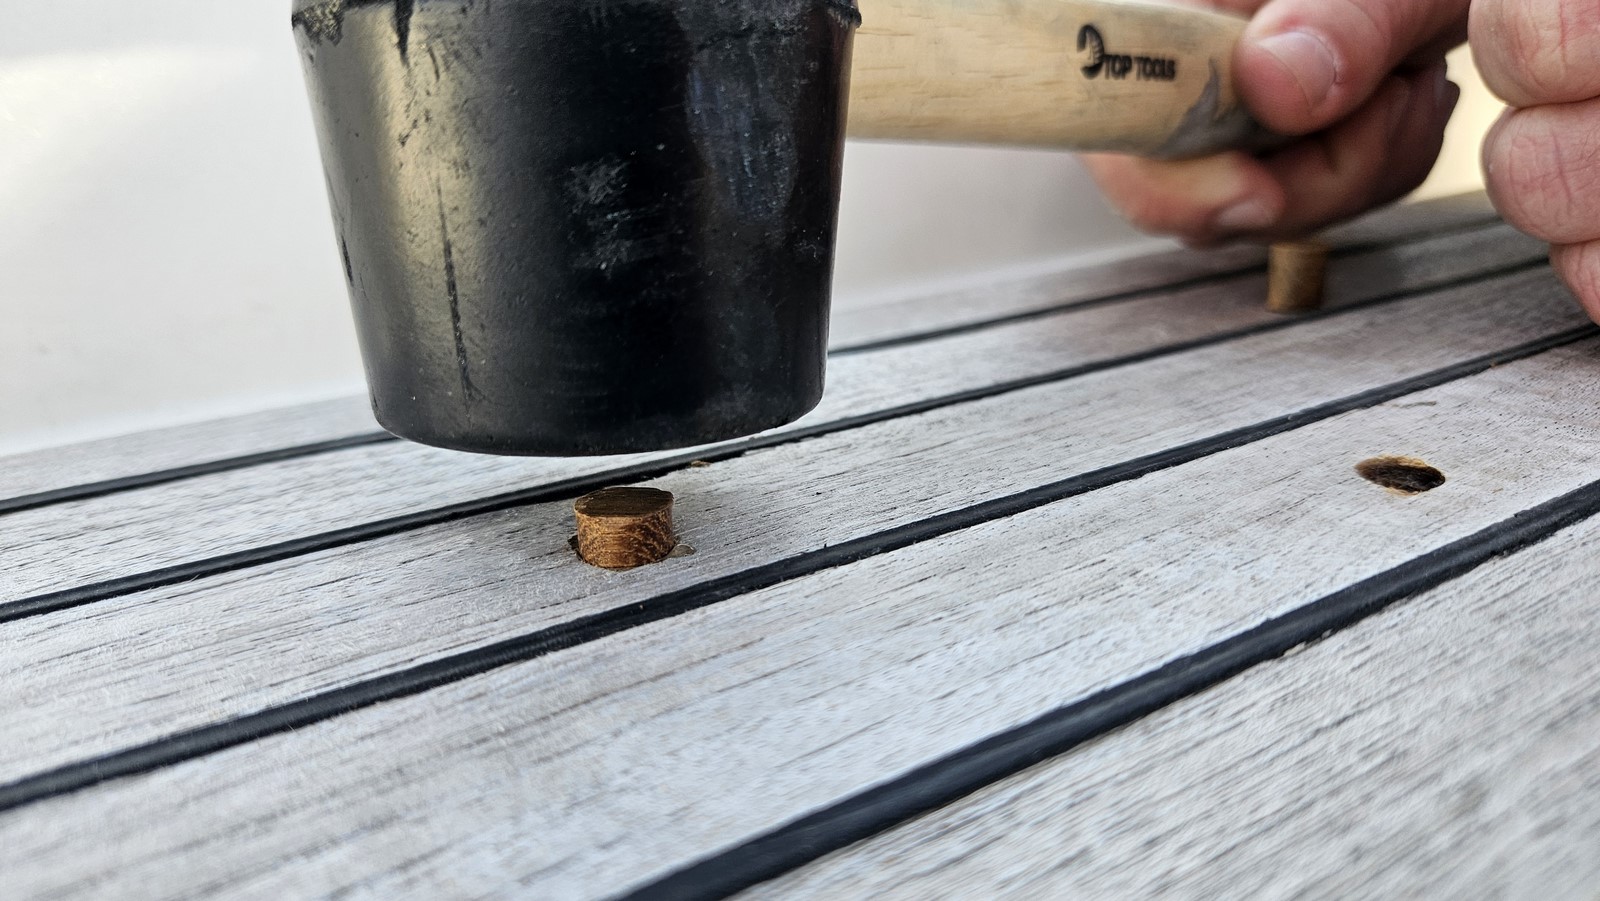
If you are mounting a plug in a shallow hole (thickness of teak is small or you’ve decided to leave the screw in), paint the hole and sides of the bung with unthickened epoxy first. Then, thicken the epoxy with filler and add it to the hole and on the plug. Tap the coated plug into the hole using a rubber hammer as far as it will go. Wipe up the excess of glue.
Obviously, it is easier to replace the plug when the hole is deep (thicker teak plank or screw removed). As the bonding surface is bigger, it is enough to apply ready epoxy glue to the hole and simply tap clean plug into. Use a rubber hammer. If you have trouble fitting a new bung in, try to reduce its bevel. Remember to line up new plugs with the plank grain, it’s very easy to forget!
Don’t worry if the excess epoxy is poured out of the hole. Wipe it out, it won’t be visible after final sanding.

7. Shearing off excess of bungs
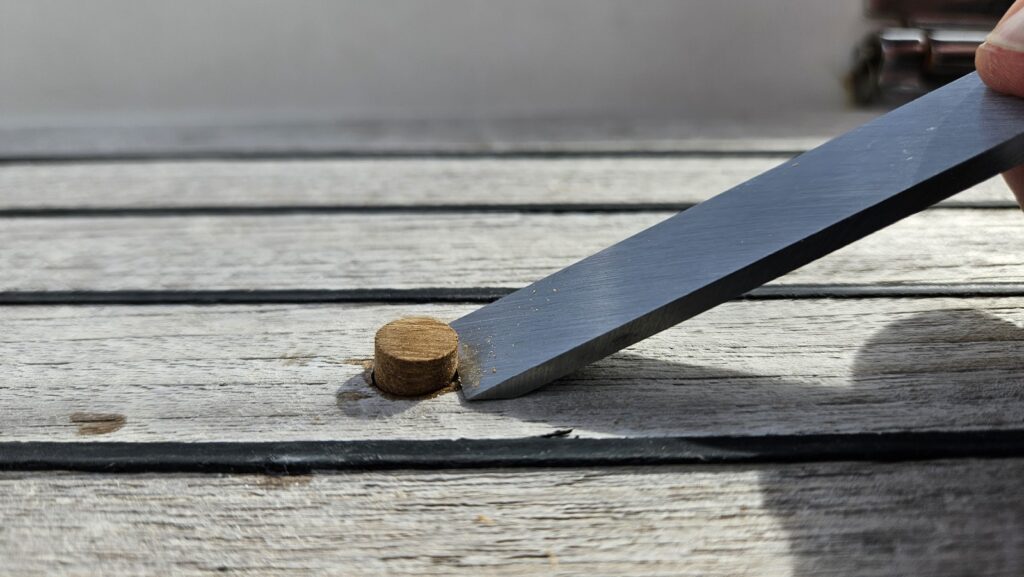
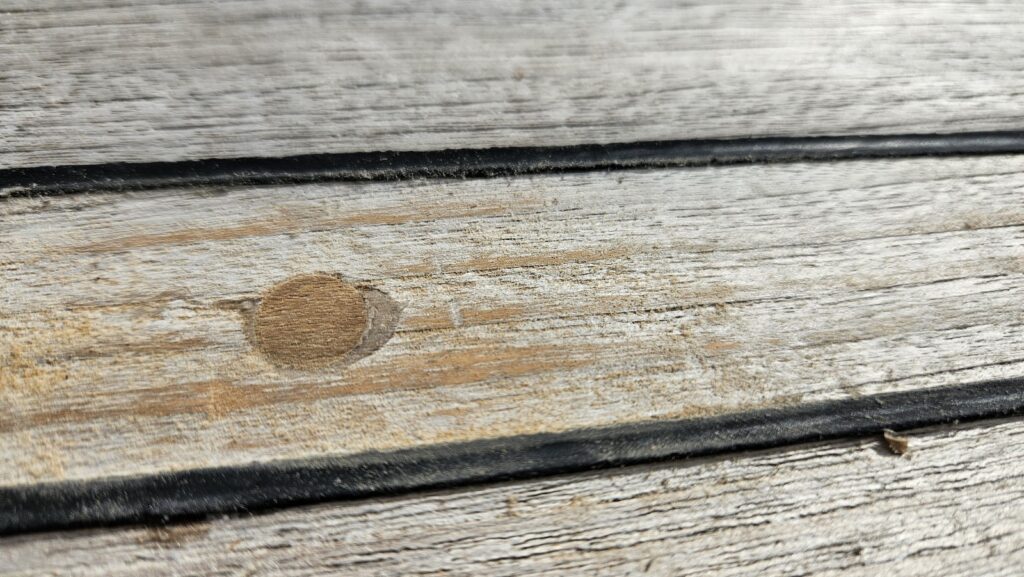
Leave the tapped bungs and wait until epoxy is cured. Check your epoxy instructions how long it should take. After epoxy is dry, use the chisel to cut the bungs. In order not to damage teak planks accidentally, place the chisel with beveled side down, about 3 mm above the surface of the plank. Tap the chisel with a hand or mallet and the plug will split away. Important! Move the chisel blade parallel to the surface. Any up or down movement will result in the plug being split unevenly. Sand the remaining height of the plug with 120-grade sandpaper. Sanding will leave characteristic dark spots around the plug which will fade away with time and sun exposure.

Summary – replacing teak bungs
To sum up, it is not a very difficult job and can be easily done as a DIY boat project. There are many guides on the Internet with different methods. The one above is based on our boat work experience and as always lots of research. But the more plugs you replace, the more proficient you get. Practice makes perfect and the best learning is by doing.

We hope this guide was helpful and you will be able to extract some useful information for your future boat projects. If you have any questions, don’t hesitate to contact us directly, we are always happy to help!


No responses yet