
Dive compressor for a sailboat
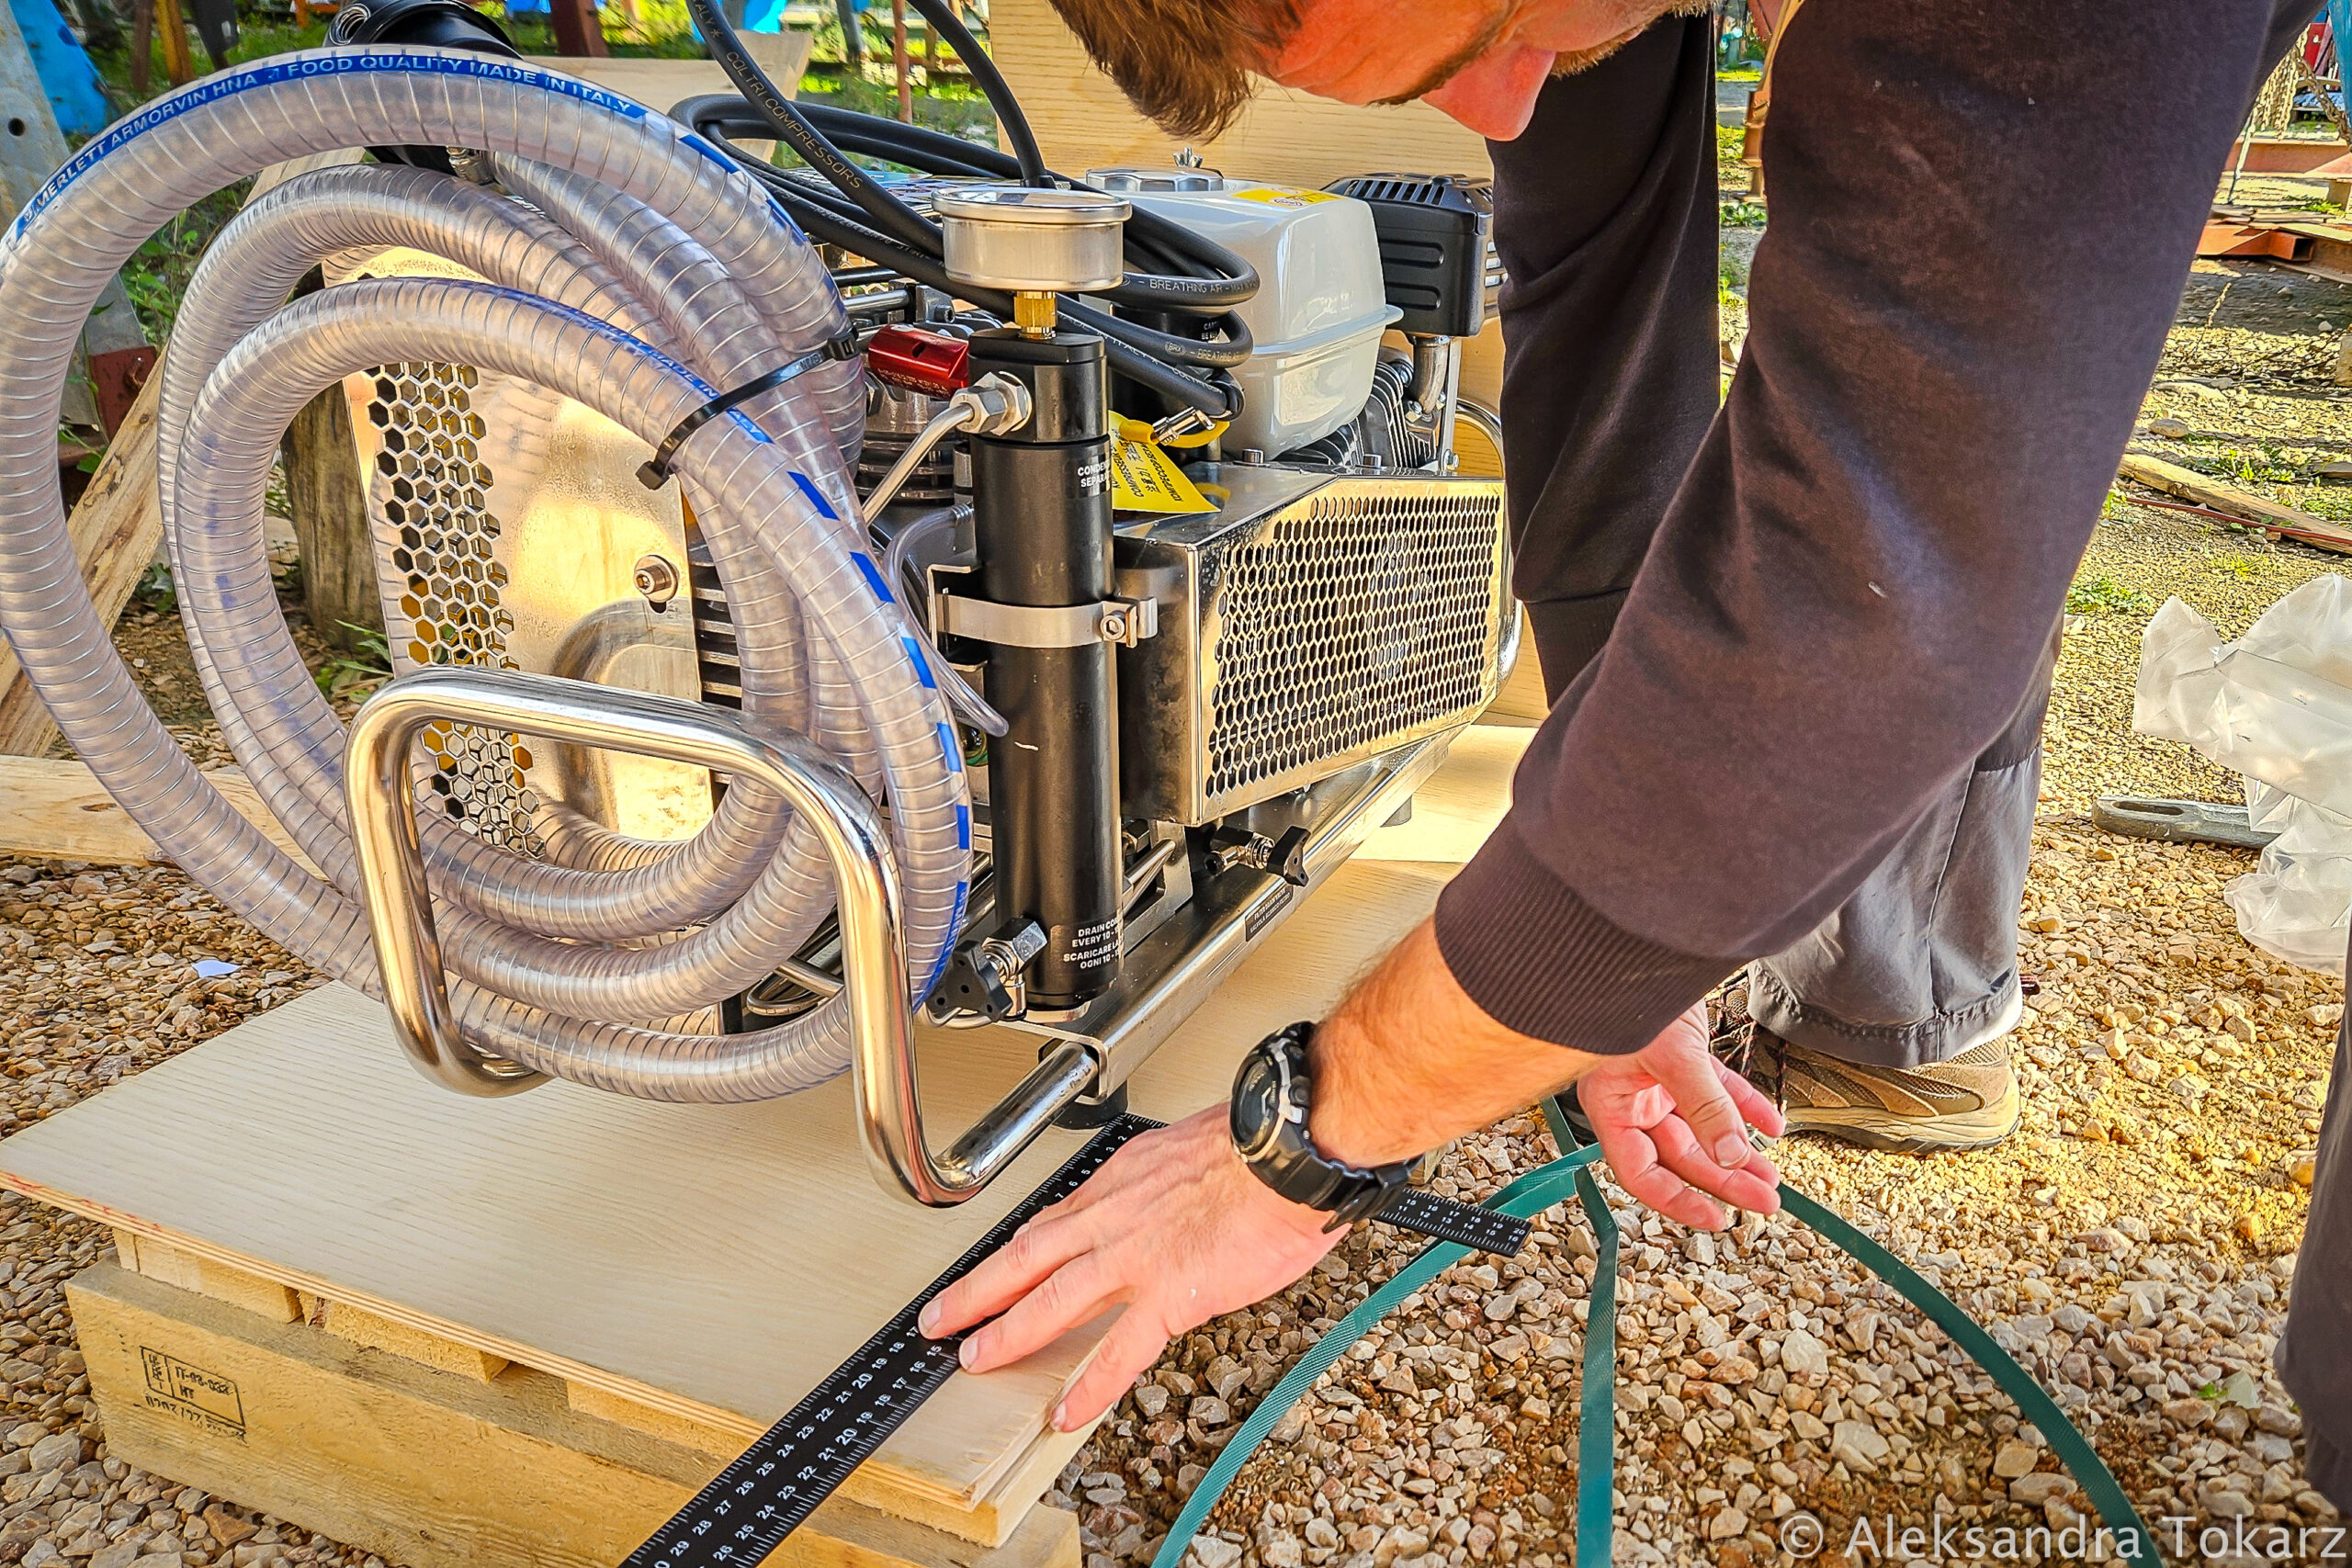
In our last article about the diving compressor, we described how we chose the model that was most suitable for us. We compared several portable compressors available on the market in terms of suitability for a yacht. We also checked their parameters and described why we finally chose Coltri Icon Inox.
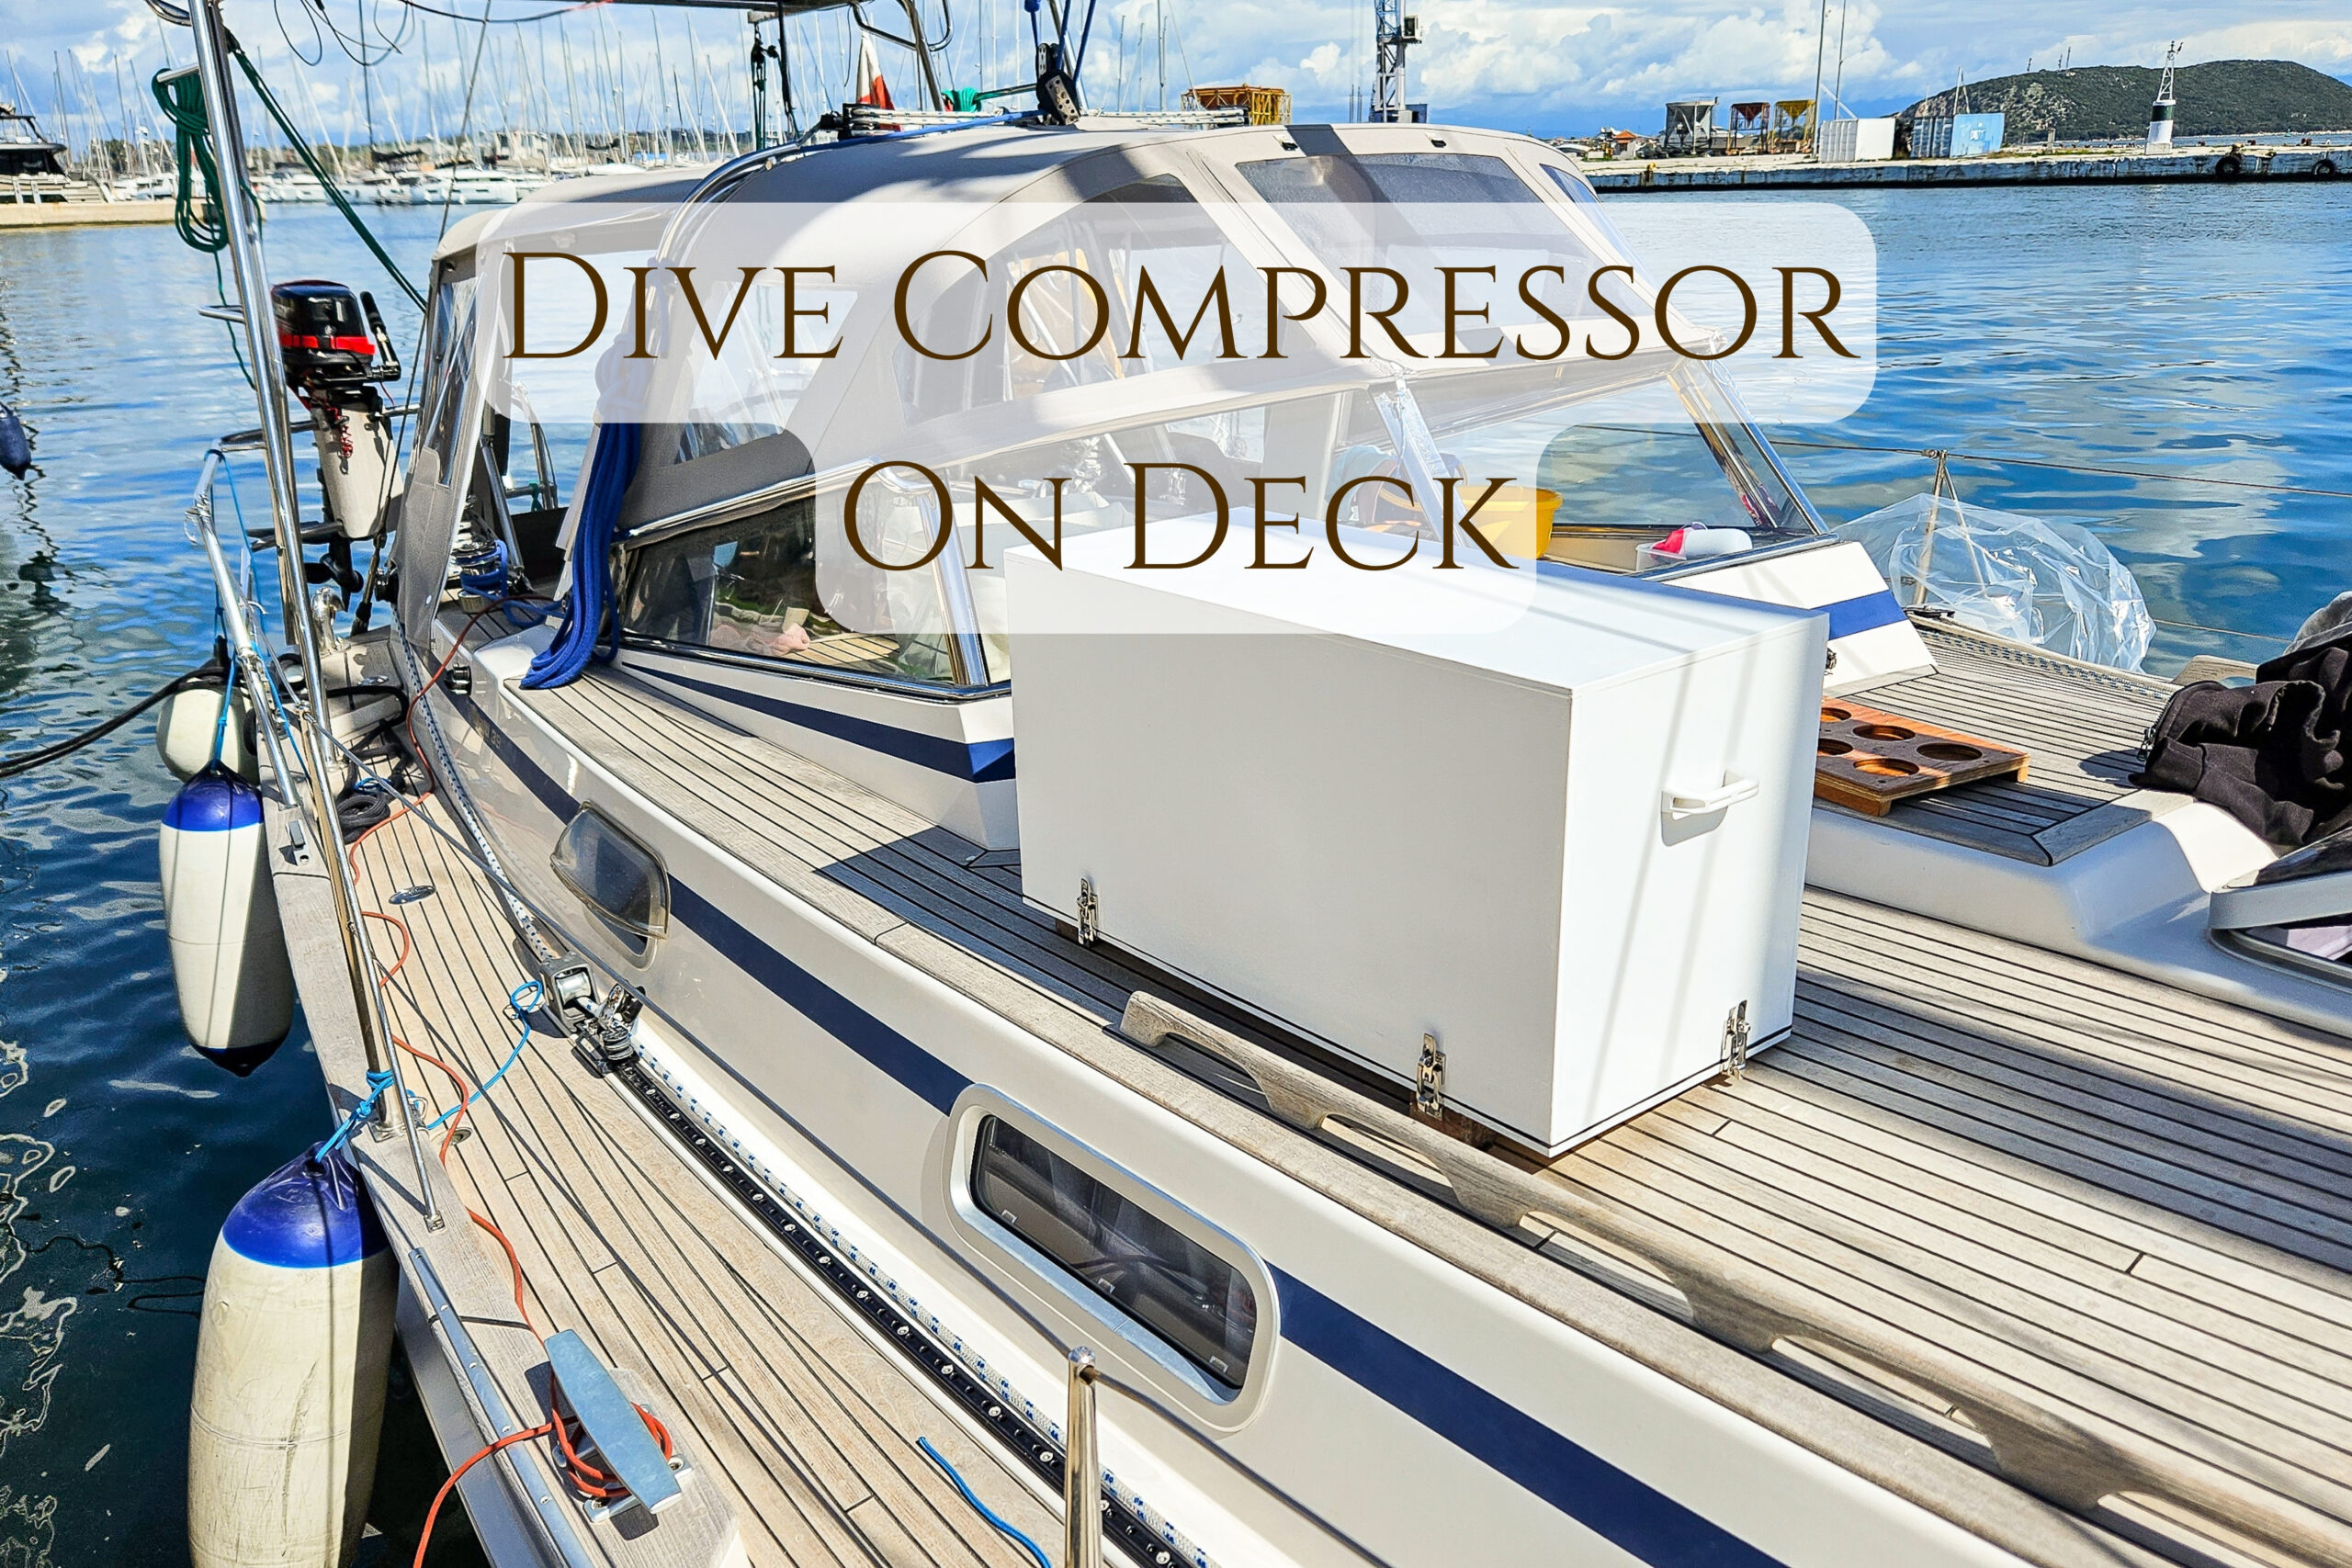
In this post you will read how we installed the dive compressor on deck of our yacht. As you know from the previous article, we had a problem with finding space for the compressor. After many considerations and attempts, we have decided that we will mount our dive compressor on deck. Is this the perfect solution? Definitely not. But it’s good enough, it works, and thanks to this we do a lot of diving.
Dive compressor on deck
Initially, it was difficult for us to find people who chose to install their compressors on deck. On larger yachts, compressors are usually mounted below deck because there is space for it. Additionally, there are relatively few cruisers that dive so much that a compressor is necessary. After lots of searching, we finally managed to find people who used similar solutions and confirmed that our idea could be successful.
Space on deck for a dive compressor
As our yacht has an stern cockpit, we do not have an aft deck. The deck at the back of the boat would be a very good place to install a compressor. This is what we have planned when we were looking for a yacht. At that time the boat model we were focused on was the Hallberg Rassy 42 with a central cockpit, so this king of solution would work well. Mounting the compressor at the back of the yacht would not limit the field of view. Additionally, the compressor’s exposure to water and salt would be less – fewer waves crash over the stern. Filling cylinders close to where they are stored and loaded to dinghy would also be easier. However, for many other reasons, we chose the Malo 39 with a rear cockpit, so no aft deck in our case unfortunately.
Therefore, on our yacht, the only option for mounting the compressor was the superstructure at the front of the cockpit or the bow – just behind the anchor locker. We also saw compressors mounted near the mast, but this solution was not an option in our case because it would limit the mainsail movement and free operation of the lines.
We decided that the bow was also not a good place for installation because it is most exposed to salt water, shocks and loads. Additionally, carrying diving tanks to the bow to fill them would not be convenient.
So the only acceptable location that came to us was the superstructure. There were also problems here – the lack of a flat surface and possibly limiting the field of view from the cockpit.
Preparing for installation of dive compressor on deck
When we made the initial decision about the compressor model, we built a cardboard mock-up imitating the compressor box. We tried different settings, moved it multiple times and discussed until the position was acceptable.
We chose a place on the superstructure in front of the cockpit, as far back and to the side as possible, so as not to limit the field of view forward, to keep good communication on board and to maintain aesthetics.
Building watertight box for dive compressor on board
From the beginning, we planned to build a waterproof box for the dive compressor on deck. Even though we chose a model with a stainless frame, many of its components are not made of stainless steel. Therefore, we wanted to protect the compressor even more from environmental factors. Although we have seen compressors mounted on board and stored in waterproof fabric covers only, we decided that a box would be more reliable protection against water and salt.
This kind of box has to be removable or easy to open. Remember, that you cannot permanently close running engine and compressor, as it has to have reasonable cooling and ventilation. Also, you need to have space to run the filling hose and air intake hose. Removable box also provide good access to the compressor for maintenance.
What material did we choose for waterproof compressor box?
The only issue left was the material from which we will make the box. The options involved plywood, coosa board (plastic panels reinforced with fiberglass) or ready-made tool boxes. Although we found people storing compressors in modified tool chests, we rejected this idea due to the limited size selection. Coosa board is certainly a very good and durable solution that we do not rule out in the future. However, we decided that for the first time we would focus on a cheaper material, which is plywood.
Our requirements for the dive compressor on deck?
- the smallest size possible
- light
- waterproof
- ventilation
- removable
- aesthetics
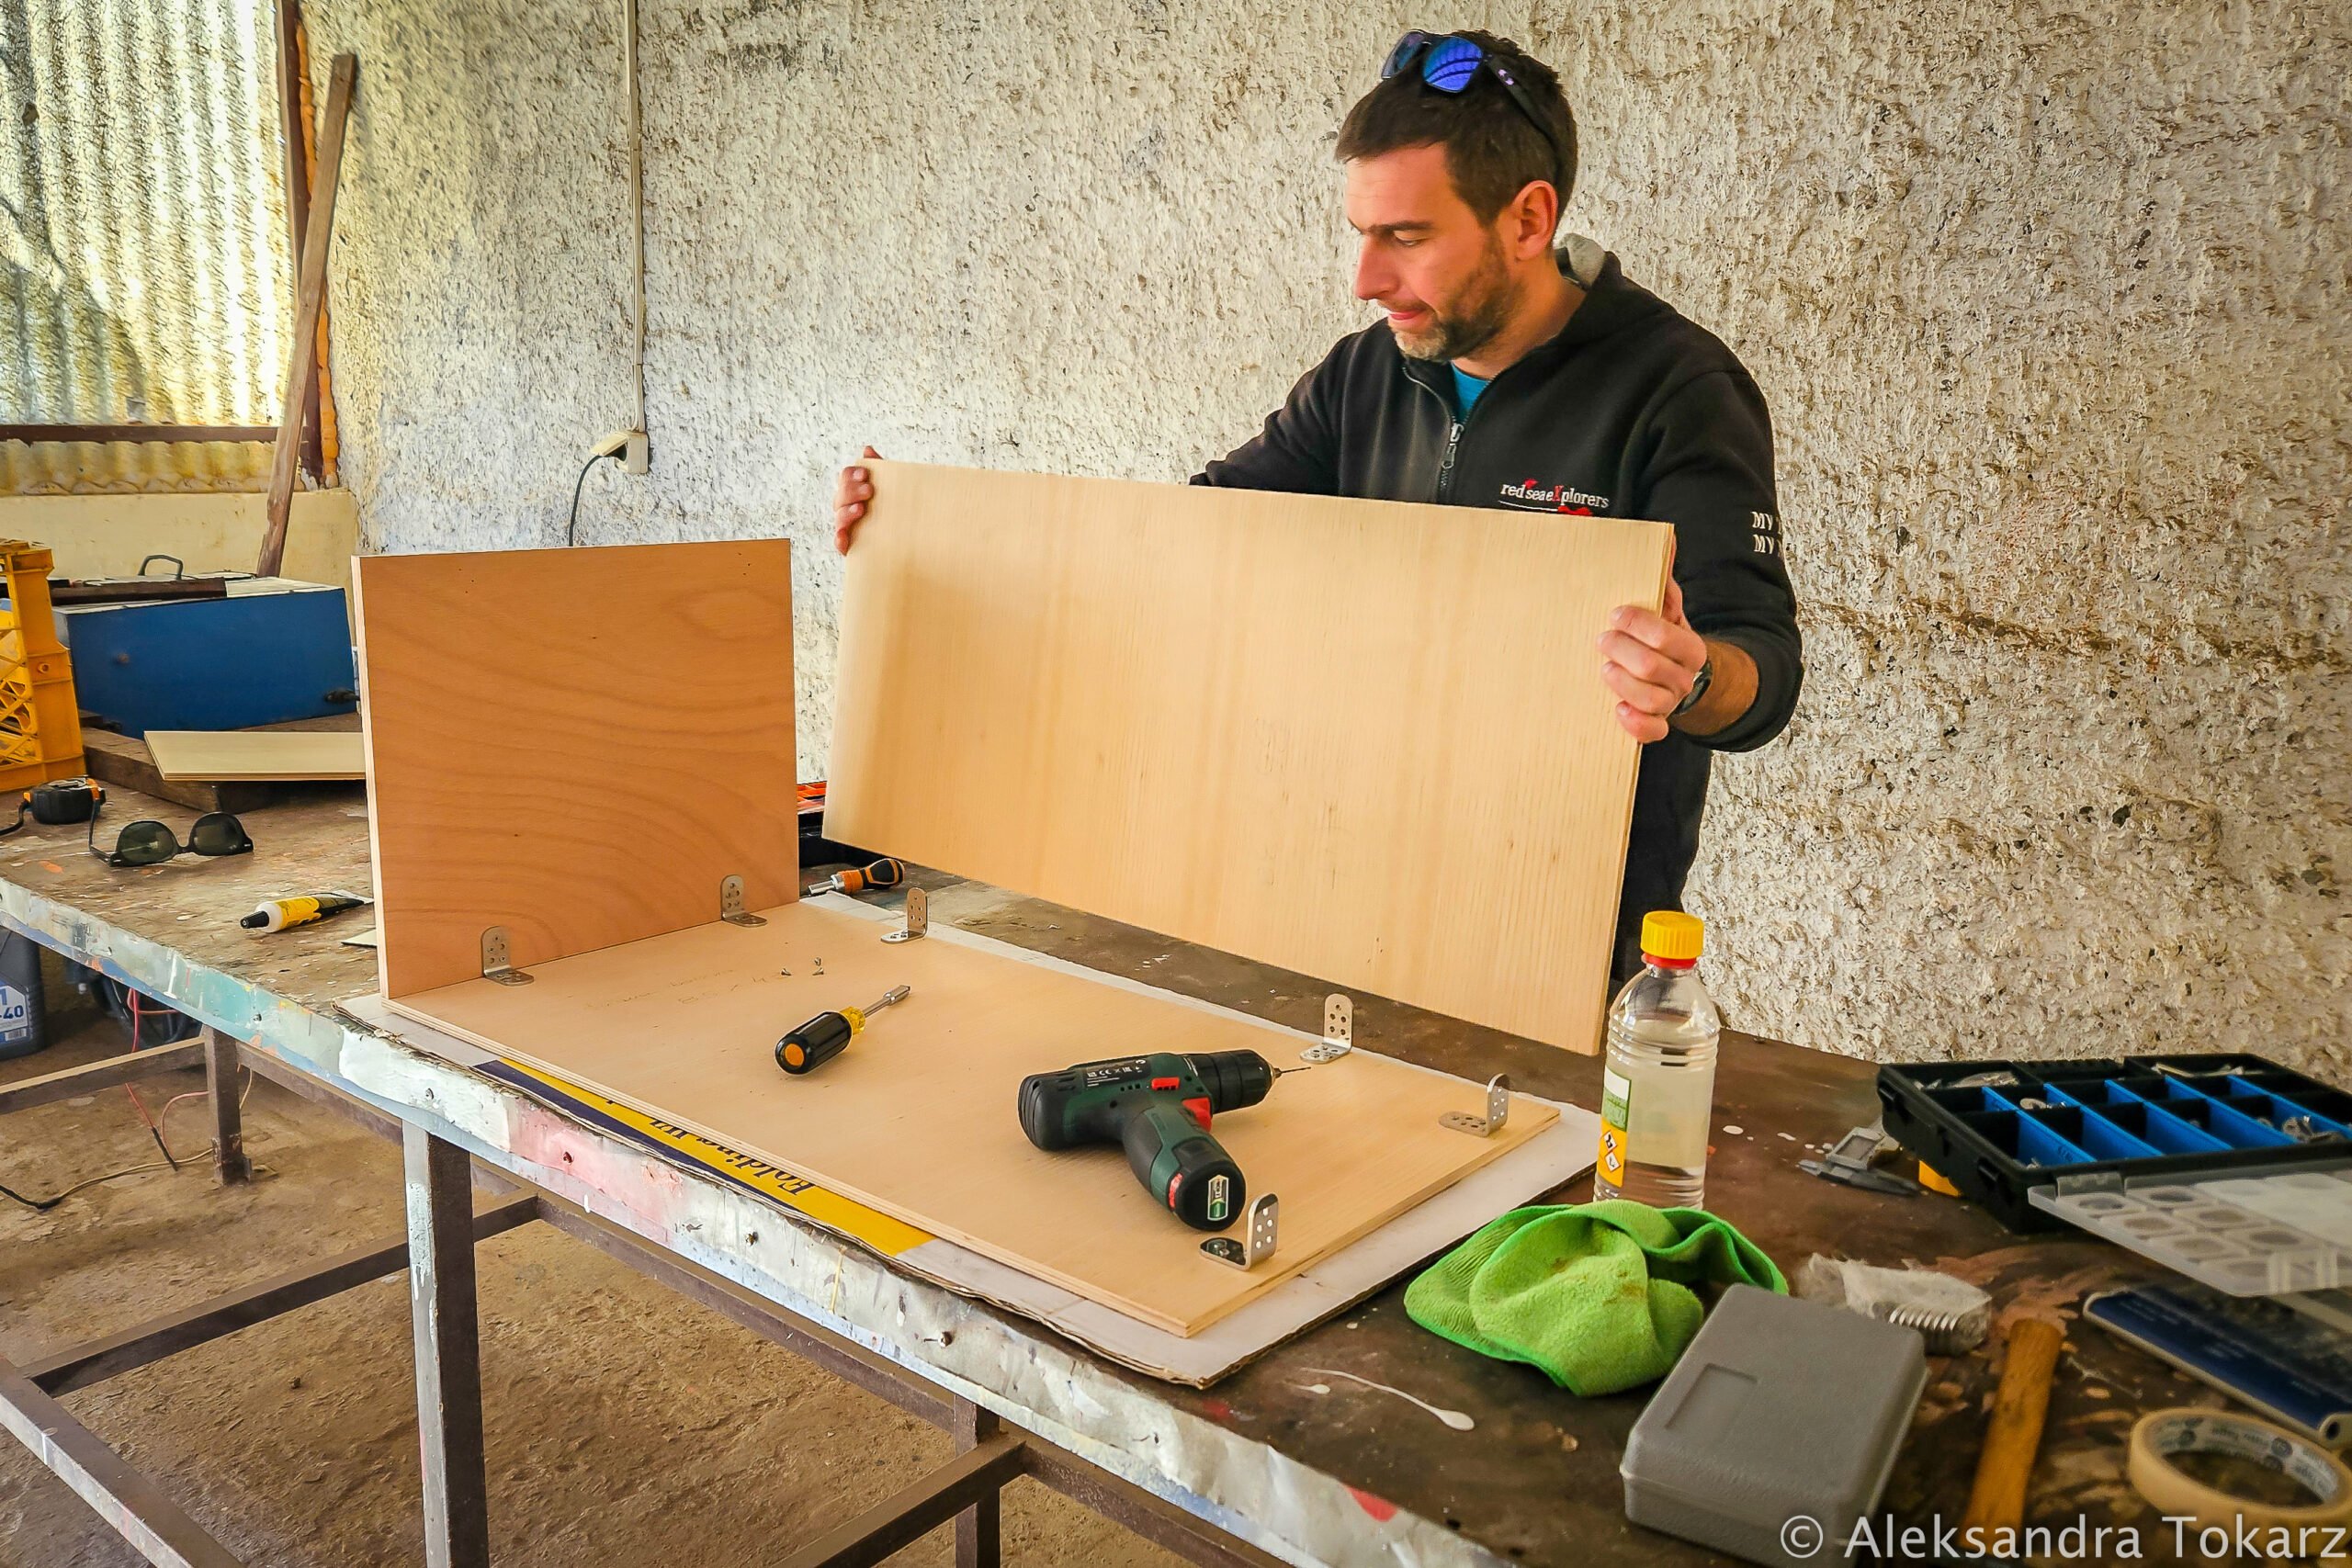
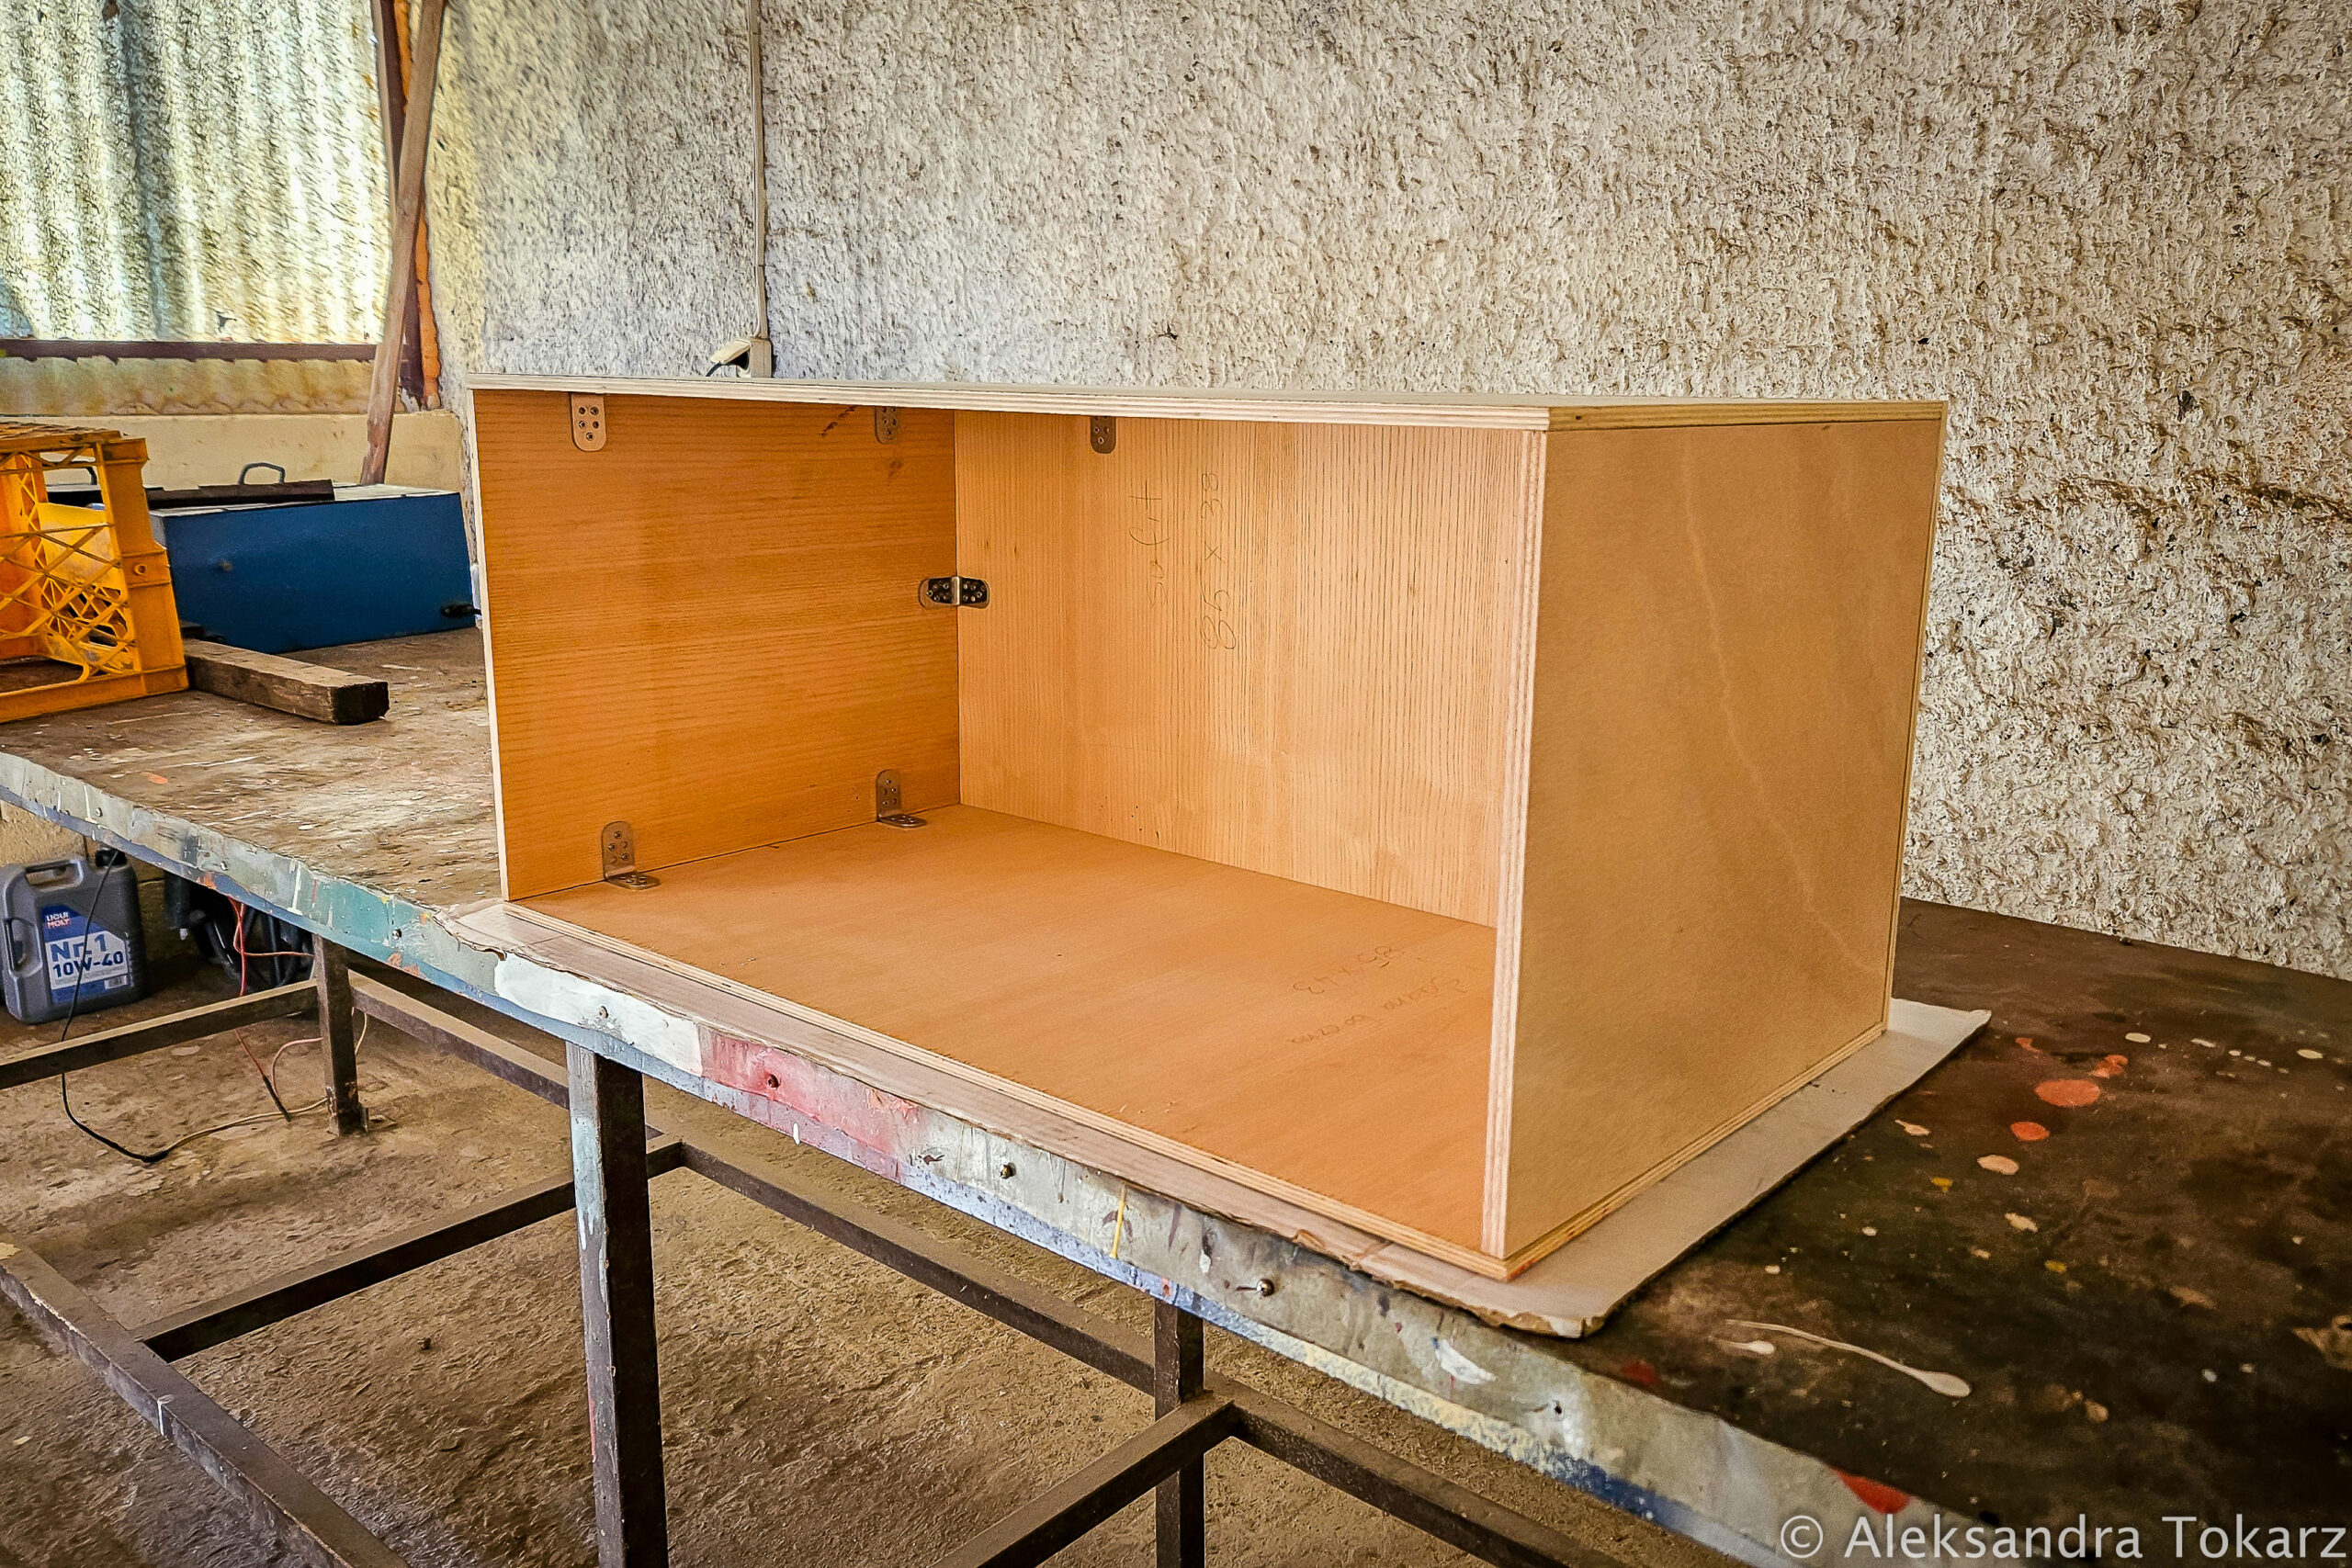
Construction of the compressor box
The construction of the box began when the compressor was already with us and we could realistically measure its dimensions and match the walls of the box to the real device.

We bought good quality plywood at a wood store and cut the walls to size. We screwed together the elements prepared in this way using stainless steel angles. The shipyard where we worked on the yacht this winter offered a workshop, which made our work easier. We fitted the ready box to the compressor again.


Then it was time for the base of the box. This is an element that will be permanently attached to the deck. To make this installation durable and provide good support for the compressor, from the beginning we planned to drill through the deck and bolt the base with four long stainless steel bolts with a diameter of 8 mm. The plan also assumed the use of wide (5x5cm), stainless backing plates from the inside and on the base.
At this stage we encountered two problems. First, we needed to remove the ceiling panels in order to drill through the deck, which is made of sandwich laminate. Unfortunately, the manufacturer glued them permanently. Cutting and removing them took us a lot of time and there were some minor damages.
The second challenge was leveling the base. This is important not only for aesthetic reasons. The compressor work is limited to 6 degrees of tilt, so even one degree of error when assembling the base is an additional limitation in use.


Unfortunately, the superstructure of our yacht is not flat in any plane. We spent a lot of time cutting the legs – each to a different size so that the whole thing was horizontal.
Legs were cut of high-quality solid wood. We also had to measure precisely where the legs were to support the base and where we could drill holes to make room for the stainless backing plates from the inside.


Drilling through the cored deck
Once we had measured the drilling locations, we made the holes. Remembering that we are drilling in a cored deck, we spent a lot of time properly securing the holes against leaking. When installing new devices to a deck made of such material, remember to secure the core – in our case, balsa wood. Unfortunately, sikaflex is not enough in this case. We wrote a separate article about the correct technique for installing equipment and drilling through the cored deck, which you can read here.
Sealing the plywood compressor box
At the same time, we started applying epoxy to the box and base to seal them. This was a bit of a challenge because the low temperatures in February (although we were in Greece) significantly extended the curing time of individual layers. Once again, a place in a covered workshop and a heater were very useful. We applied 5 layers of resin on the outside and 3 on the inside. We also considered using fiberglass and laminating the box, but after long consideration, we decided that such strength is not necessary and we decided to seal the plywood with resin only.


Final installation of the compressor base
We waited a week for the resin to cure properly and then we started the final assembly of the base to the deck. We used 5x5cm stainless backing plates from the inside and inserted long, also stainless bolts into properly secured holes. Then we sealed the holes for the second time, this time with sikaflex and placed the base legs. Then we mounted the base itself, further stainless plates and nuts on the bolts. We cut off the remaining length of the bolts.


Placing the compressor
We attached the compressor to the base with stainless steel clamps that we cut ourselves from a sheet and placed rubber under them to reduce vibrations during compressor operation.
Then we made a hole in the box for ventilation.
We painted the whole thing white with UV-resistant paint. We wanted the box to heat up as little as possible and keep the aesthetics of the deck. I think we managed to achieve this.

Finally, it was time for details. We screwed on stainless steel clamps to attach the box to the base, handles for lifting it and an air vent. We glued a seal to the connection between the base and the box. The effect is satisfactory.


Dive compressor on deck – summary
Is this the ideal way to have a dive compressor on board? Definitely not. With more space below deck or an aft deck, we would definitely go that way. However, I think we managed to reach a compromise, like many on a yacht. We have a compressor that is well protected against the marine environment and easy to use. Additionally, the box is aesthetic and only minimally limits the field of view.
What would we do differently? We see that the quality of the white paint is not the best, so we will definitely repaint the box after the season. The clamps that connect the box to the base do not work very well – they rust (despite being stainless) and are susceptible to being ripped out. It is possible that we will change the mounting to lashing straps around the whole box.
A box like this is also a good solution for storing other things when there is no space on the yacht. You can place a generator or anything else in it, and its waterproofness will protect the devices against moisture and rust.
Thanks for reading this article. We invite you to check our other posts in 4 different categories: sailing, diving, technical and travel.


2 Responses
Thanks for sharing so many details about your installation. We are considering a compressor for our sailboat and are leaning towards the same petrol compressor that you installed. We also would likely mount it on deck with a box, but we also have a storage space where we could secure it down below in a large storage space during extended off shore passages if we wanted to.
After another year cruising with your compressor are you still happy with it and with your installation? How often are you diving and do you feel the compressor is worth it? We have found a few easy places to get tanks filled in the Caribbean, but there are so many places we would like to dive that are far from places that will fill tanks.
Hi Dave!
You’re welcome! We decided to mount our compressor permanently, as we don’t have storage space for it as it is quite heavy to move around. Maybe going for electric one is an option if you have enough power?
With this compressor we were diving one season in the Med. Well, definitely if we had a better place to store it, we would do that, as box on deck is limiting field of view. Our diving frequency did not depend only on the compressor but rather a specific place. For example some places in Greece were easy to organize diving while Malta was disappointing. But if you find a good spot to anchor with diving places around, having a compressor is super comfortable. You don’t have to go back and forth to the dive center to fill the tanks. We used to set up a “diving center” for couple of days in one anchorage and do 3 dives a day. Without the compressor it would not be possible. And of course we have in mind far away places, where getting our tanks filled will be impossible.
If you have more questions drop us an email.